
AI-Powered Techniques to Scale Up and Revitalize Classic Images Sans Photoshop
AI-Powered Techniques to Scale Up and Revitalize Classic Images Sans Photoshop
Key Takeaways
- Microsoft’s free AI effectively restores old photos with just one click, surpassing Photoshop’s results.
- Use Replicate’s catalog of AI tools to restore, colorize, and upscale old photos.
- Additional AI models on Replicate can further enhance and refine photos, offering endless possibilities for restoration.
Photoshop has a built-in neural filter for restoring old scratched photos. But you don’t need to spend 20 bucks a month just to use that feature. Microsoft has developed a more robust AI for the job and it’s completely free. Here’s the only guide you need to bring your old photos back to life.
Microsoft’s AI that Brings Old Photos Back to Life
There was a time when it took Photoshop gurus hours of painstaking labor to fix up old degraded photos . Today, AI can do most of the heavy lifting. So much so that you can restore a photo with just one click!
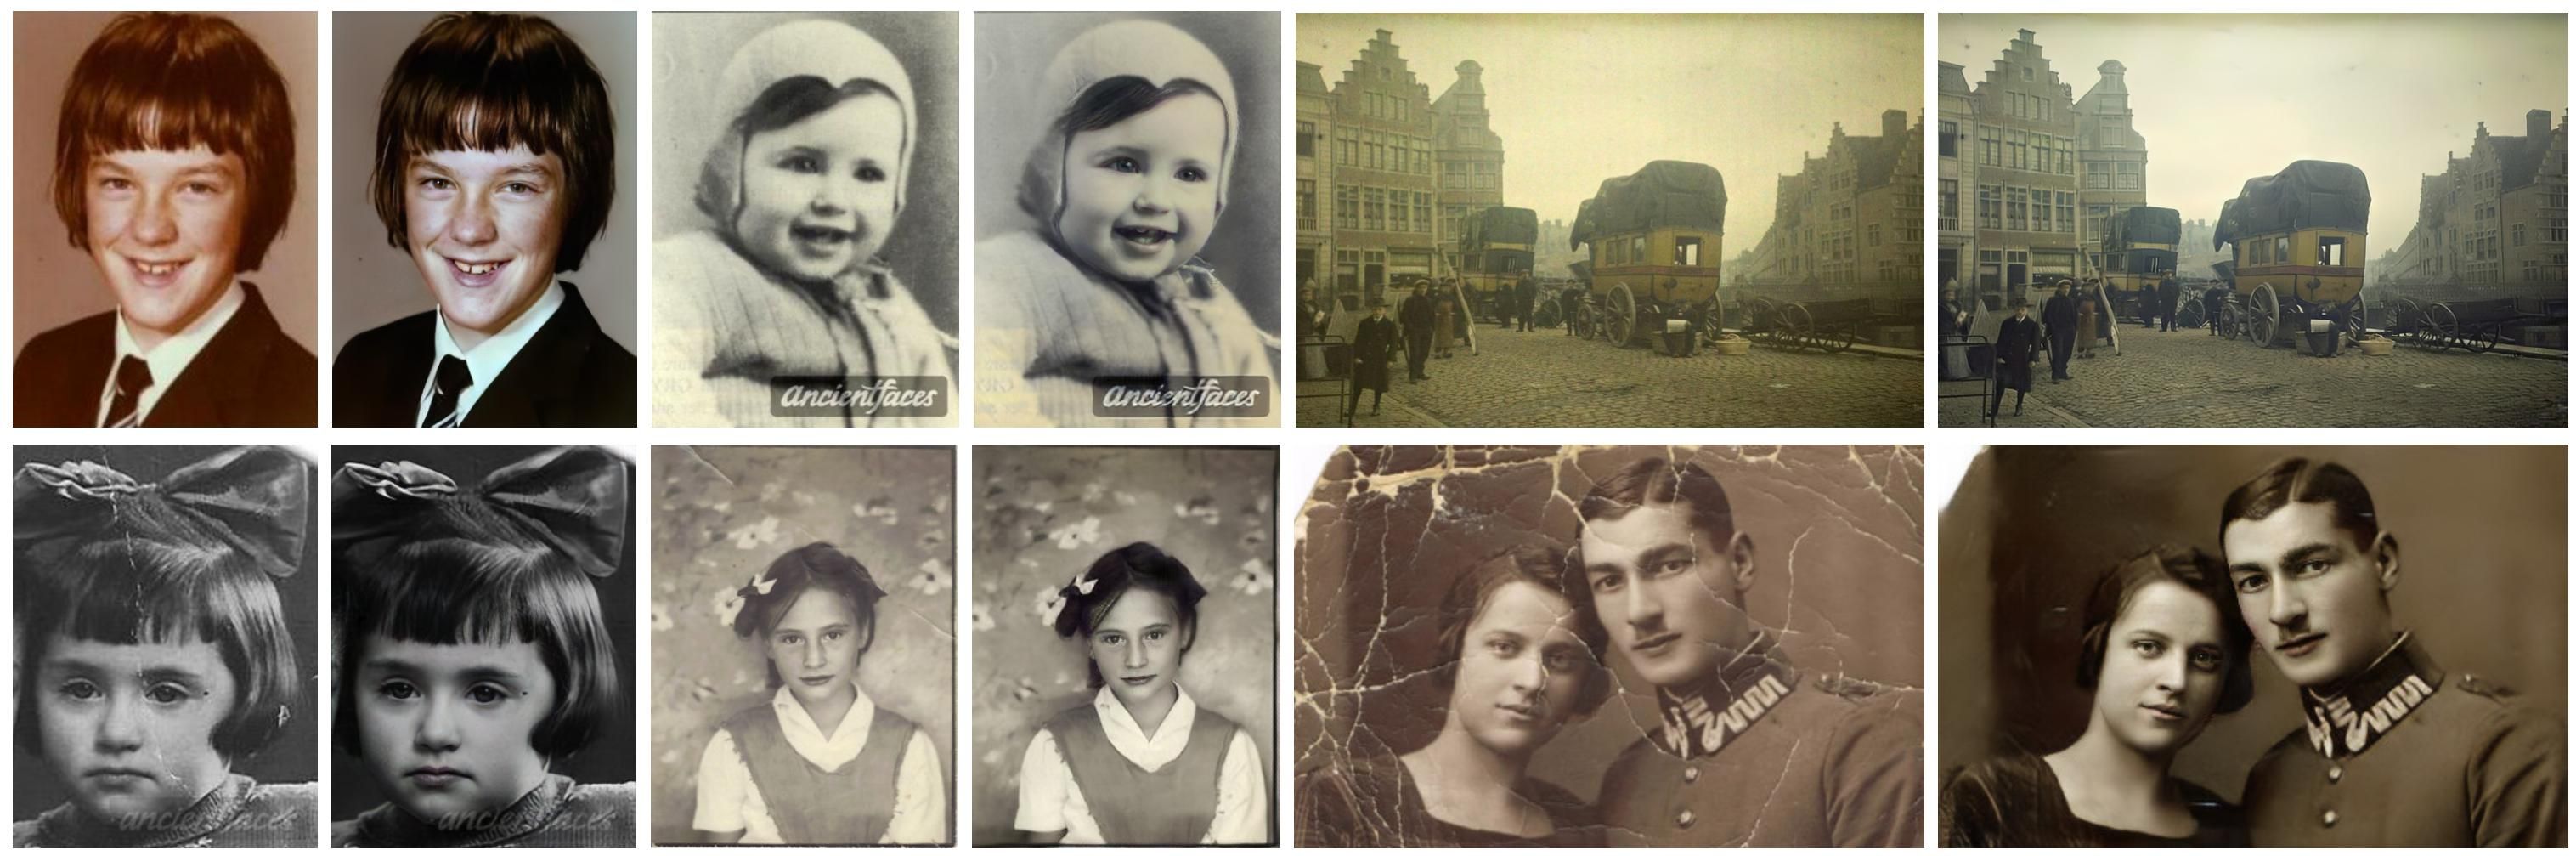
Bringing Old Photos Back to Life is the official Microsoft project for AI-powered photo restoration. The project samples show some stunning restoration jobs on a few degraded photos. I tested it with some photos of my own too, and it worked like a charm.
Unfortunately, Microsoft has yet to offer an official app to use this AI. If you have a powerful PC and you possess the technical know-how, you can run the AI on your own hardware.
But the easiest way is to run it for free on the cloud. You can either use:
- Google Colab
- Replicate
Colab allows you to execute code over the cloud using Google’s hardware resources. I tested the Bringing Old Photos Back to Life AI on the Google Colab notebook first. It proved buggy for me; your mileage may vary too. It’s a little tricky to use.
Replicate lets you run open-source AI models with ease. Microsoft’s AI runs faster and smoother on this platform, and it only takes one click to get the output. That’s why we’ll be using it for this demonstration.
This demonstration also includes two AI tools for colorizing and enhancing your restored photos. They’re both freely available on Replicate and Google Colab. I highly recommend trying them, but Microsoft’s AI alone is enough to cover basic restoration.
How to Restore, Colorize, and Upscale Old Photos
Passing an old degraded photo through Microsoft’s AI is only the first step in my process. After that once over, we can use AI to colorize our restored photo (this bit is optional). Finally, I use a third AI to upscale the whole image.
To get started with Replicate, all we need is a GitHub account. If you already have a GitHub, skip this step, otherwise, head over to GitHub . You need a valid email to join GitHub and the sign-up only takes a few minutes.
Restoring Old Photos
After logging into Replicate , we’re ready for the first step. In the search bar, enter Bringing Old Photos Back to Life, or you can go directly to the page .
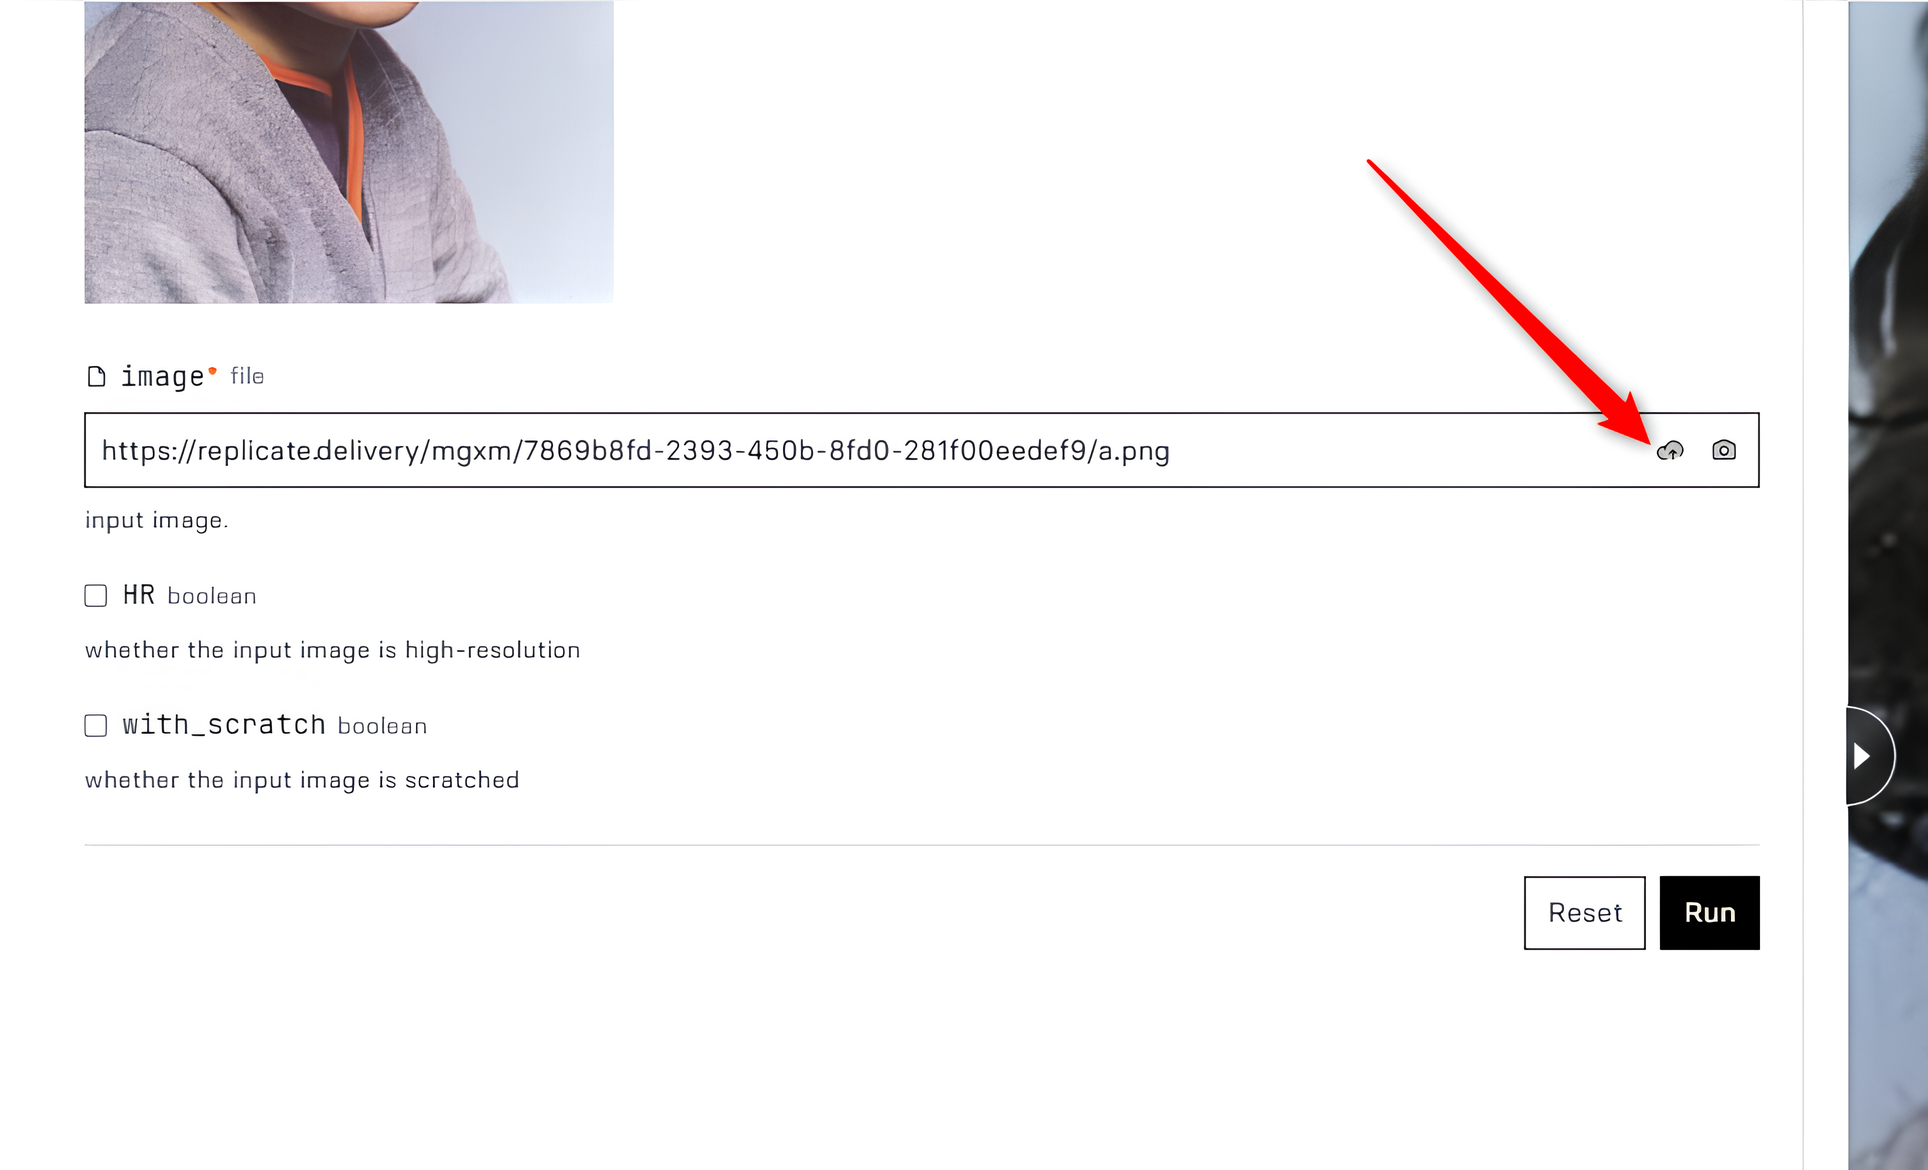
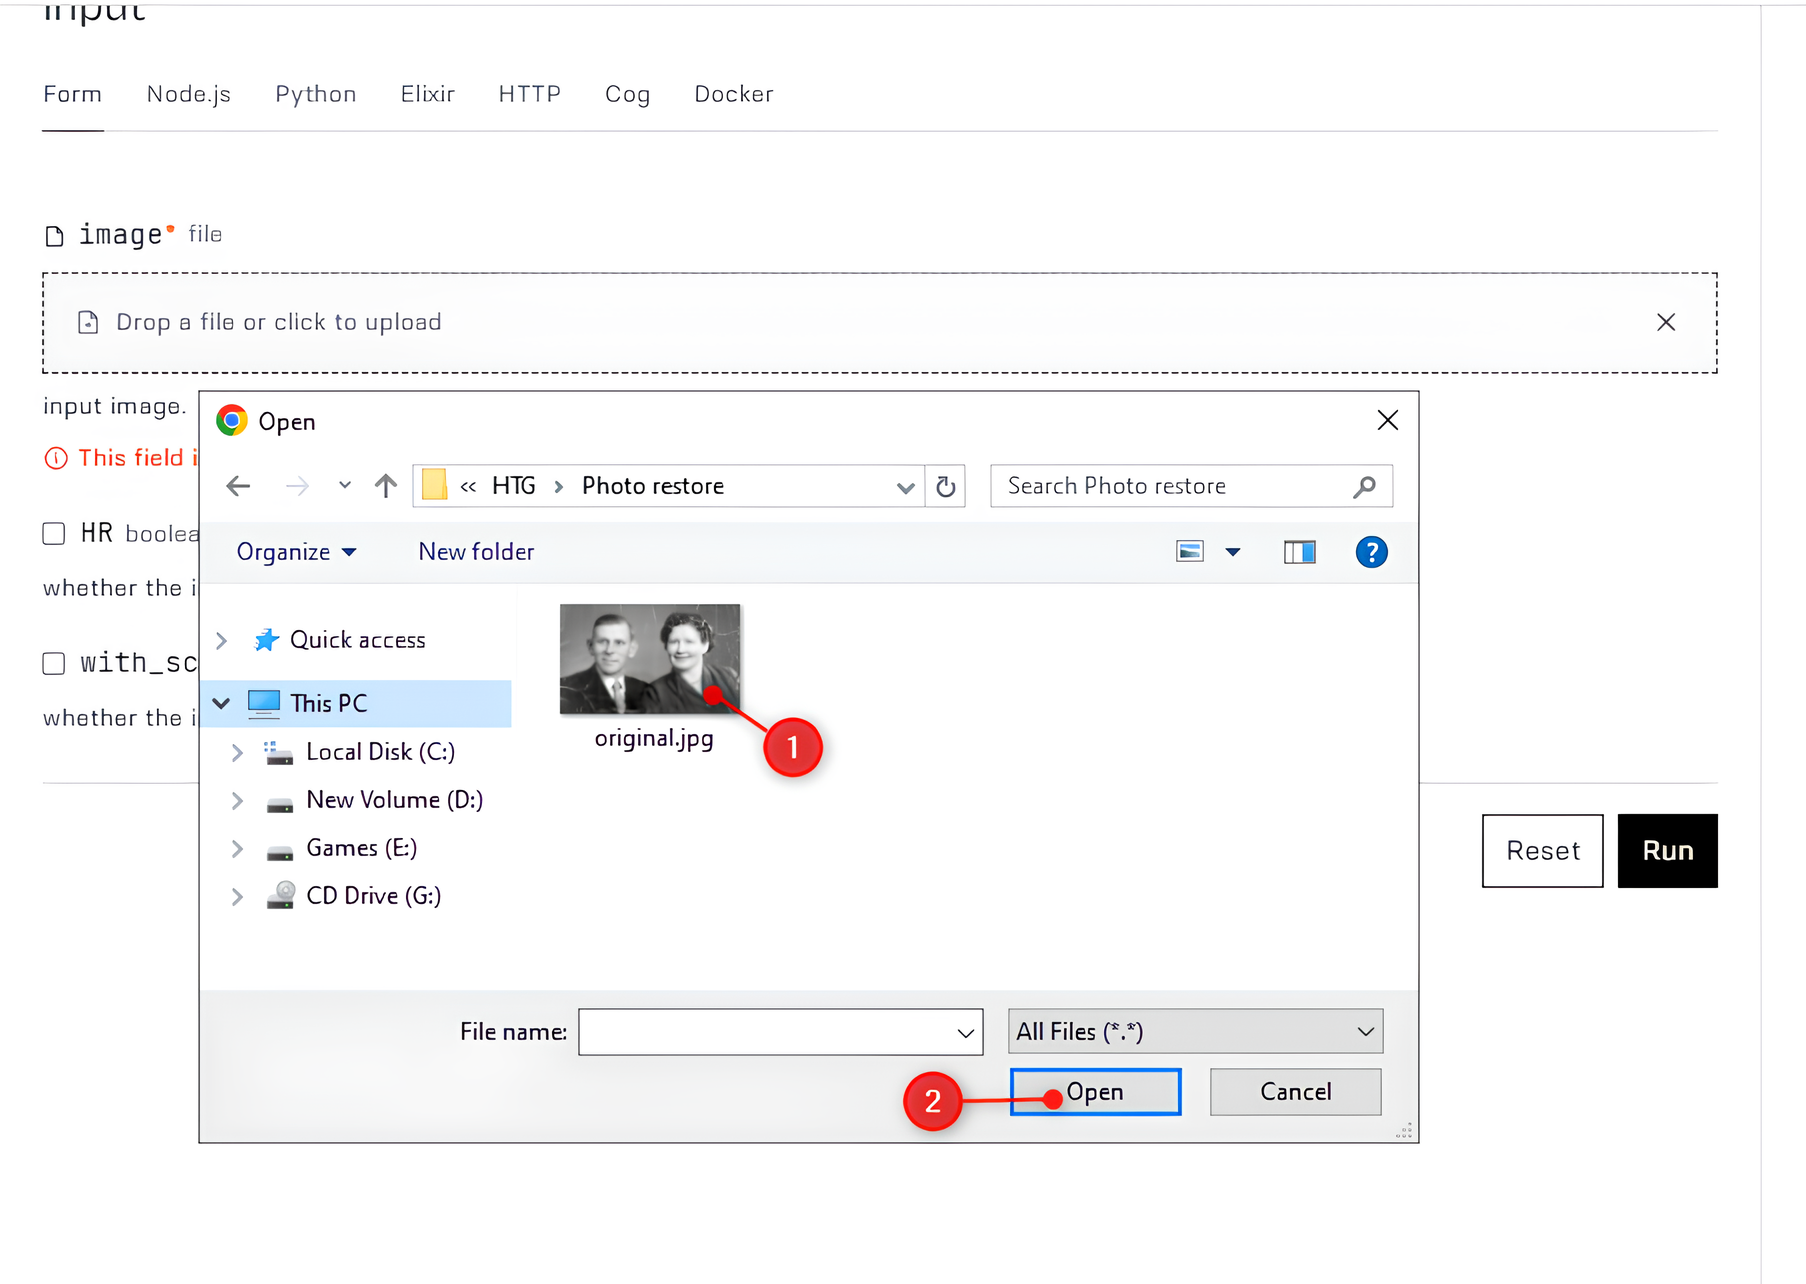
Click the tiny cloud icon to select and upload the photo you want to restore.
Close
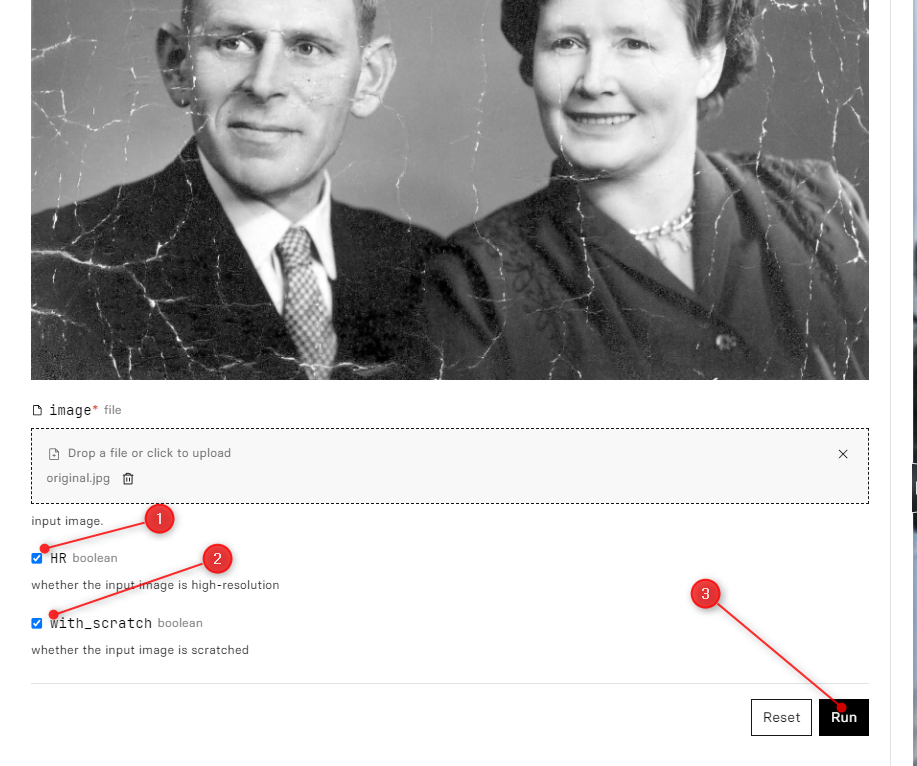
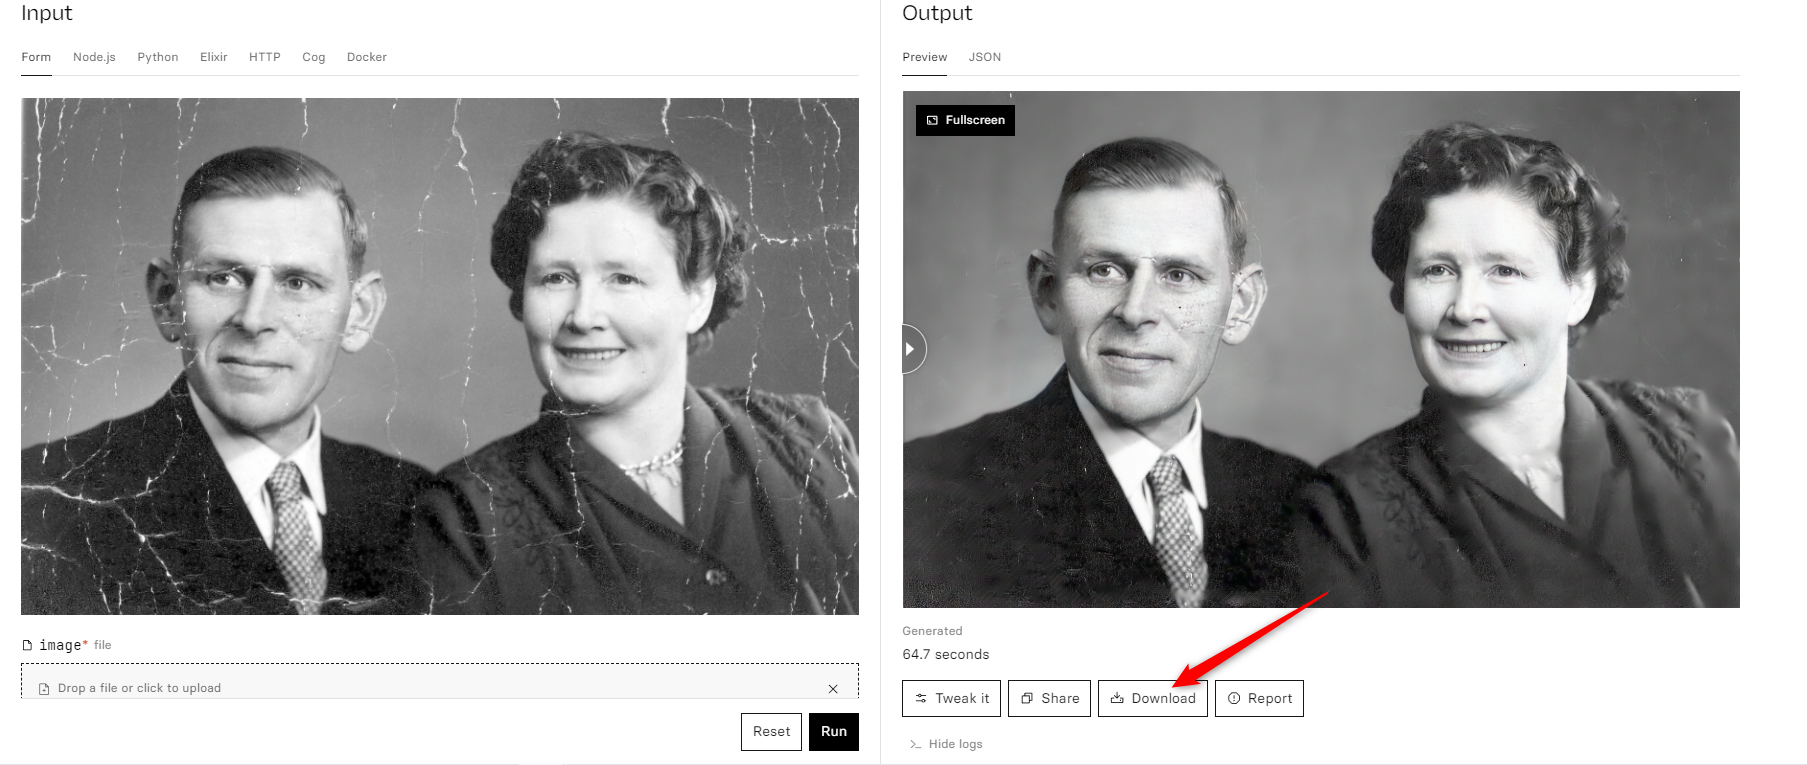
Check the relevant boxes if you have a high-resolution scan and if your photo has scratches. Click “Run.” It should take roughly 2 minutes to process the output. The tool has a helpful slider to view the before and after.
Keep an eye on the Warm or Cold tag under the title of the AI model. A cold tag means the model is booting, and your photo will take longer to process. If the model is already warm, you’ll get the output sooner.
As you can see, the AI has done a great job of cleaning up the photo. Click “Download” to get your restored image in full resolution. Or click “Tweak” to run the AI again with different settings.
Colorizing Restored Photos
Before we upscale our restored photo, we are going to add color to it. You can skip this step if you want to keep the original colors.
We’ll be using the Deoldify AI. I tested almost half a dozen other models on Replicate built for the same job. But Deoldify consistently produced the best results.
To run Deoldify on your restored image, search deoldify in the Replicate search bar or visit the Deoldify page directly .
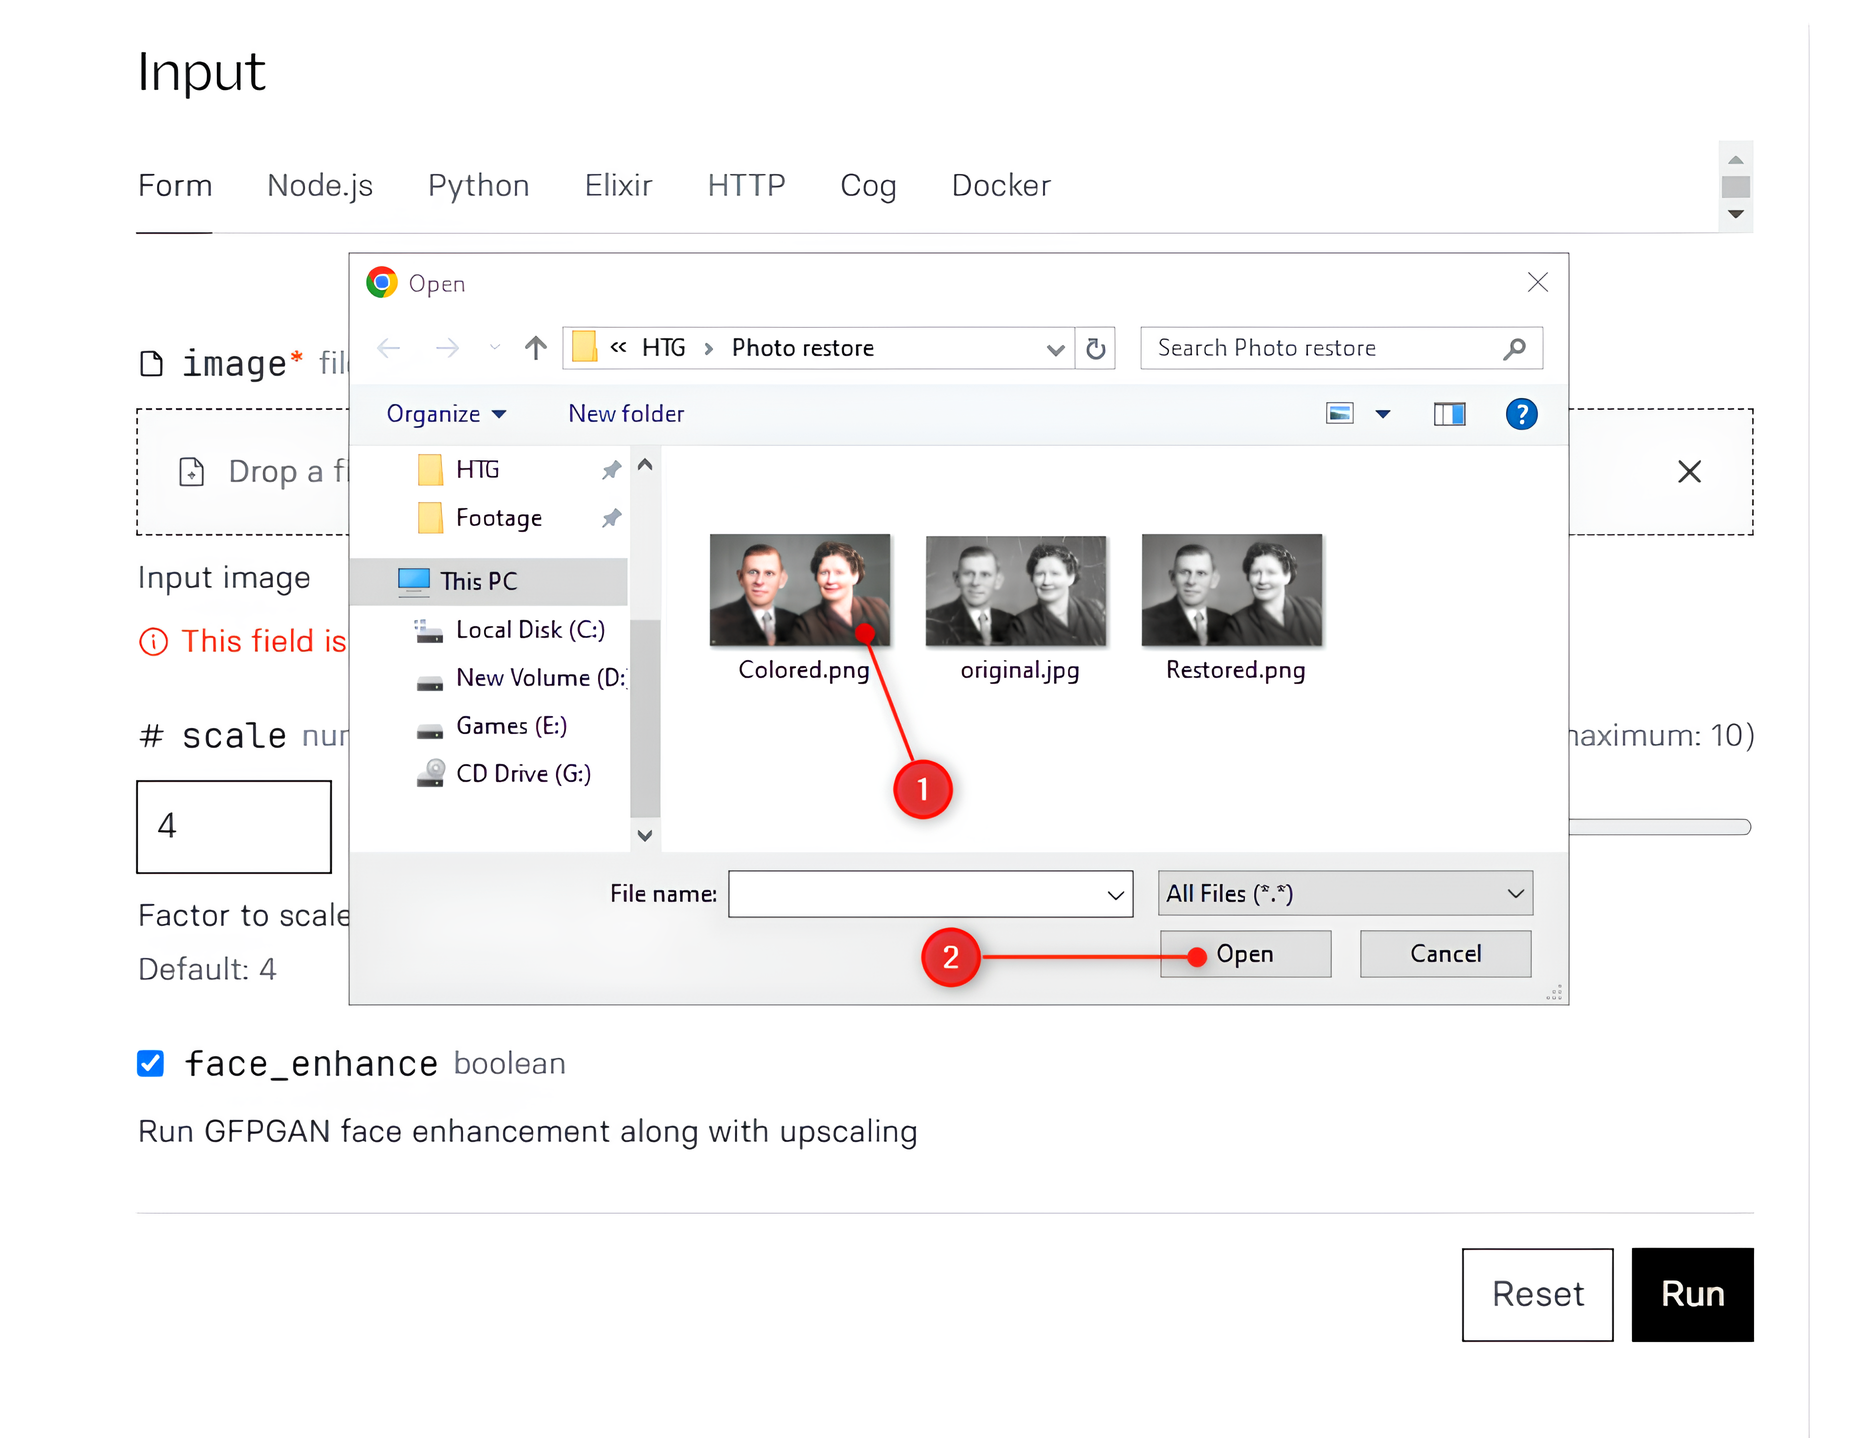
Click the upload icon and select the restored file you just downloaded.
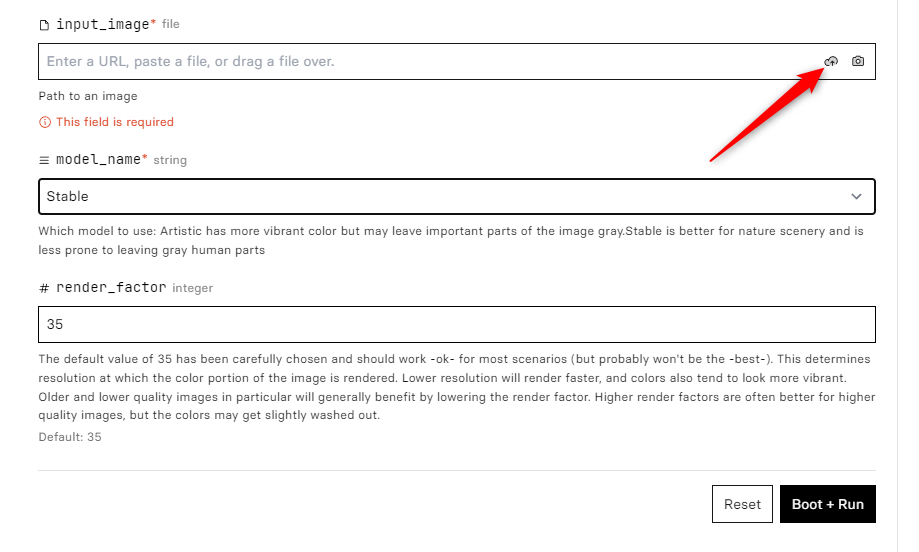
Deoldify has two settings: the model name and the render factor. You can play around with both until you get the best result. The default is the Artistic model and a render factor of “35” which should work in most scenarios. I got a better result with Stable here.
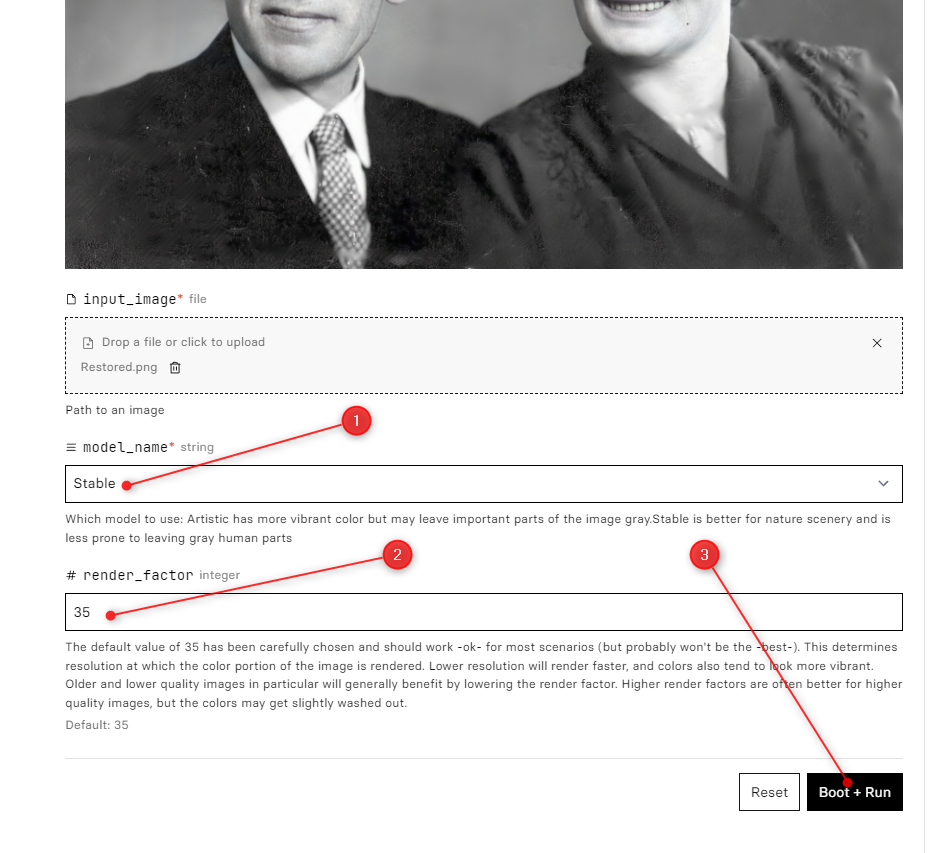
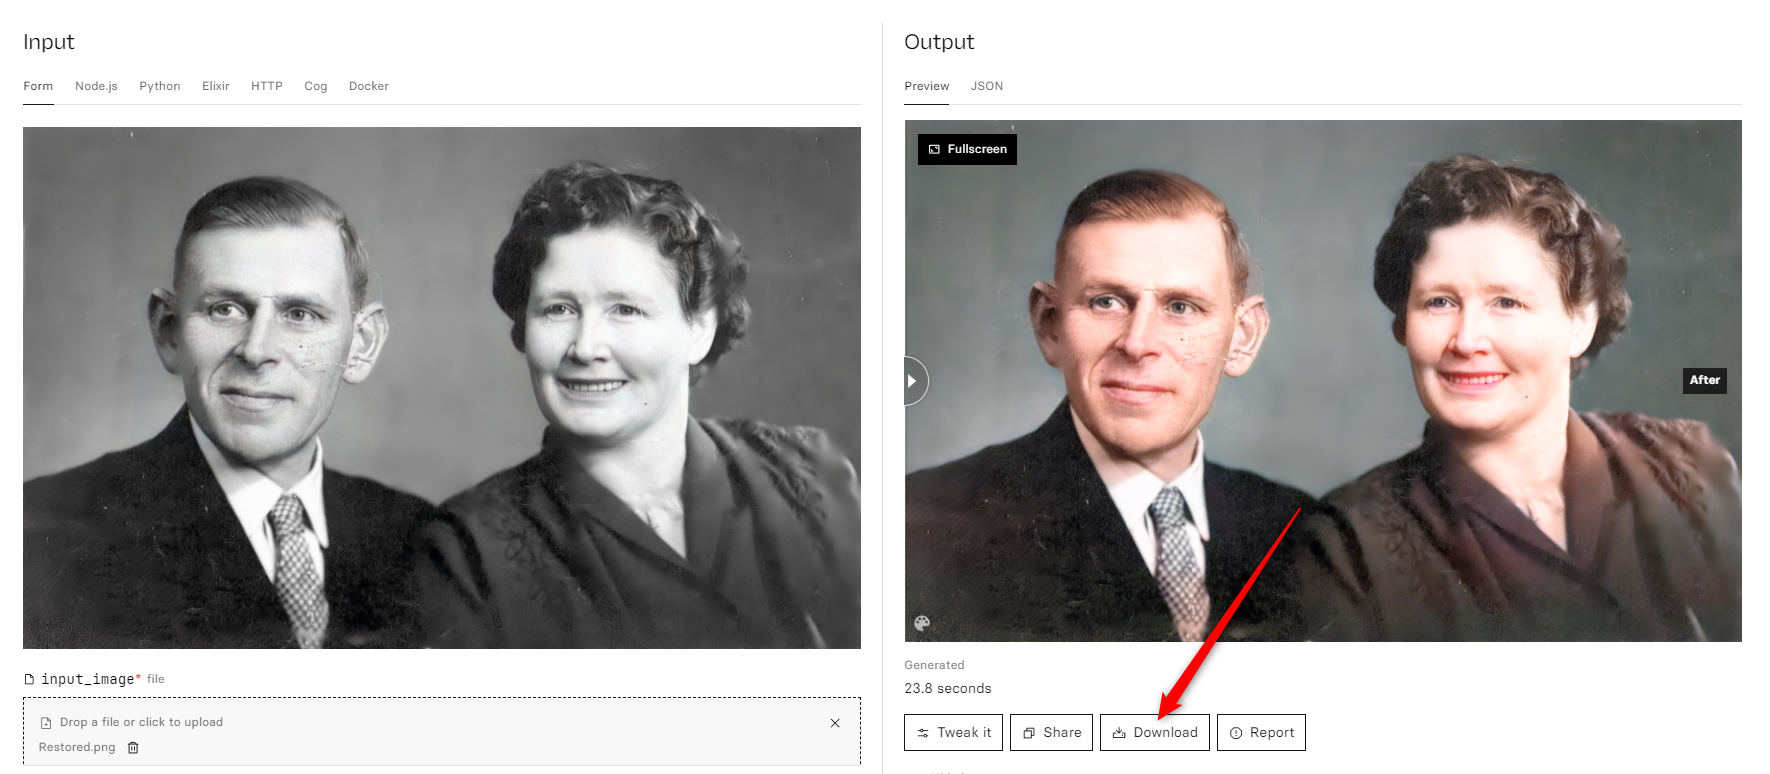
Click “Run” once you’ve selected your preferred settings. Wait for the processed output. If you’re happy with the result, click “Download.” Or click “Tweak it” to re-process it with different settings.
Upscaling Old Photos
So far, we’ve restored a badly damaged photo and added a splash of color to it. To top off this restoration job, we’ll upscale the processed photo. Upscaling uses AI to add more pixels to an image, making it bigger, sharper, and clearer. Think of the “zoom and enhance” trope from CSI.
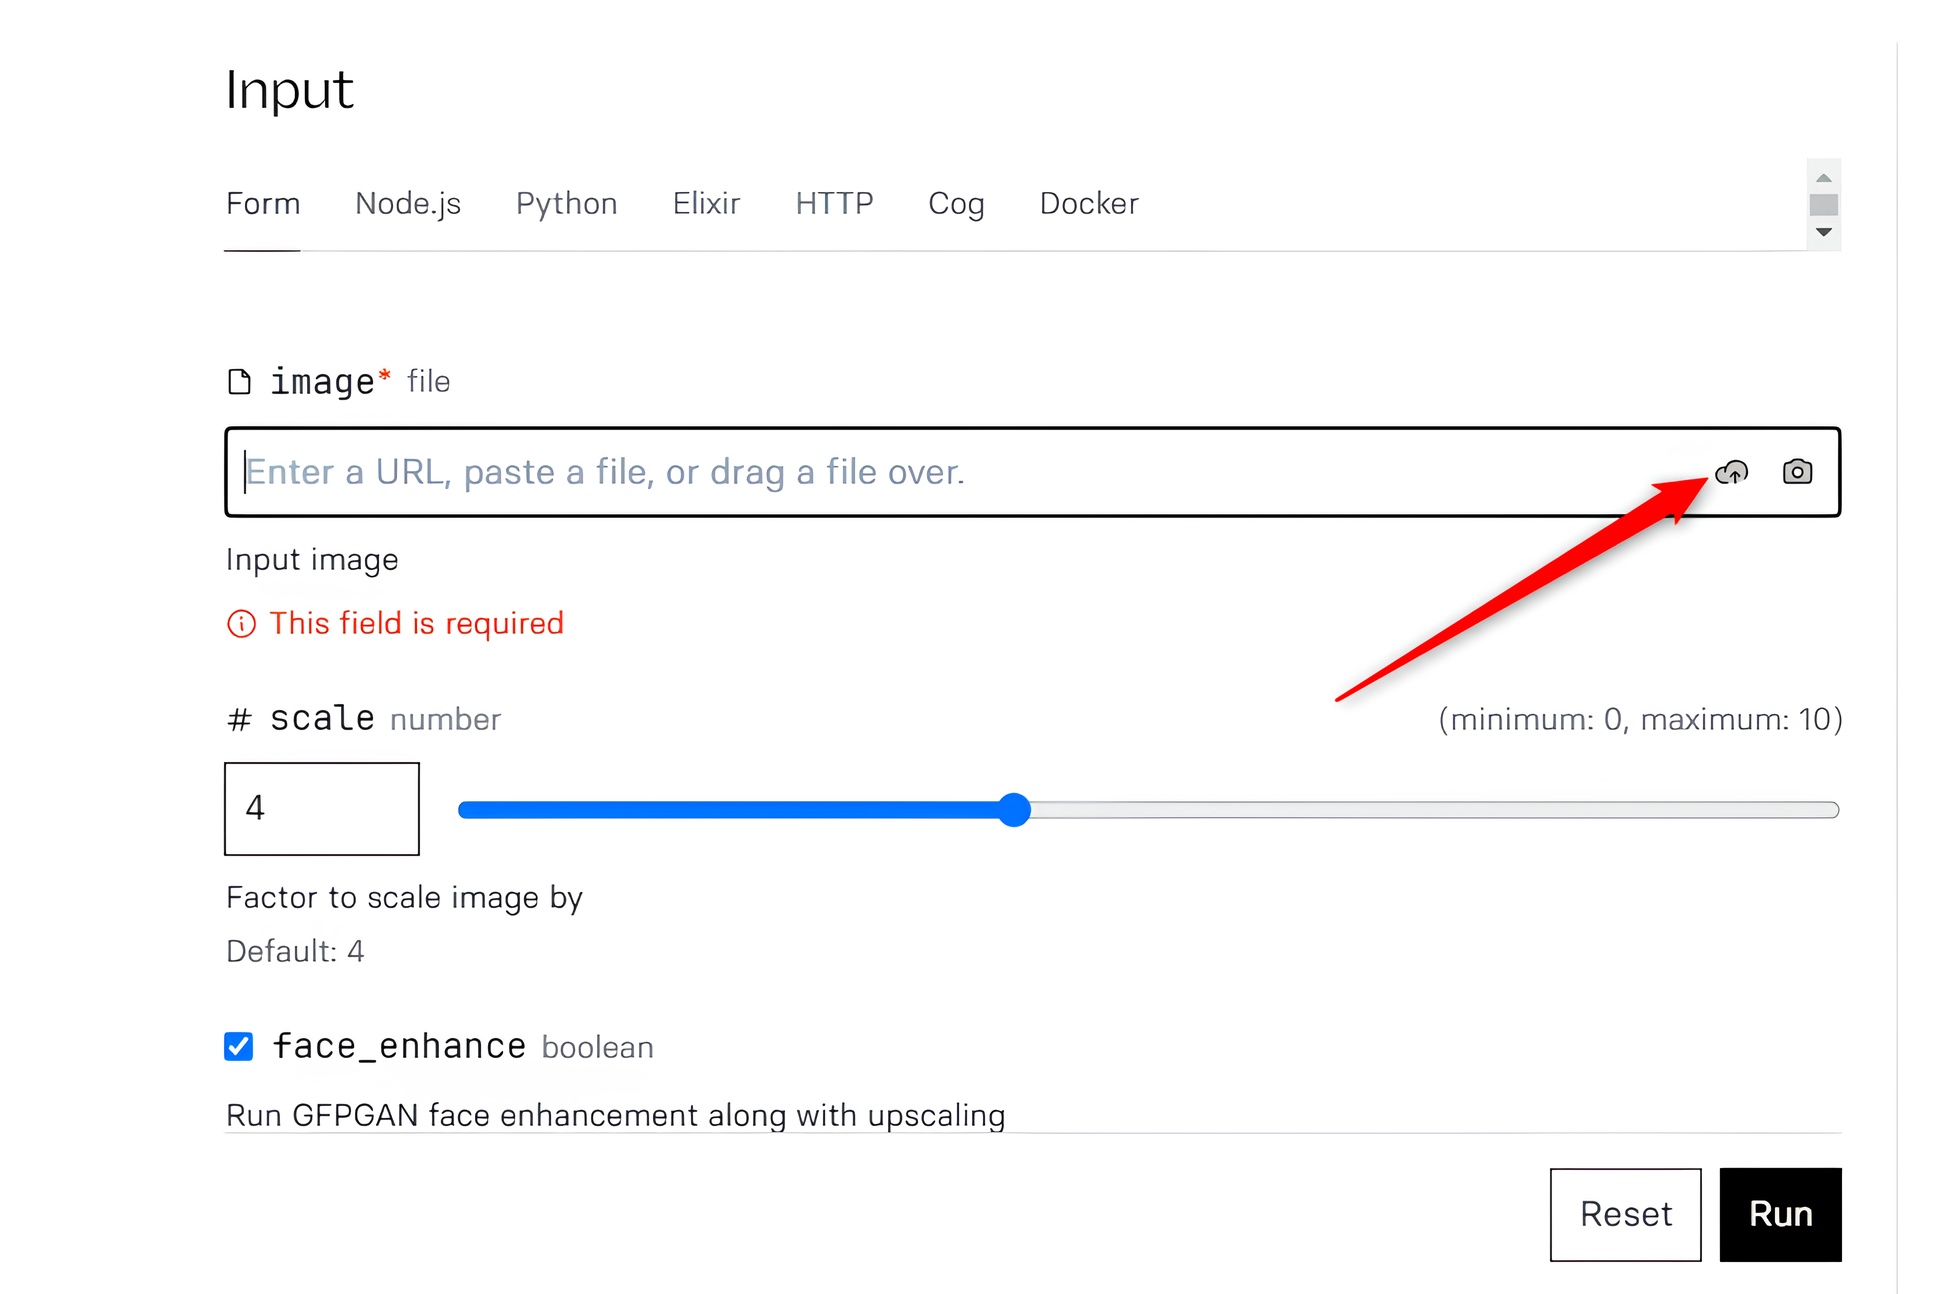
OpenESRGAN on Replicate . Click the upload button and drop the colorized image as input.
Close
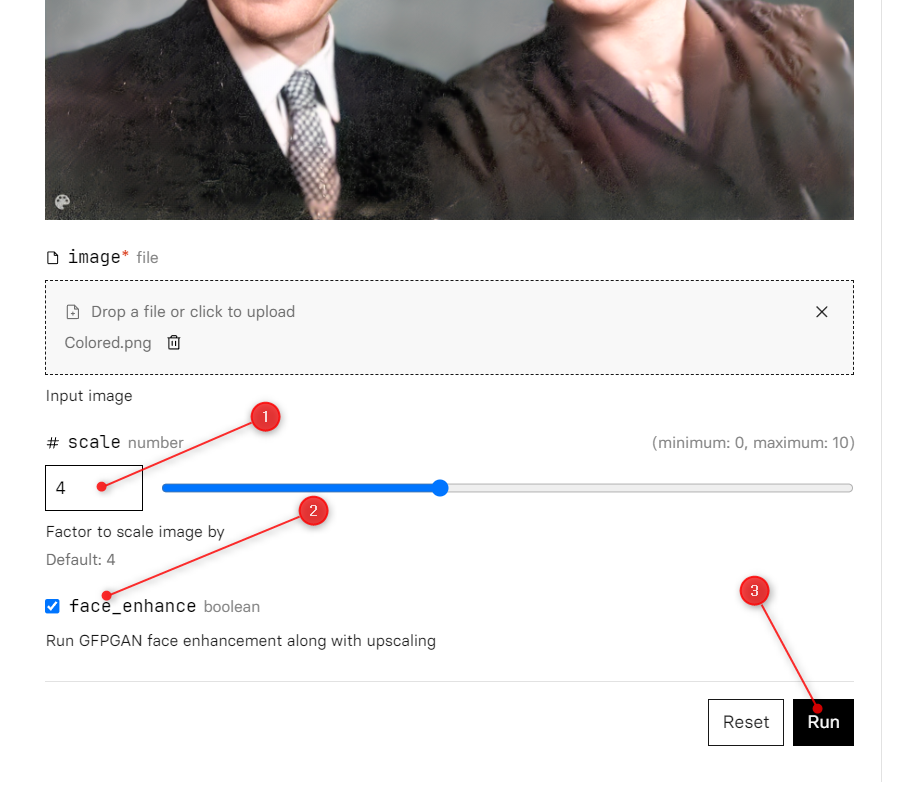
Next, we enter the scale. The scale here refers to the image size. I’ve set it to 4, which will give me an image 4 times bigger than my input. So for a 1080P image, I’ll get 4K as output. You can also select Face Enhance to clear up details on faces. Finally, click “Run.”
When it’s done, the before and after previews look identical. But when you download the processed file, it has a much higher resolution.
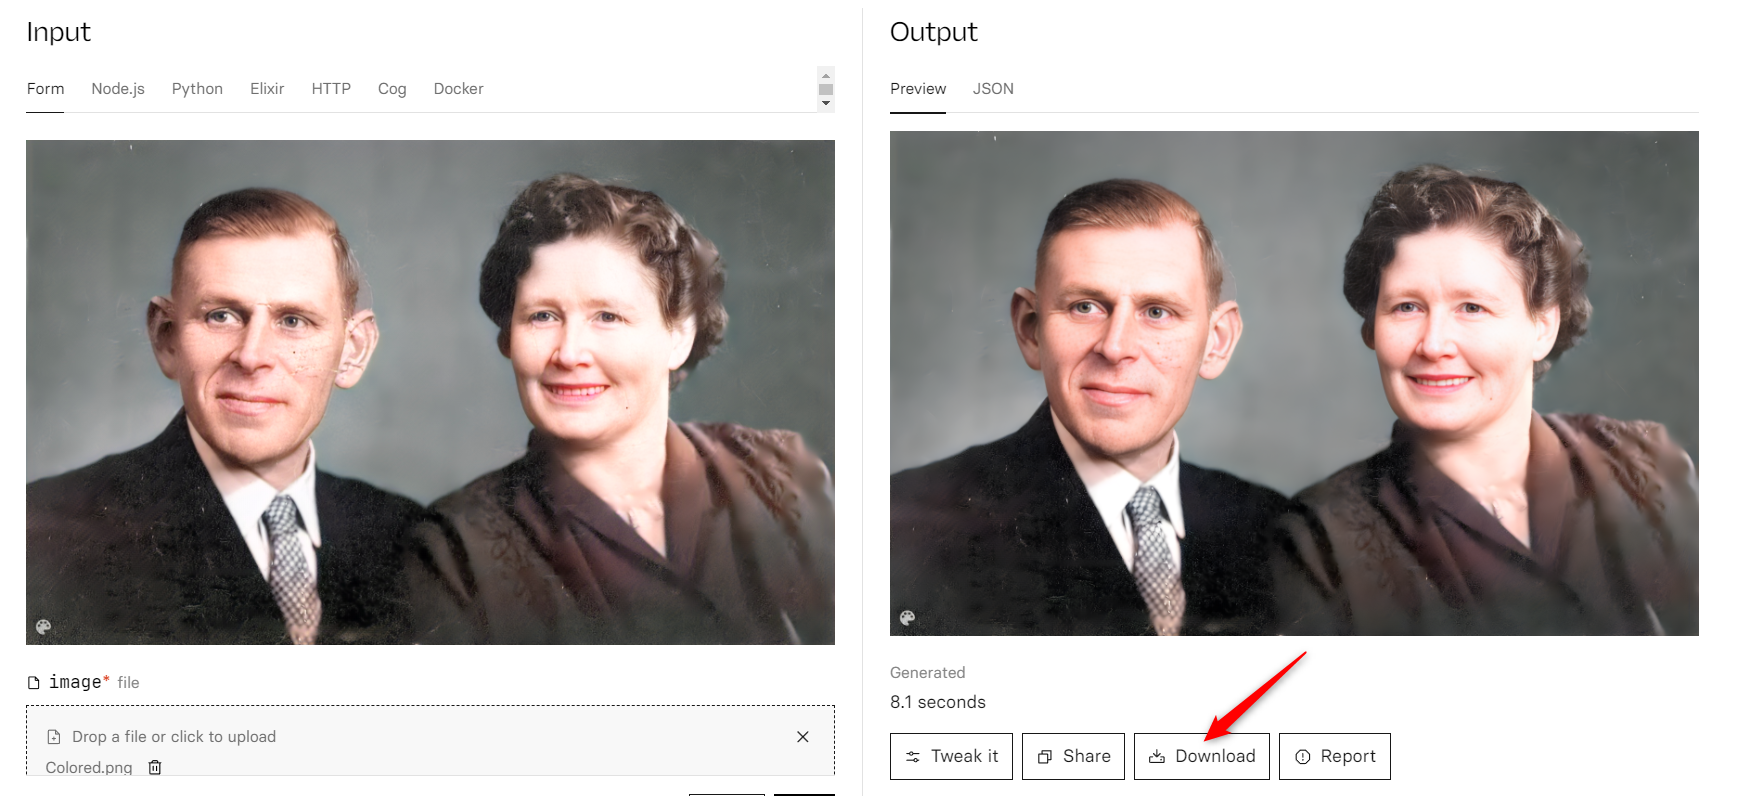
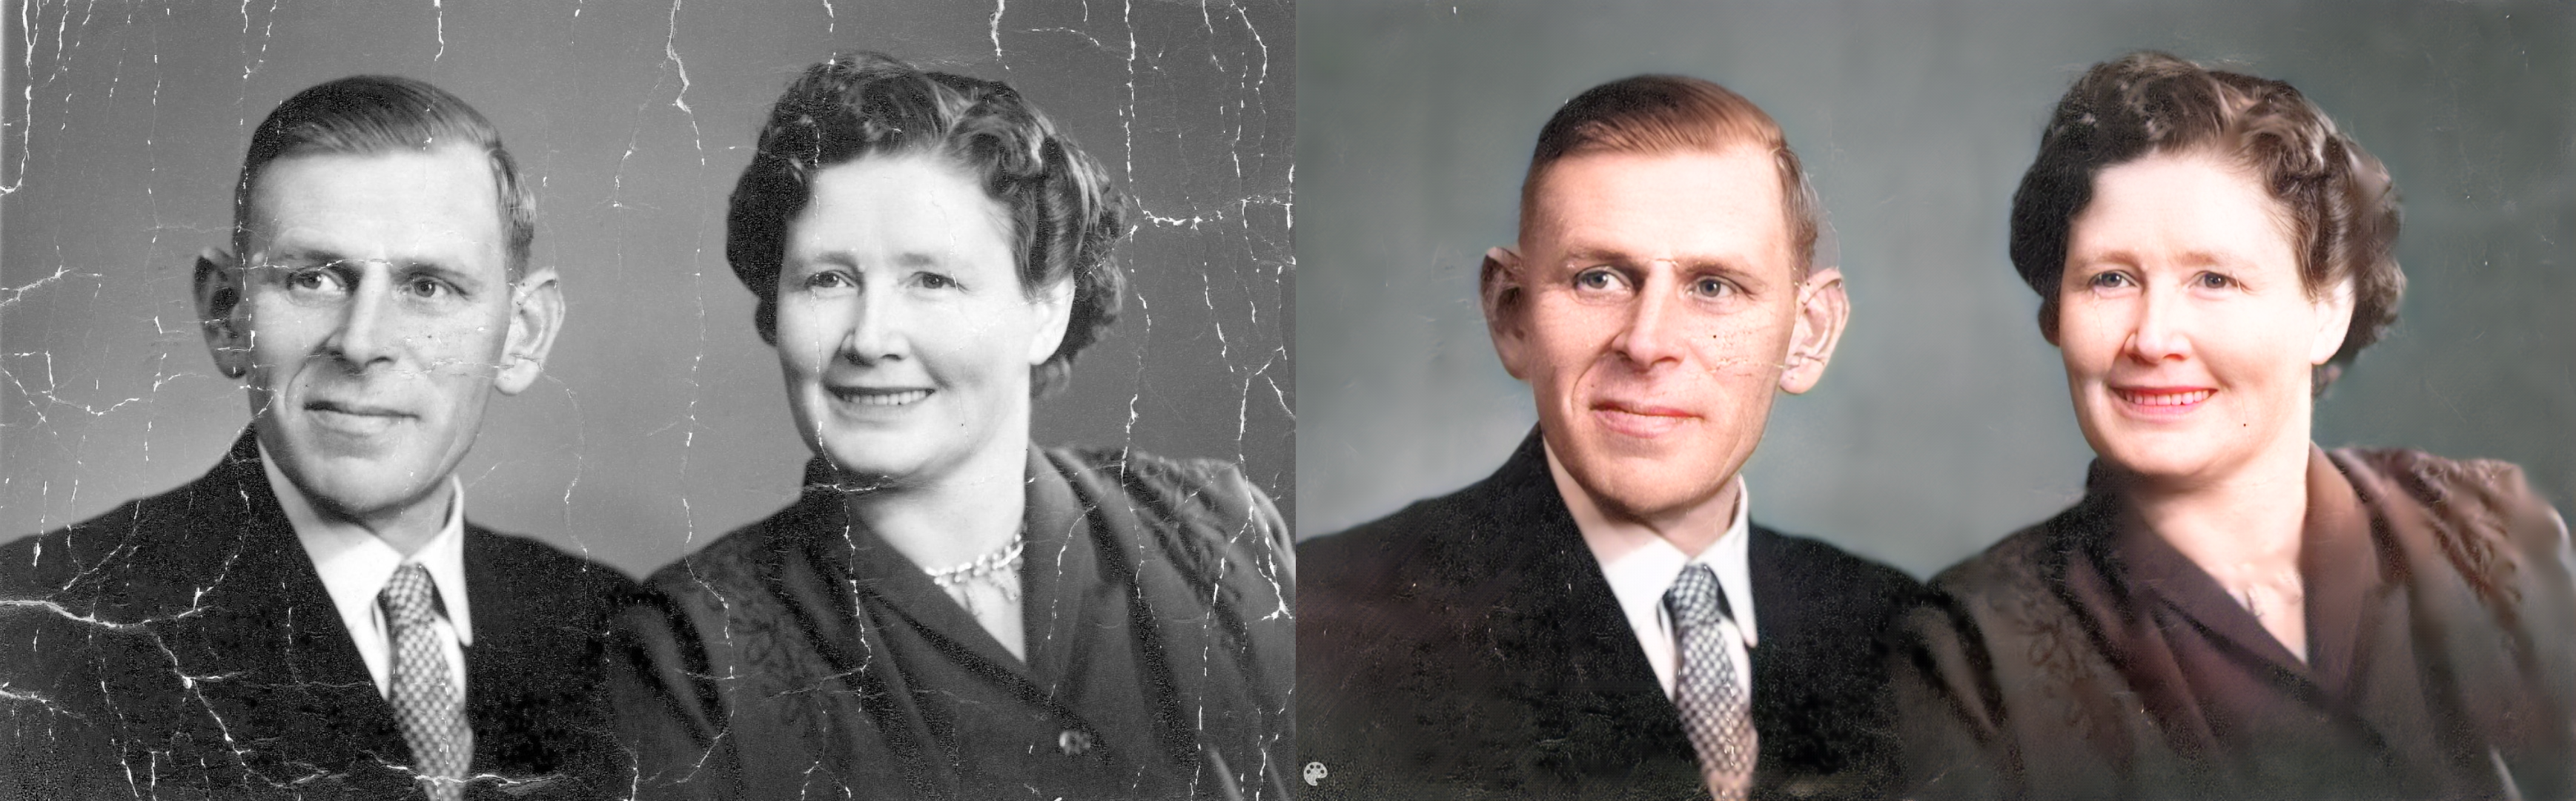
That’s all. Now our restored photo is ready for your digital or print album. Here’s a side-by-side comparison.
Including these three AI models, Replicate has a whole collection of image restoration models . There’s also a catalog dedicated to image upscaling and refining models .
Google’s Maxim AI caught my eye in particular. It can deblur, denoise, derain, and dehaze photos with one click. The results are simply astonishing. It works wonders on Polaroids or photos taken with low-res dumbphone cameras. You can retouch those old low-light photos with Google’s AI magic too.
With the three simple steps, you can restore and enhance most of any old photo. But you may have to fiddle with the settings to get the perfect output. I also suggest playing around with other restoration models freely available on Replicate. You could modify my workflow or create your own.
Also read:
- [New] Elevate Your Video Productions 15 Top-Tier Free Music Websites for 2024
- [Updated] In 2024, Cutting-Edge Recording Best Camcorders Reviewed
- 2024 Approved The Art of Monitoring YouTube Discussions
- 2024 Approved Tips to Improve Your GoPro's Power Sustainability
- Beneath the Ocean’s Veil Tips for Recording Top-Notch Underwater GoPro Videos
- Easy Methods to Download & Improve Your Intel HD Graphics 5500 Software
- How To Confirm Successful Printer Integration with Your PC: Expert Tips From YL Software
- In 2024, Network Locked SIM Card Inserted On Your Oppo K11x Phone? Unlock It Now
- In 2024, The Best 8 VPN Hardware Devices Reviewed On Vivo Y27 4G | Dr.fone
- Step-by-Step Process to Install Tiny Tina's Adventure Game Without Issues: A Comprehensive Guide for Personal Computers
- The Edited Essence Unlocking Techniques for Visual Impact for 2024
- Unlock New Looks with These 15 Free Windows 11 Themes for Personalized Computing
- Unlock the Best Places to Explore Vector Artwork at No Cost for 2024
- Title: AI-Powered Techniques to Scale Up and Revitalize Classic Images Sans Photoshop
- Author: Daniel
- Created at : 2025-02-28 18:44:18
- Updated at : 2025-03-06 01:06:49
- Link: https://some-skills.techidaily.com/ai-powered-techniques-to-scale-up-and-revitalize-classic-images-sans-photoshop/
- License: This work is licensed under CC BY-NC-SA 4.0.