Elevate Your AI Imagery: Discover the Top 8 Midjourney Modifiers That Enhance Creativity

Elevate Your AI Imagery: Discover the Top 8 Midjourney Modifiers That Enhance Creativity
Quick Links
- The Blend Command: Combine Images Together
- The Describe Command: From Images to Text
- The No Parameter: Avoid Certain Elements In Images
- The Stylize Parameter: Control Midjourney’s Stylization
- The Repeat Parameters: Fast Visual Exploration
- The Weird Parameter: Make Images Stranger
- The Video Parameter: Capture the Creation Process
- The Tile Parameter: Craft Stunning Patterns
Midjourney has a ton of features baked into it that you won’t find if you don’t know where to look. Many of these features can help you create awesome images, while others are not so useful. So, here are eight Midjourney commands and parameters that I find most productive and fun to use.
Midjourney commands refer to typed commands such as “/imagine” or “/settings”that you type into the message bar to trigger the Midjourney bot. Whereas, parameters refer to examples like “–v6”or “–niji,” which you use to provide additional instructions along with your prompt.
1 The Blend Command: Combine Images Together
You might already know that Midjourney lets you create AI images using your own images . Now with the blend command, you can upload 2-5 images to Midjourney and combine the concepts and aesthetics of each image into a new original creation.
To use it, enter “/blend” into the Midjourney bot and upload your images. You can either drag and drop the images from your PC or upload them from your mobile photo library. By default, the blend will take two images as input. But you can add up to 5 by tapping the options field in the prompt window and then choosing “image3”, “image4”, and “image5.”
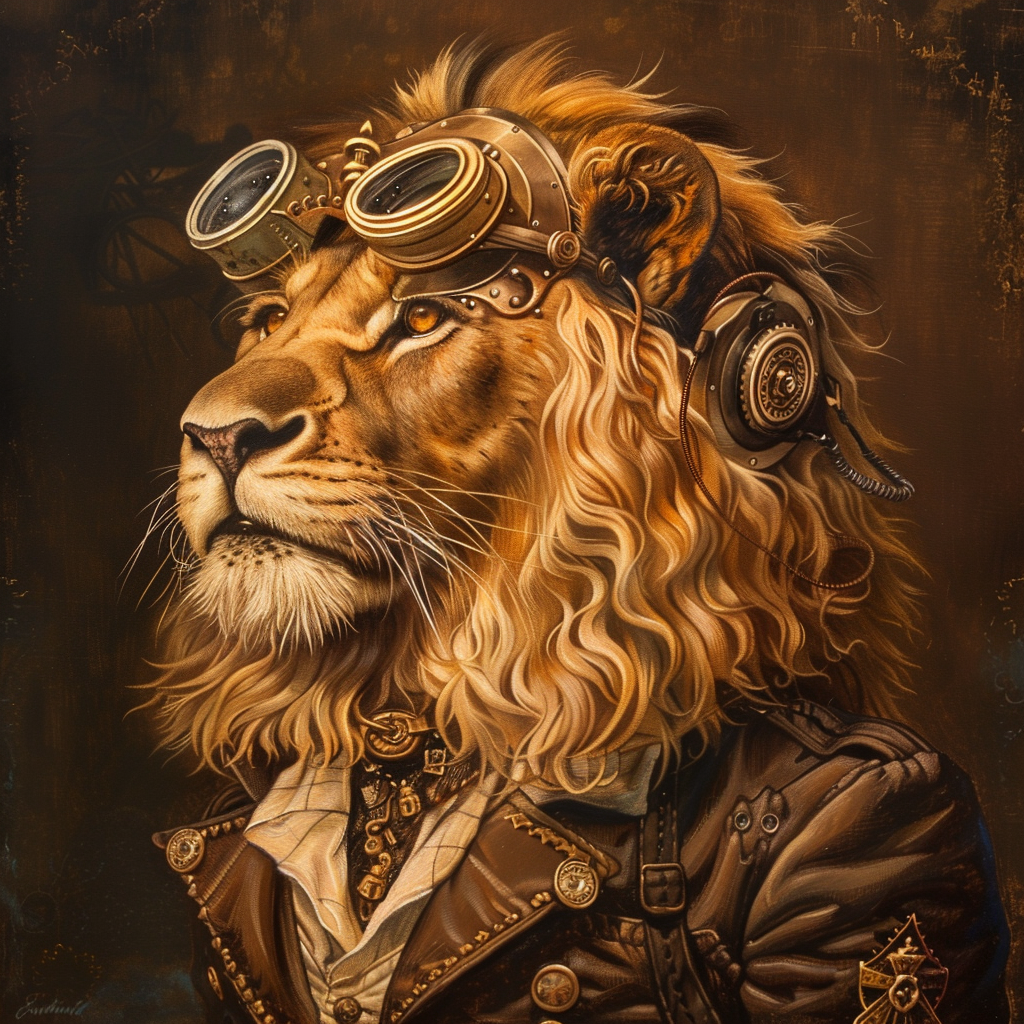
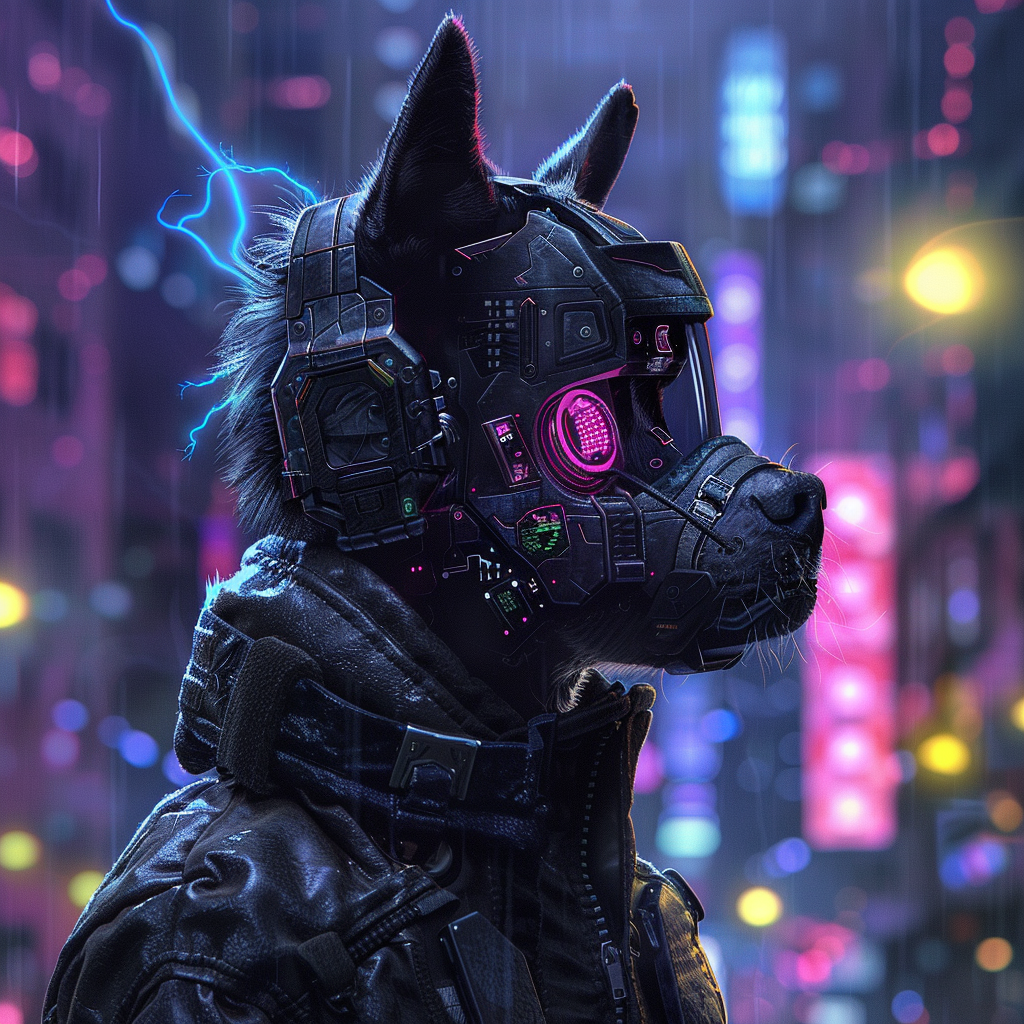
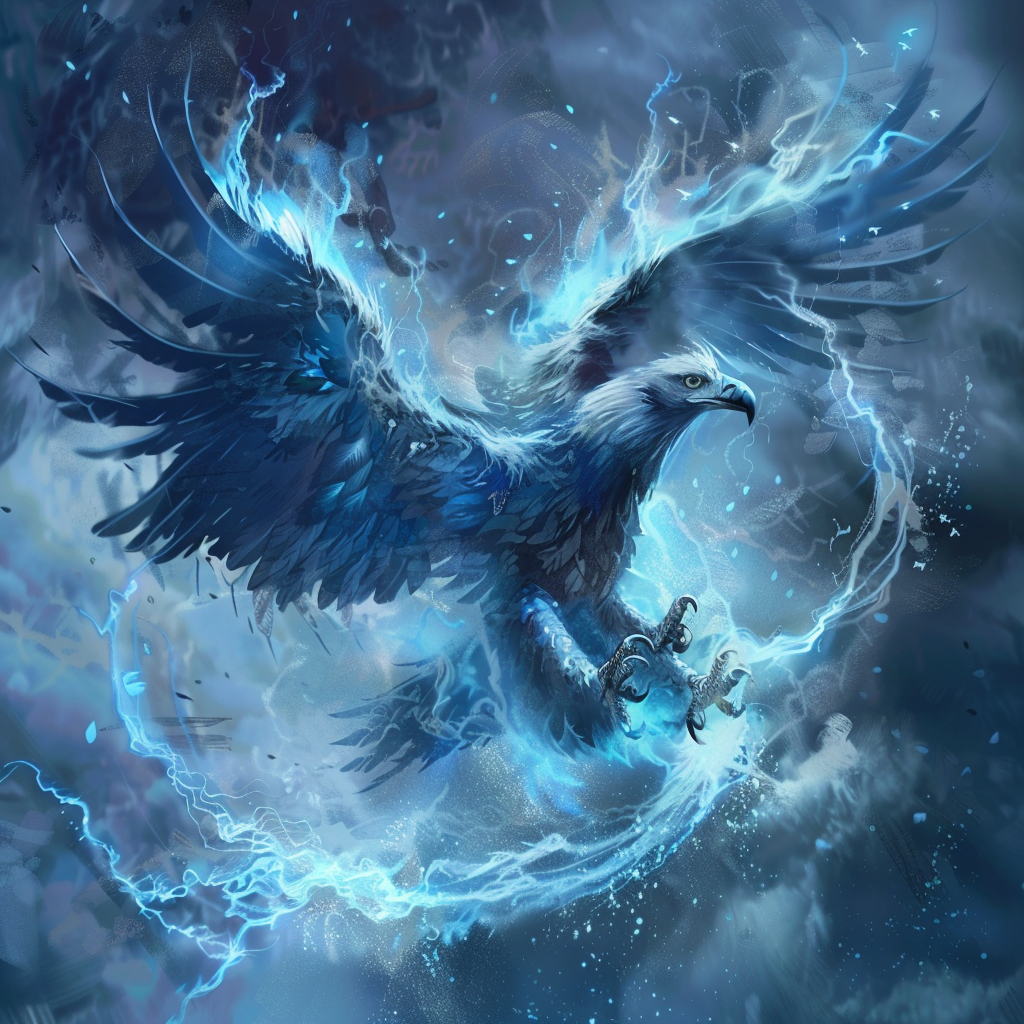
Now, let’s see this in action. I inserted the following 3 images
Close
And got this blended result:
By default, /blend generates square images with a 1:1 aspect ratio. You can customize this by going into Options > Dimension, in the prompt window and specifying the aspect ratio to Portrait, Square, or Landscape. You can also add suffixes and parameters to your blend command just like with /imagine, to further customize the results.
2 The Describe Command: From Images to Text
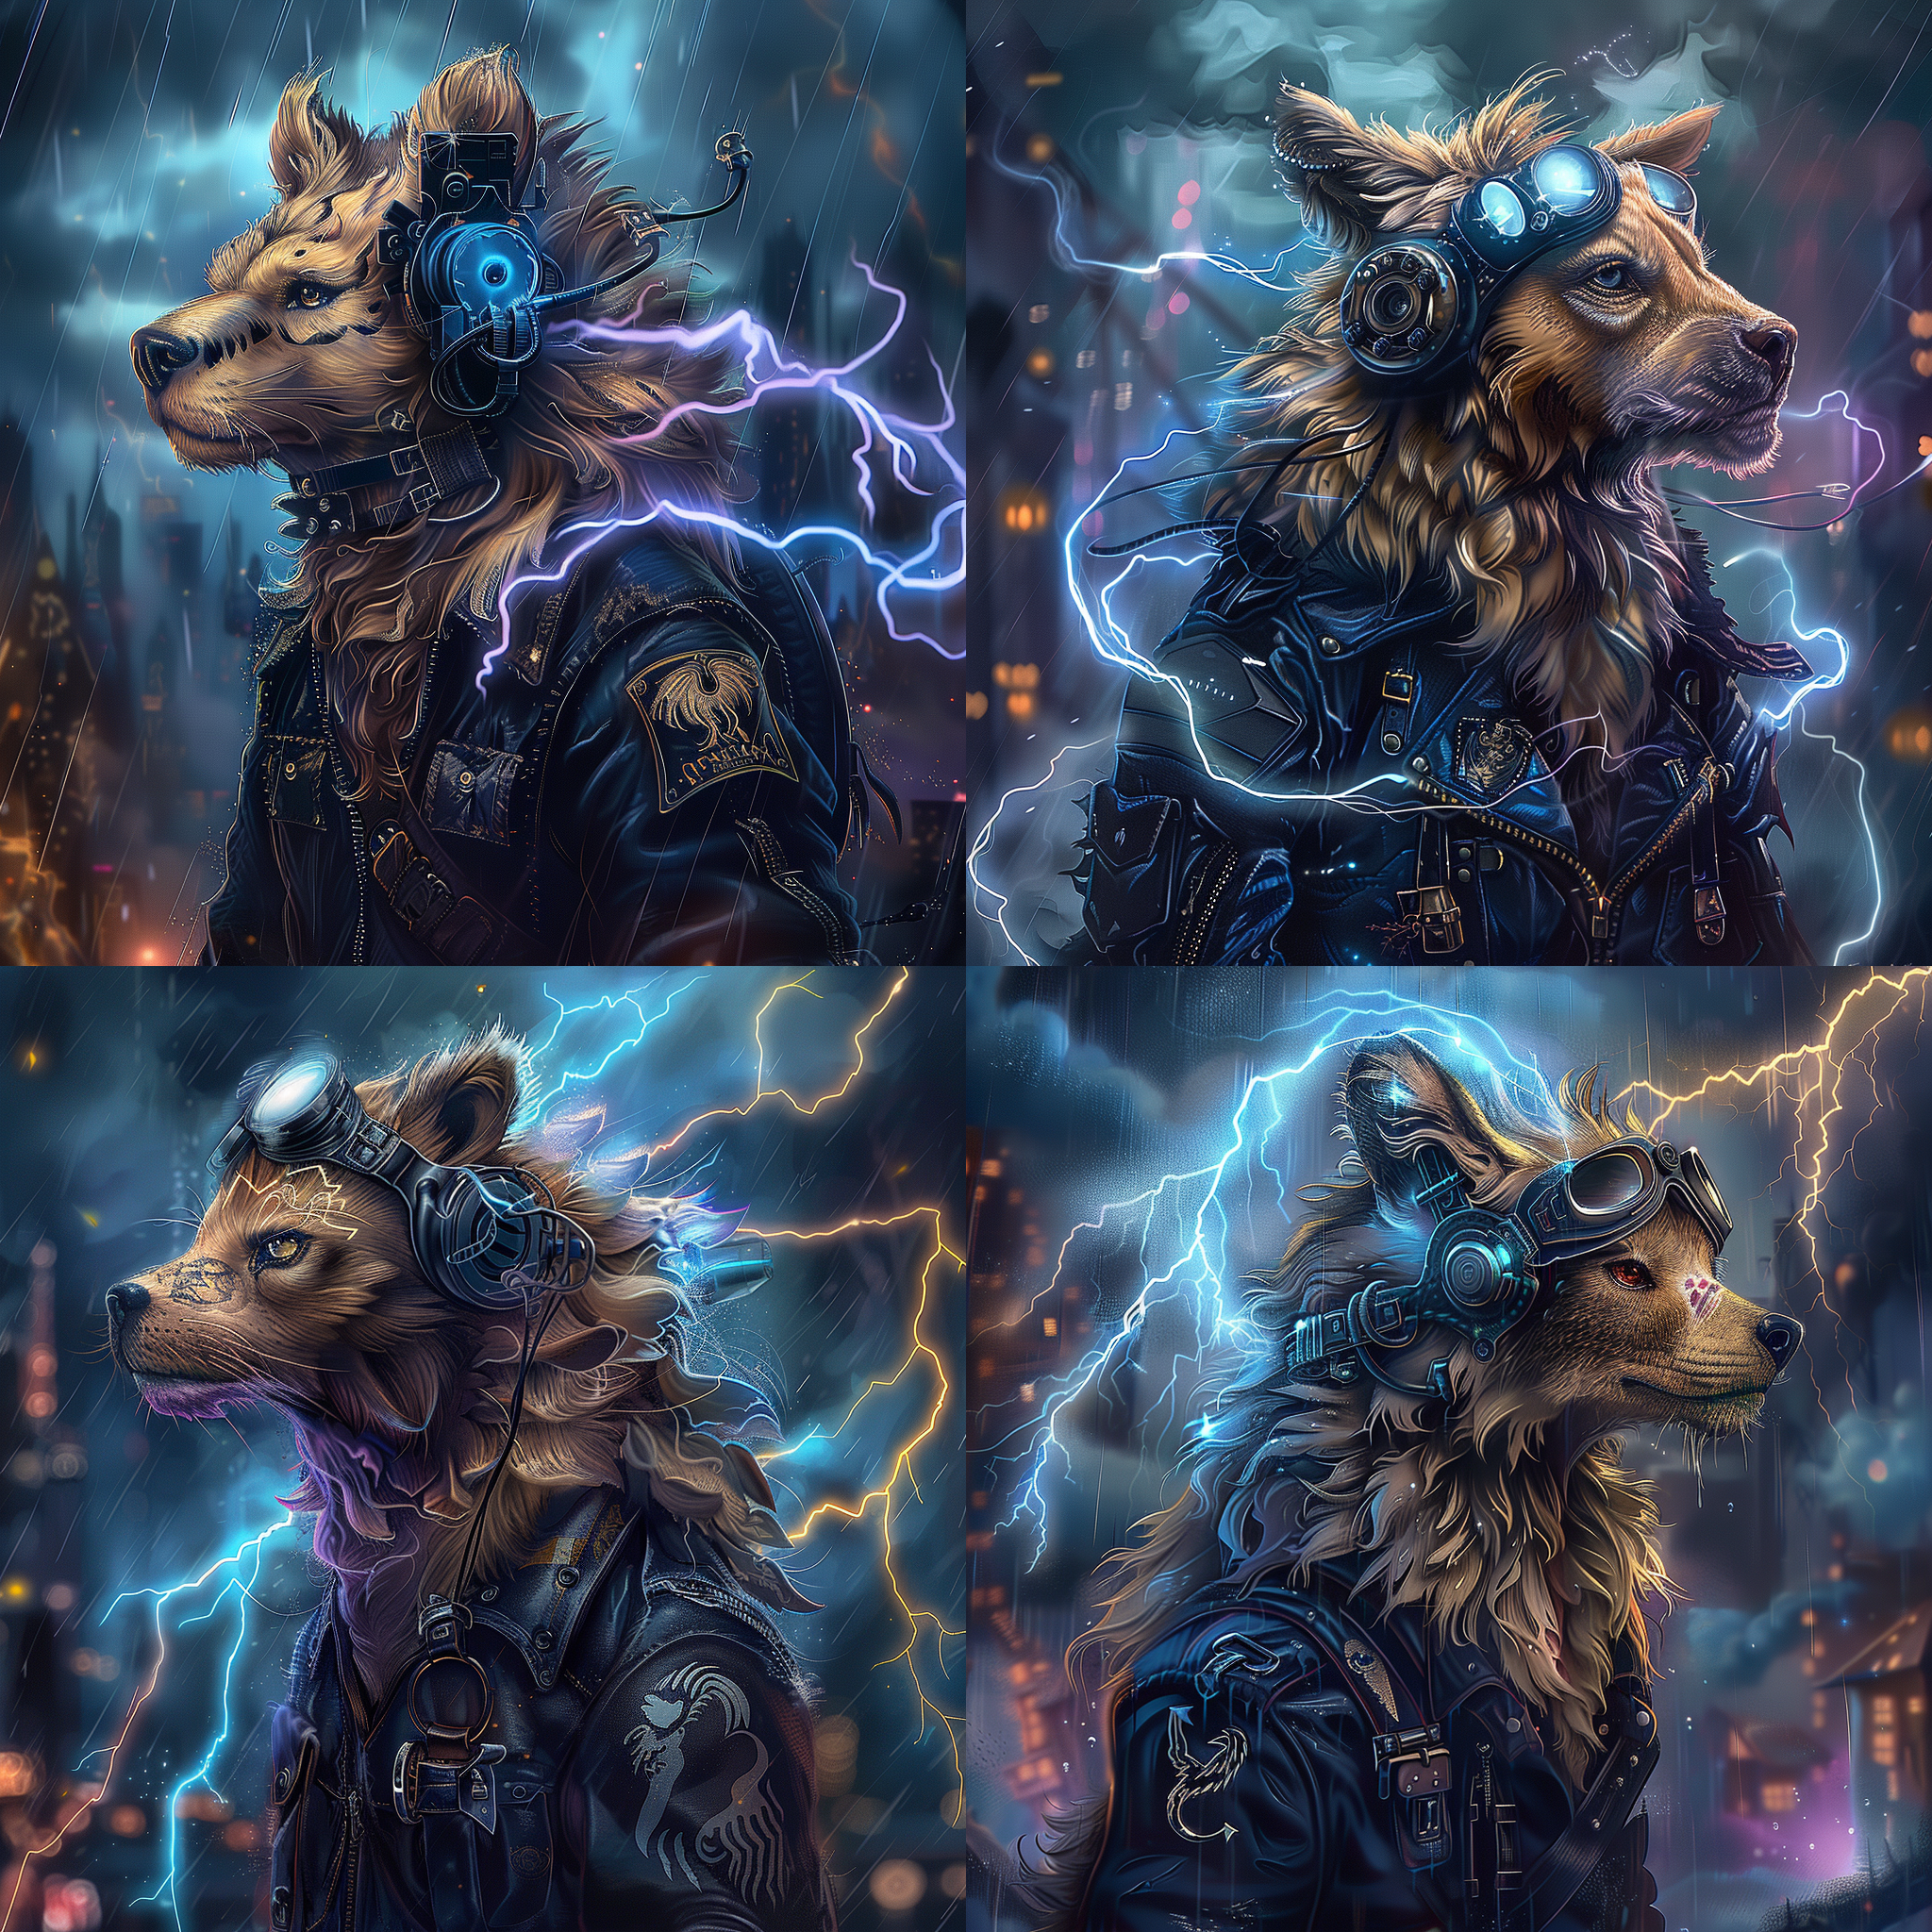
You can use the describe command to provide Midjourney with an image and get a prompt as input. So, the reverse of what we generally use it for. Simply type in “/describe” and you’ll be asked to either upload the image or provide a link to the image. Provide your image, and Midjourney will present 4 potential prompts for that image.
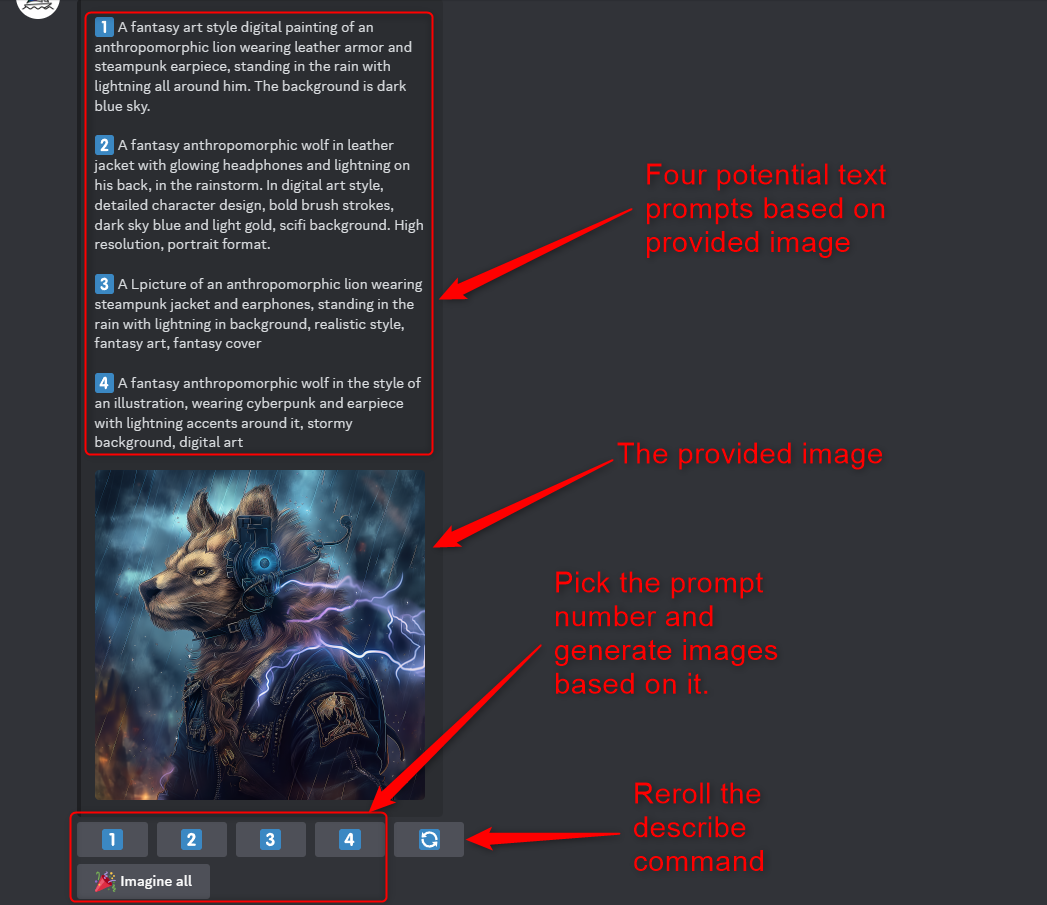
You can now use these prompts with the /imagine command to see what Midjourney cooks up. Or you can just use this to expand your artistic vocabulary. That said, one of the best use cases of this command is to reverse engineer AI images you see online and on social media and try to recreate them using Midjourney.
3 The No Parameter: Avoid Certain Elements In Images
Sometimes, when using a prompt, certain elements or items might repeatedly pop up in your image. At this point, you can use the no parameter to remove items or objects you don’t want in your composition.
For instance, this is what Midjourney generates with the following prompt:
summer picnic scene
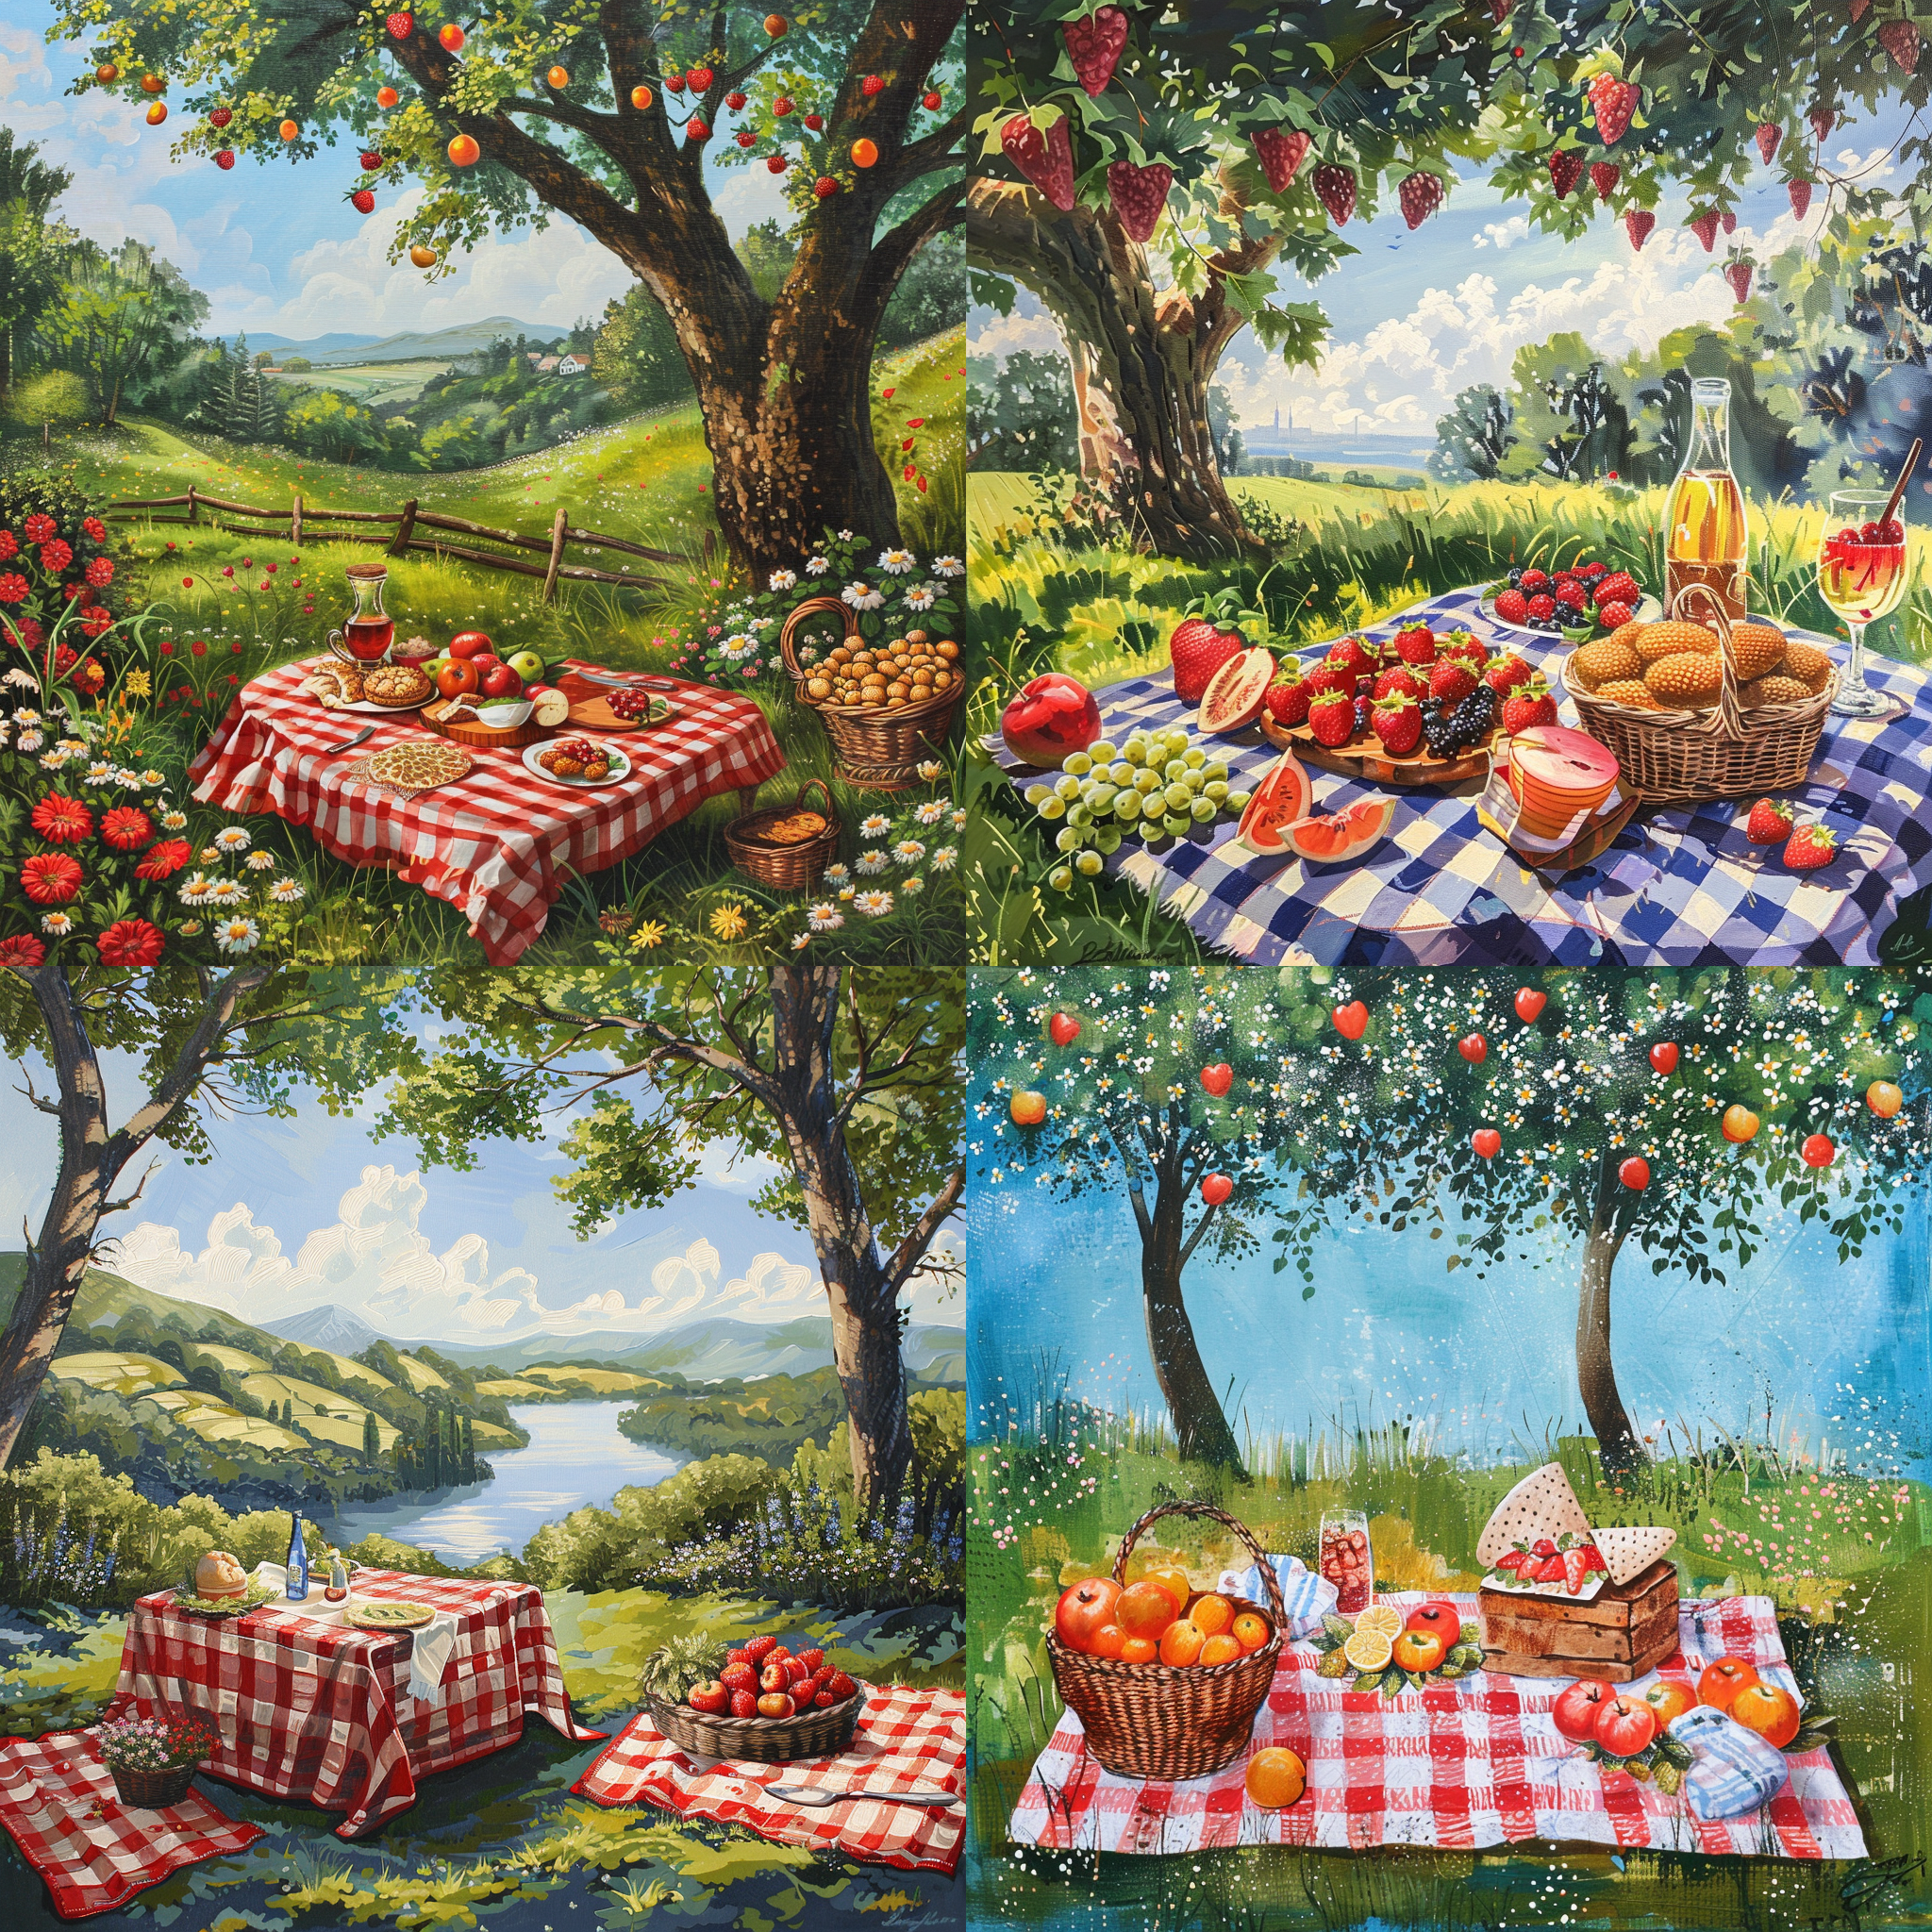
As you can see, Midjourney is creating images with trees in them. But I don’t want trees. So, if I modify the prompt to:
summer picnic scene without trees
This is what I get:
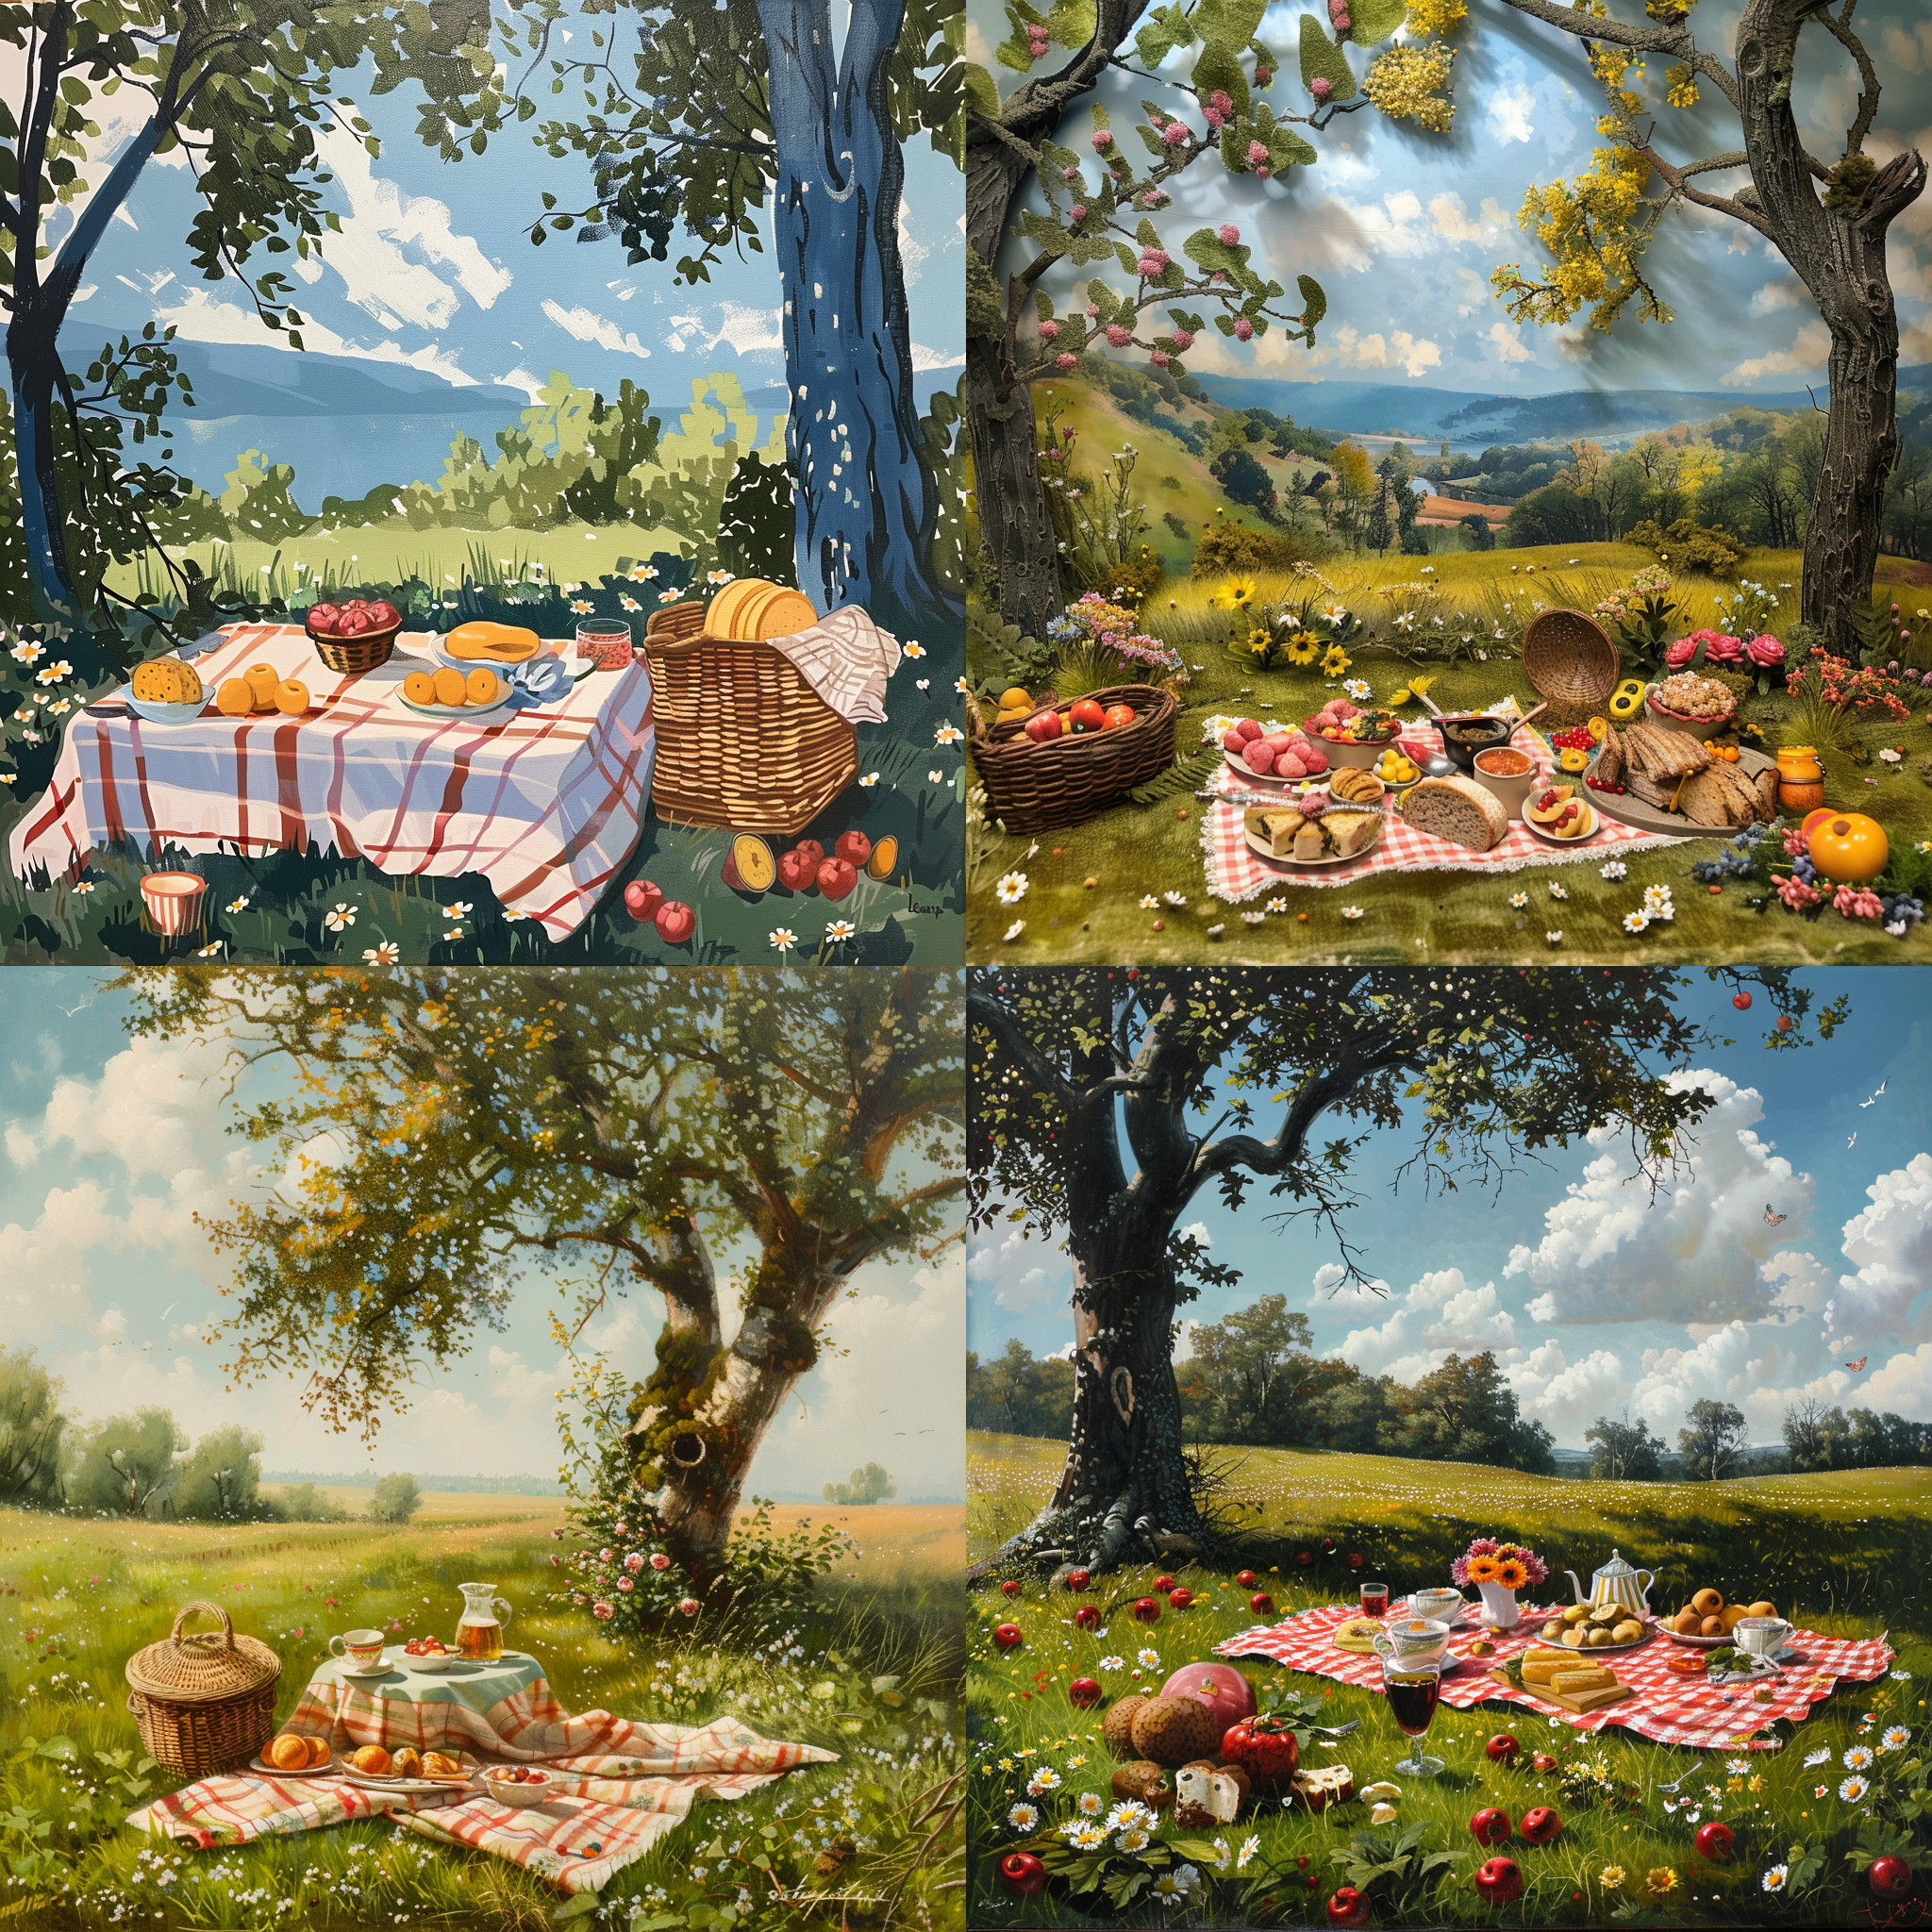
Still, the generated images include trees. But you can stop this from happening by using the “no” parameter and specifying what you want removed. The modified prompt becomes:
summer picnic scene –no tree, branches, leaves, trunks.
And here’s the generated image:
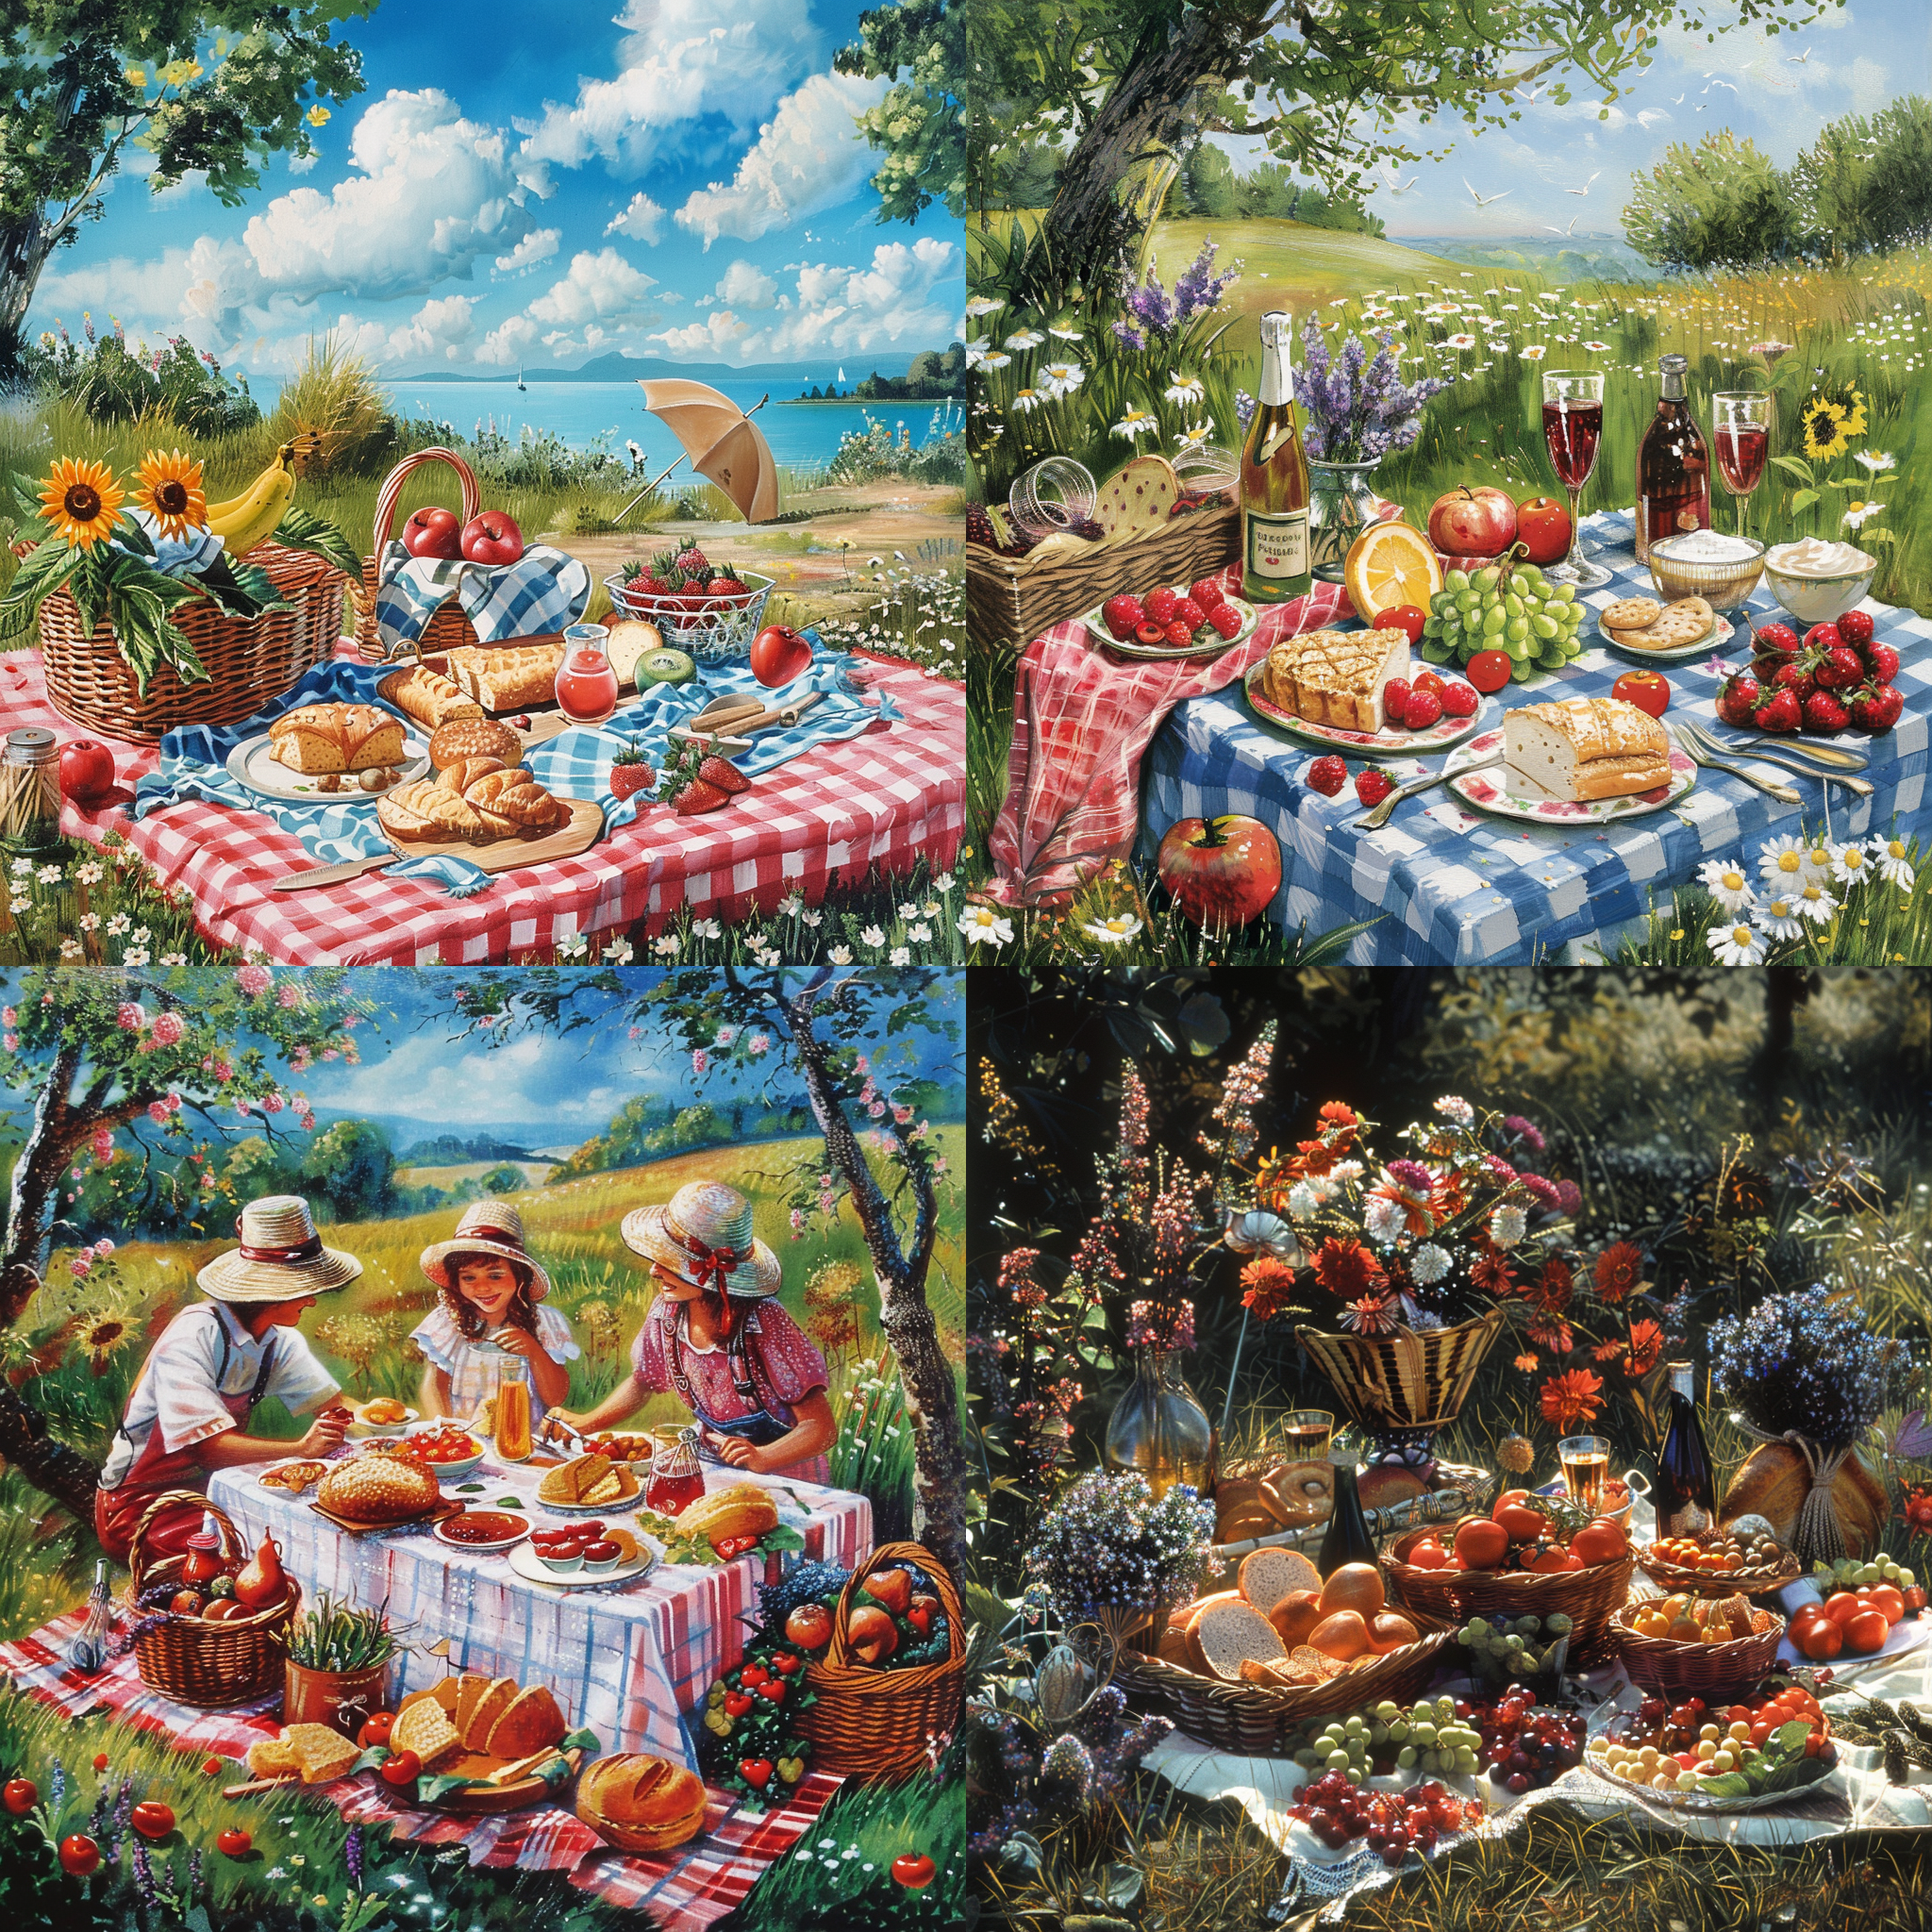
Yes, trees are still present in the composition, but their presence is significantly reduced.
You can remove multiple items using the “no” parameter, such as: –no item1, item2, item3, item4…
4 The Stylize Parameter: Control Midjourney’s Stylization
The ‘stylize’parameter has a value between 0-1000 with the default value being 100. You can freely increase or decrease it to create more or less stylistic art by adding “–s 10” or “–stylize 900” (or whatever value you want to specify) at the end of the prompt.
If the Stylize Parameter is close to 10, it will create images that closely adhere to the prompt. However, if you go for a high Stylize parameter like 900, you’ll get an image that tries to look good (stylistic, according to Midjourney’s training) even if it has to ignore elements of the given prompt.
Let’s take this prompt for example:
a child’s painting of a house with a car and a pool.
Here’s what you get from Midjourney without using the stylize feature:
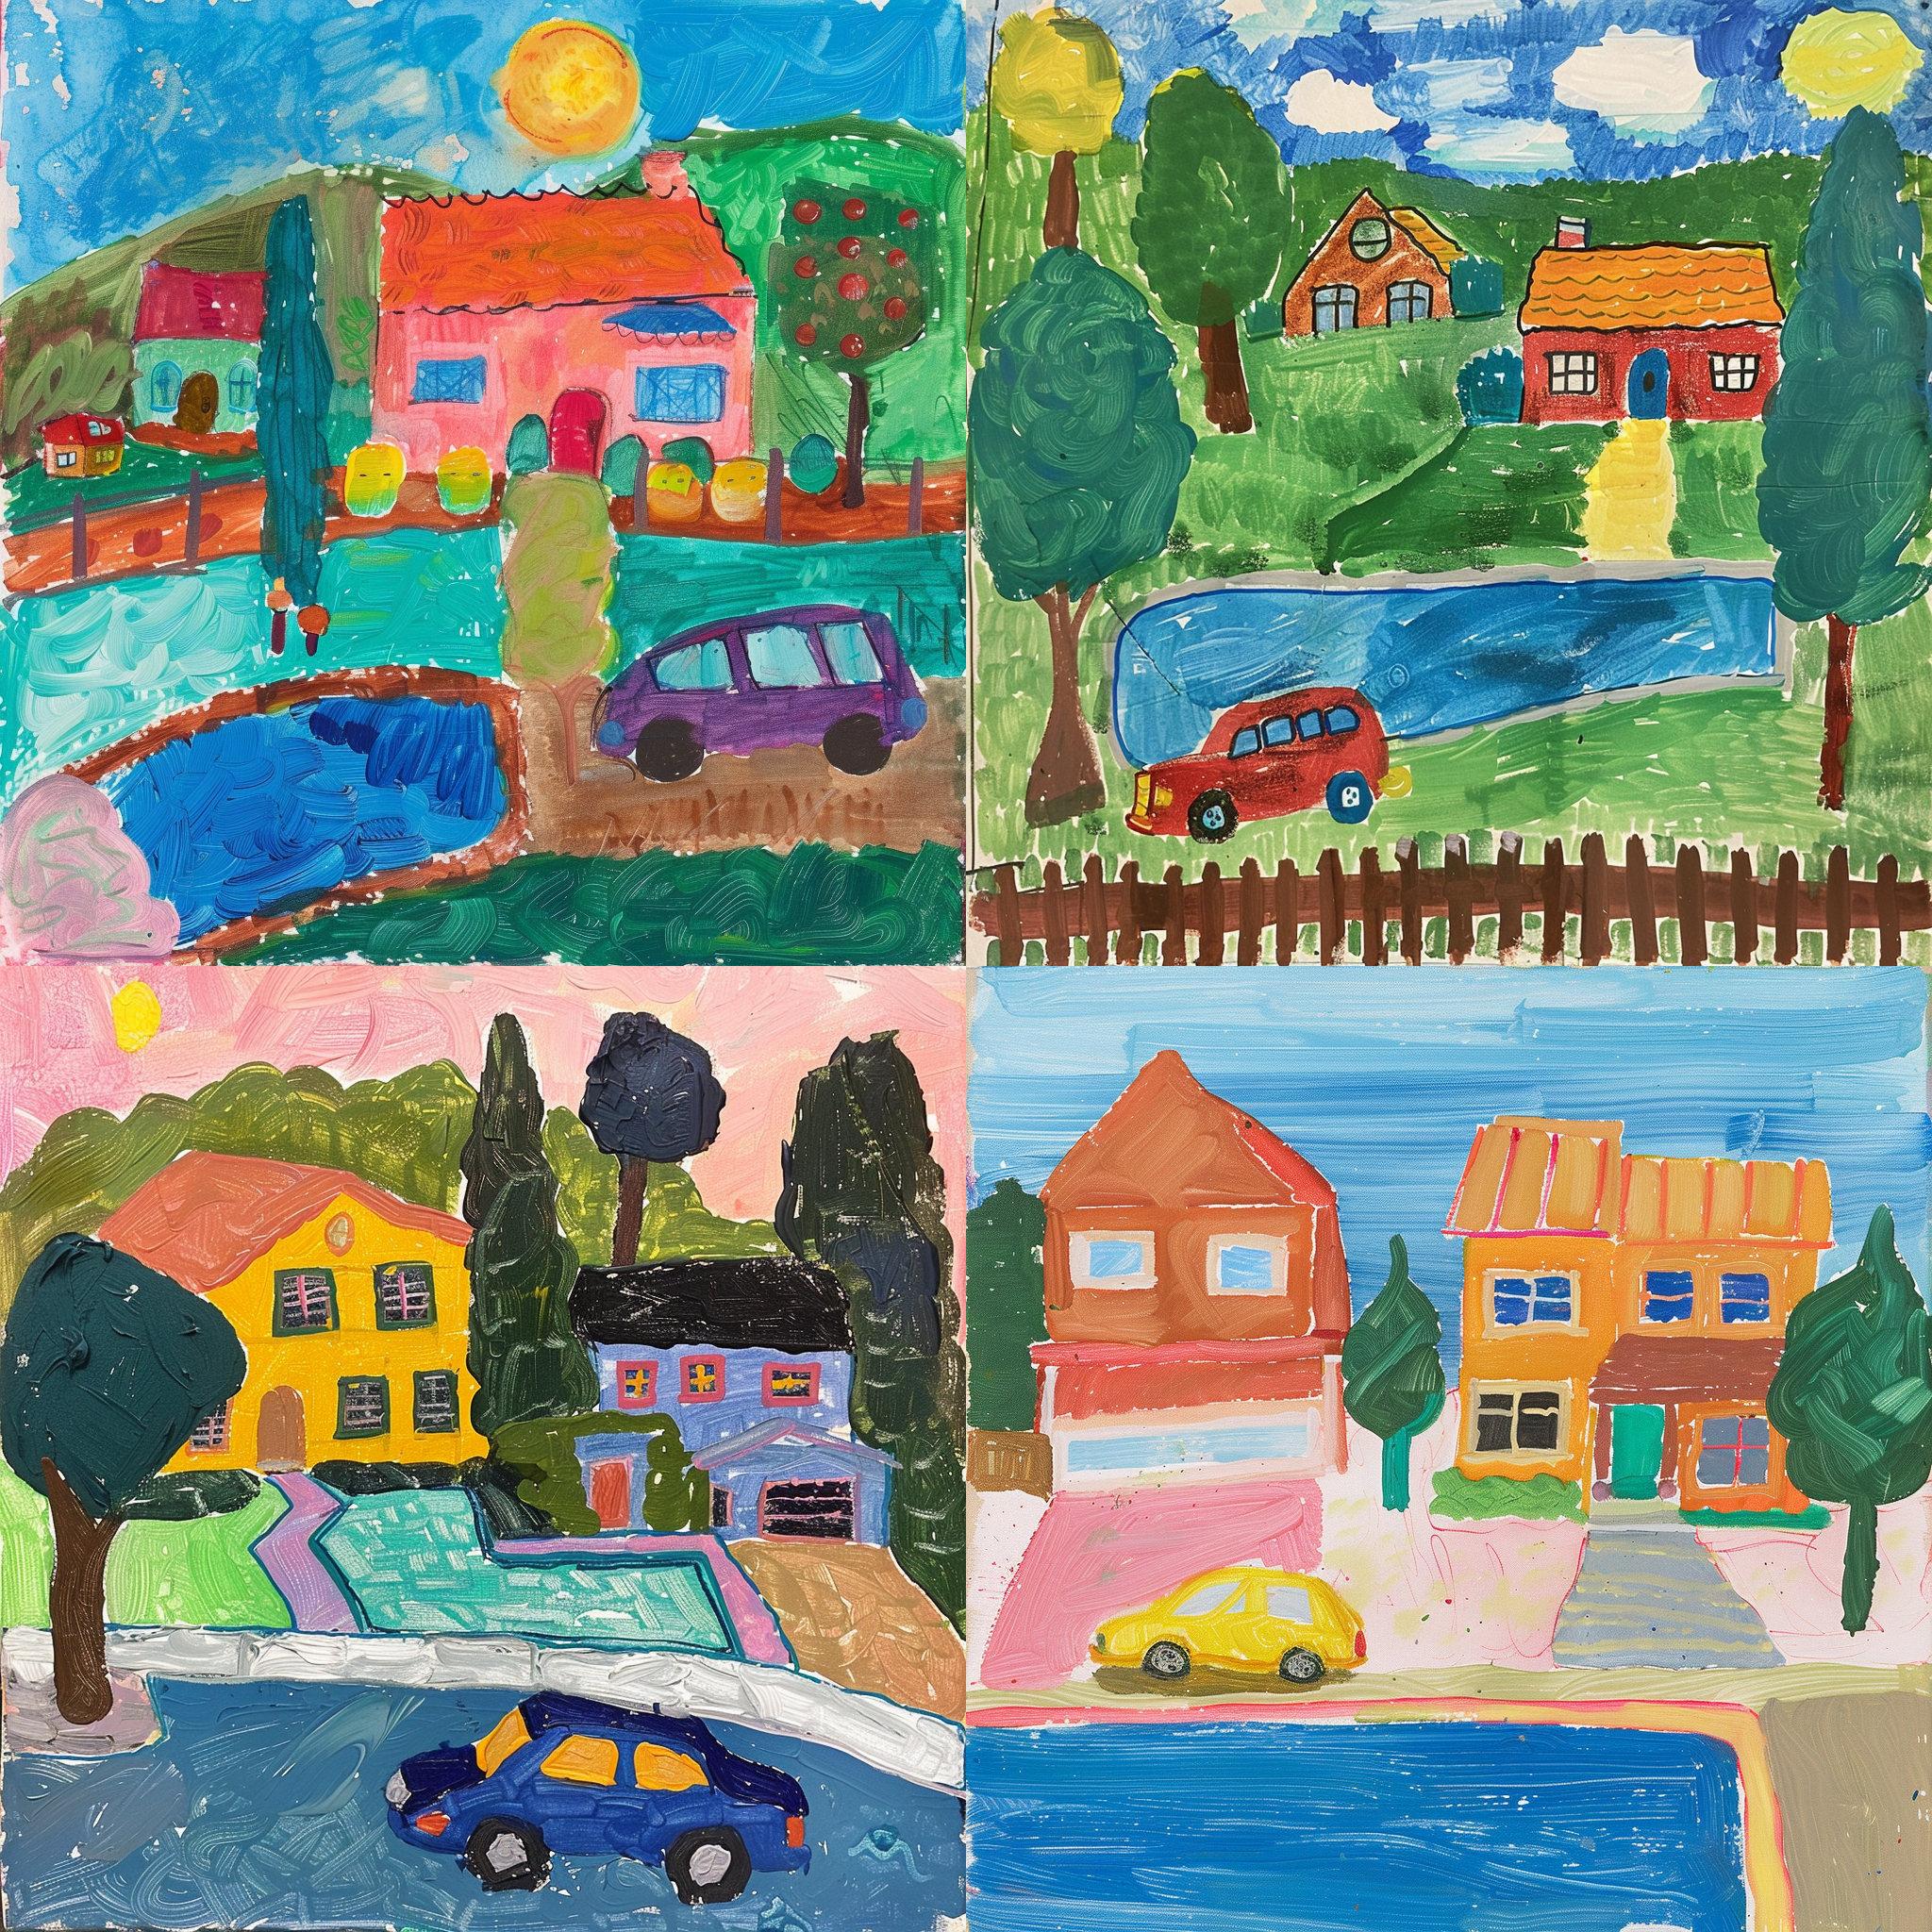
Now, with stylize set to 10:
a child’s painting of a house with a car and a pool –s 10
This is the generated image:
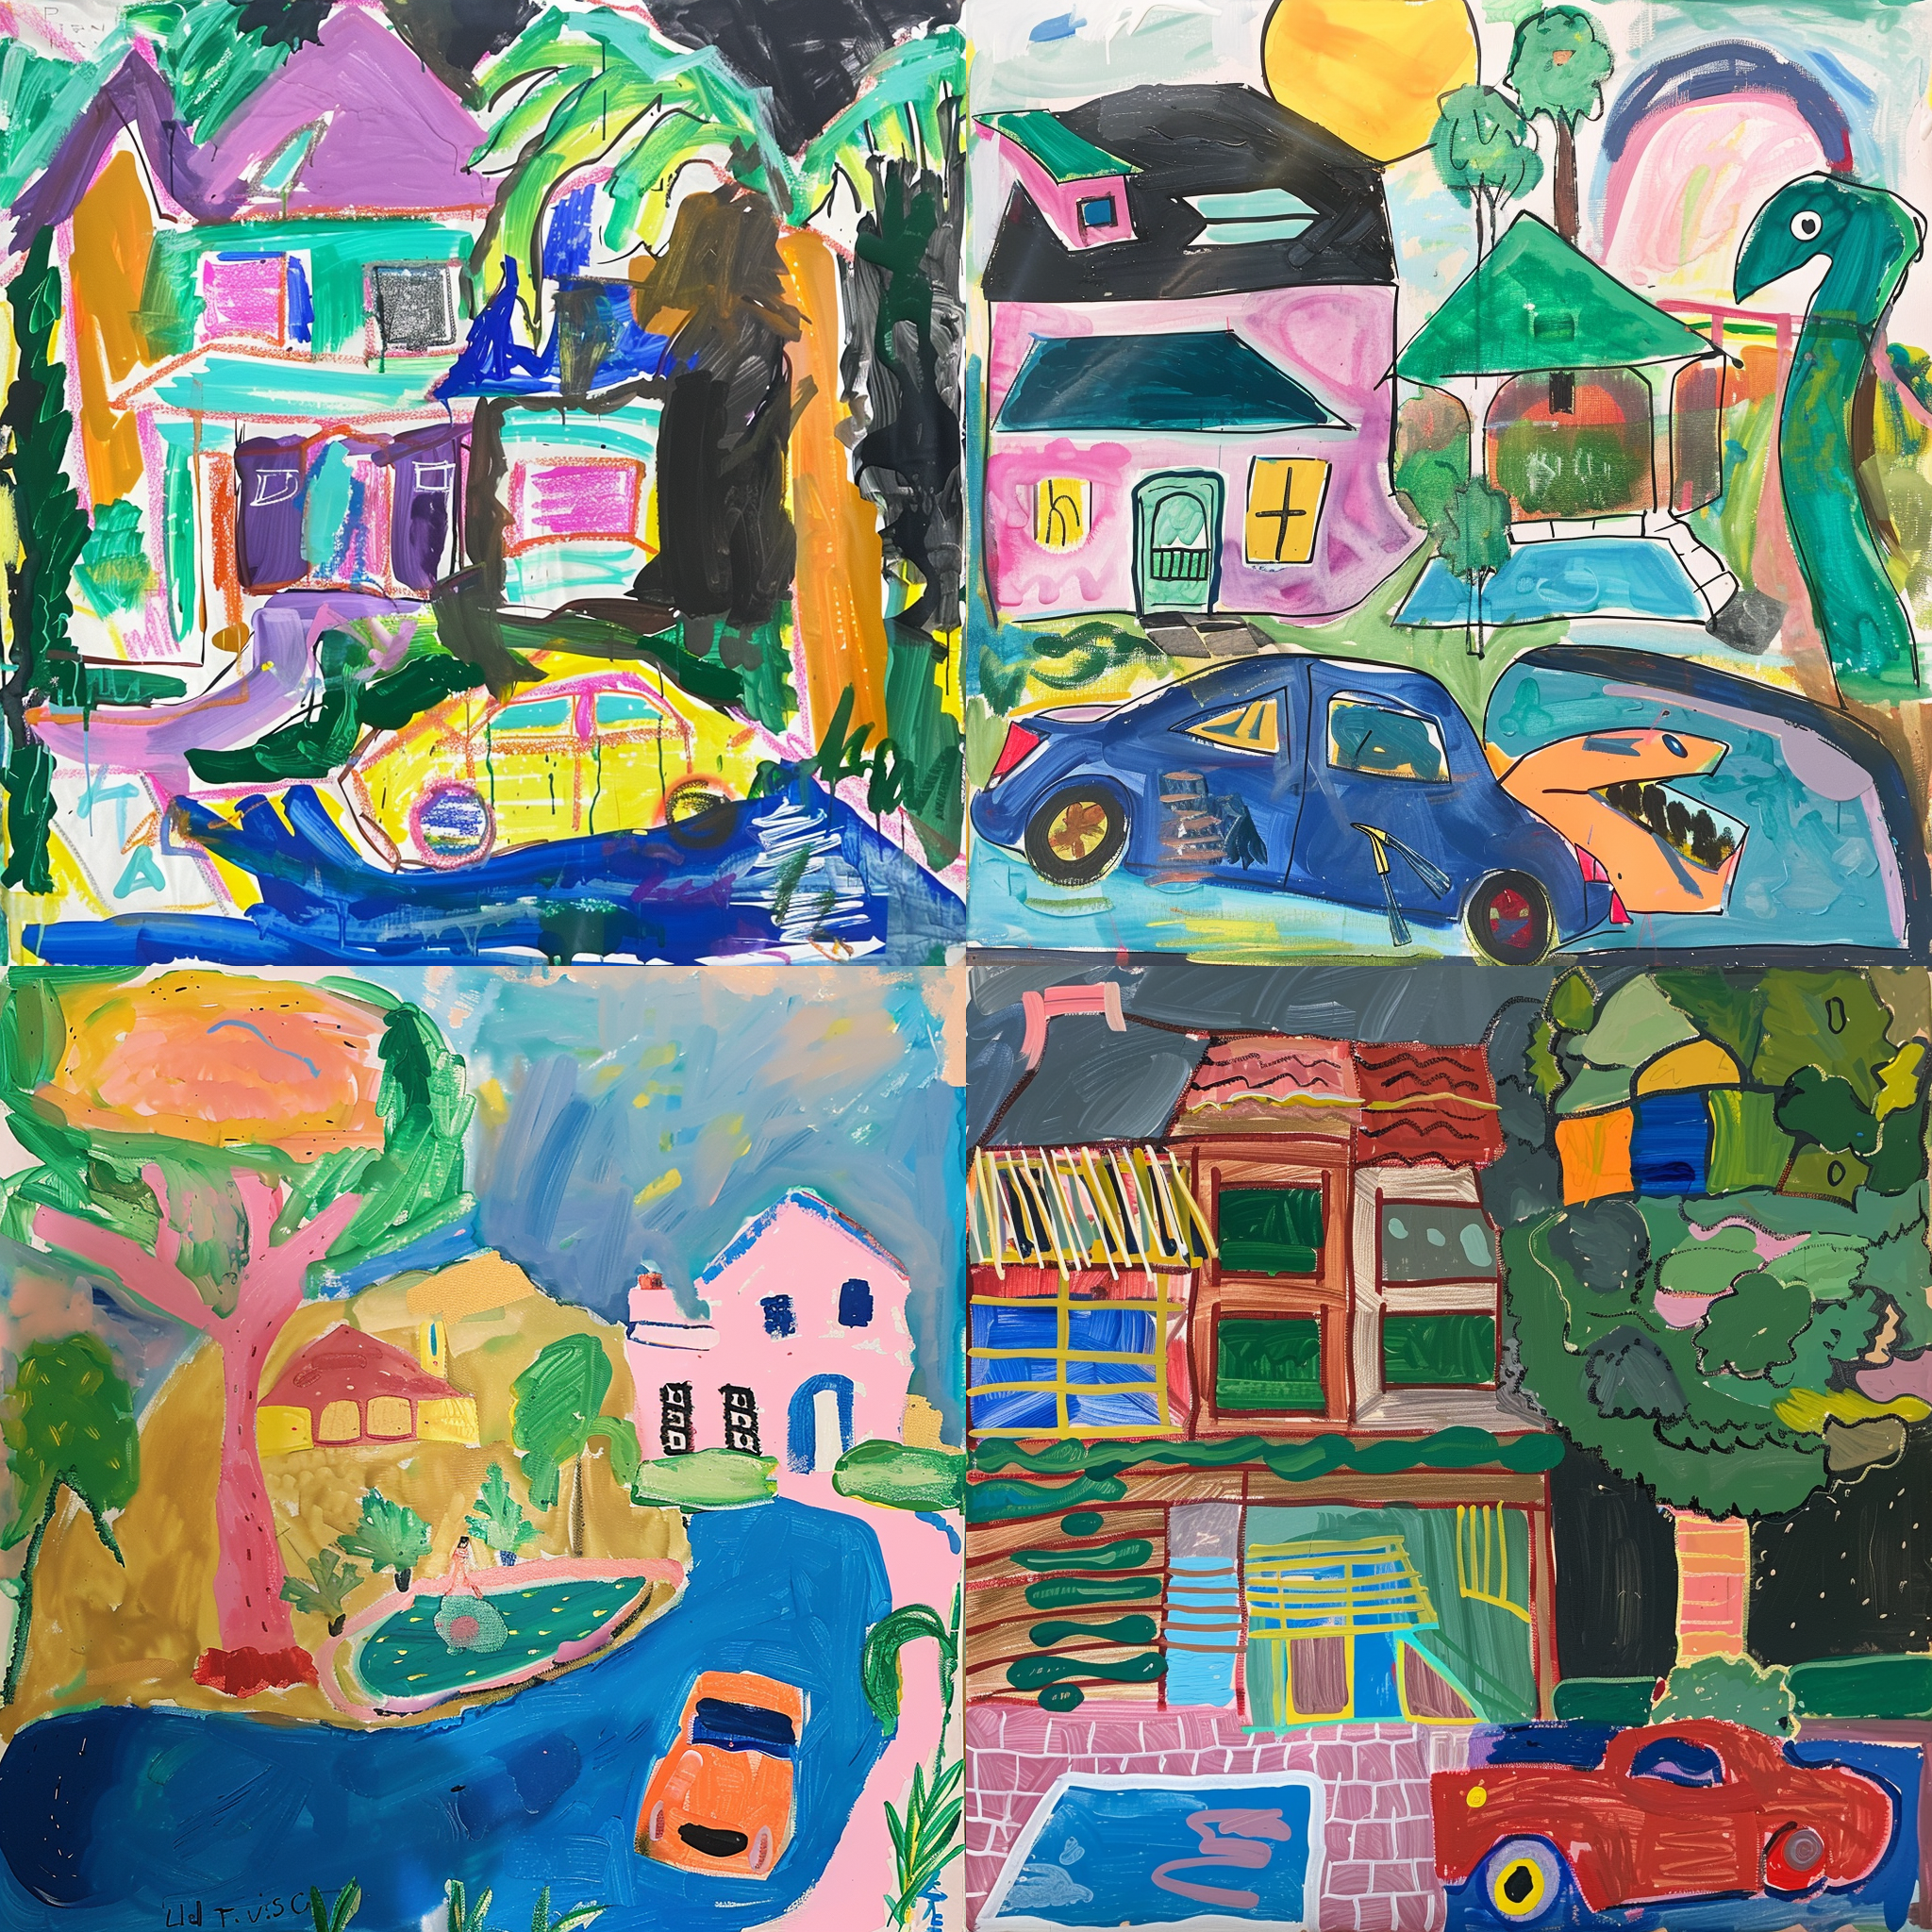
And with stylize set to 900:
a child’s painting of a house with a car and a pool –s 900
We get this:
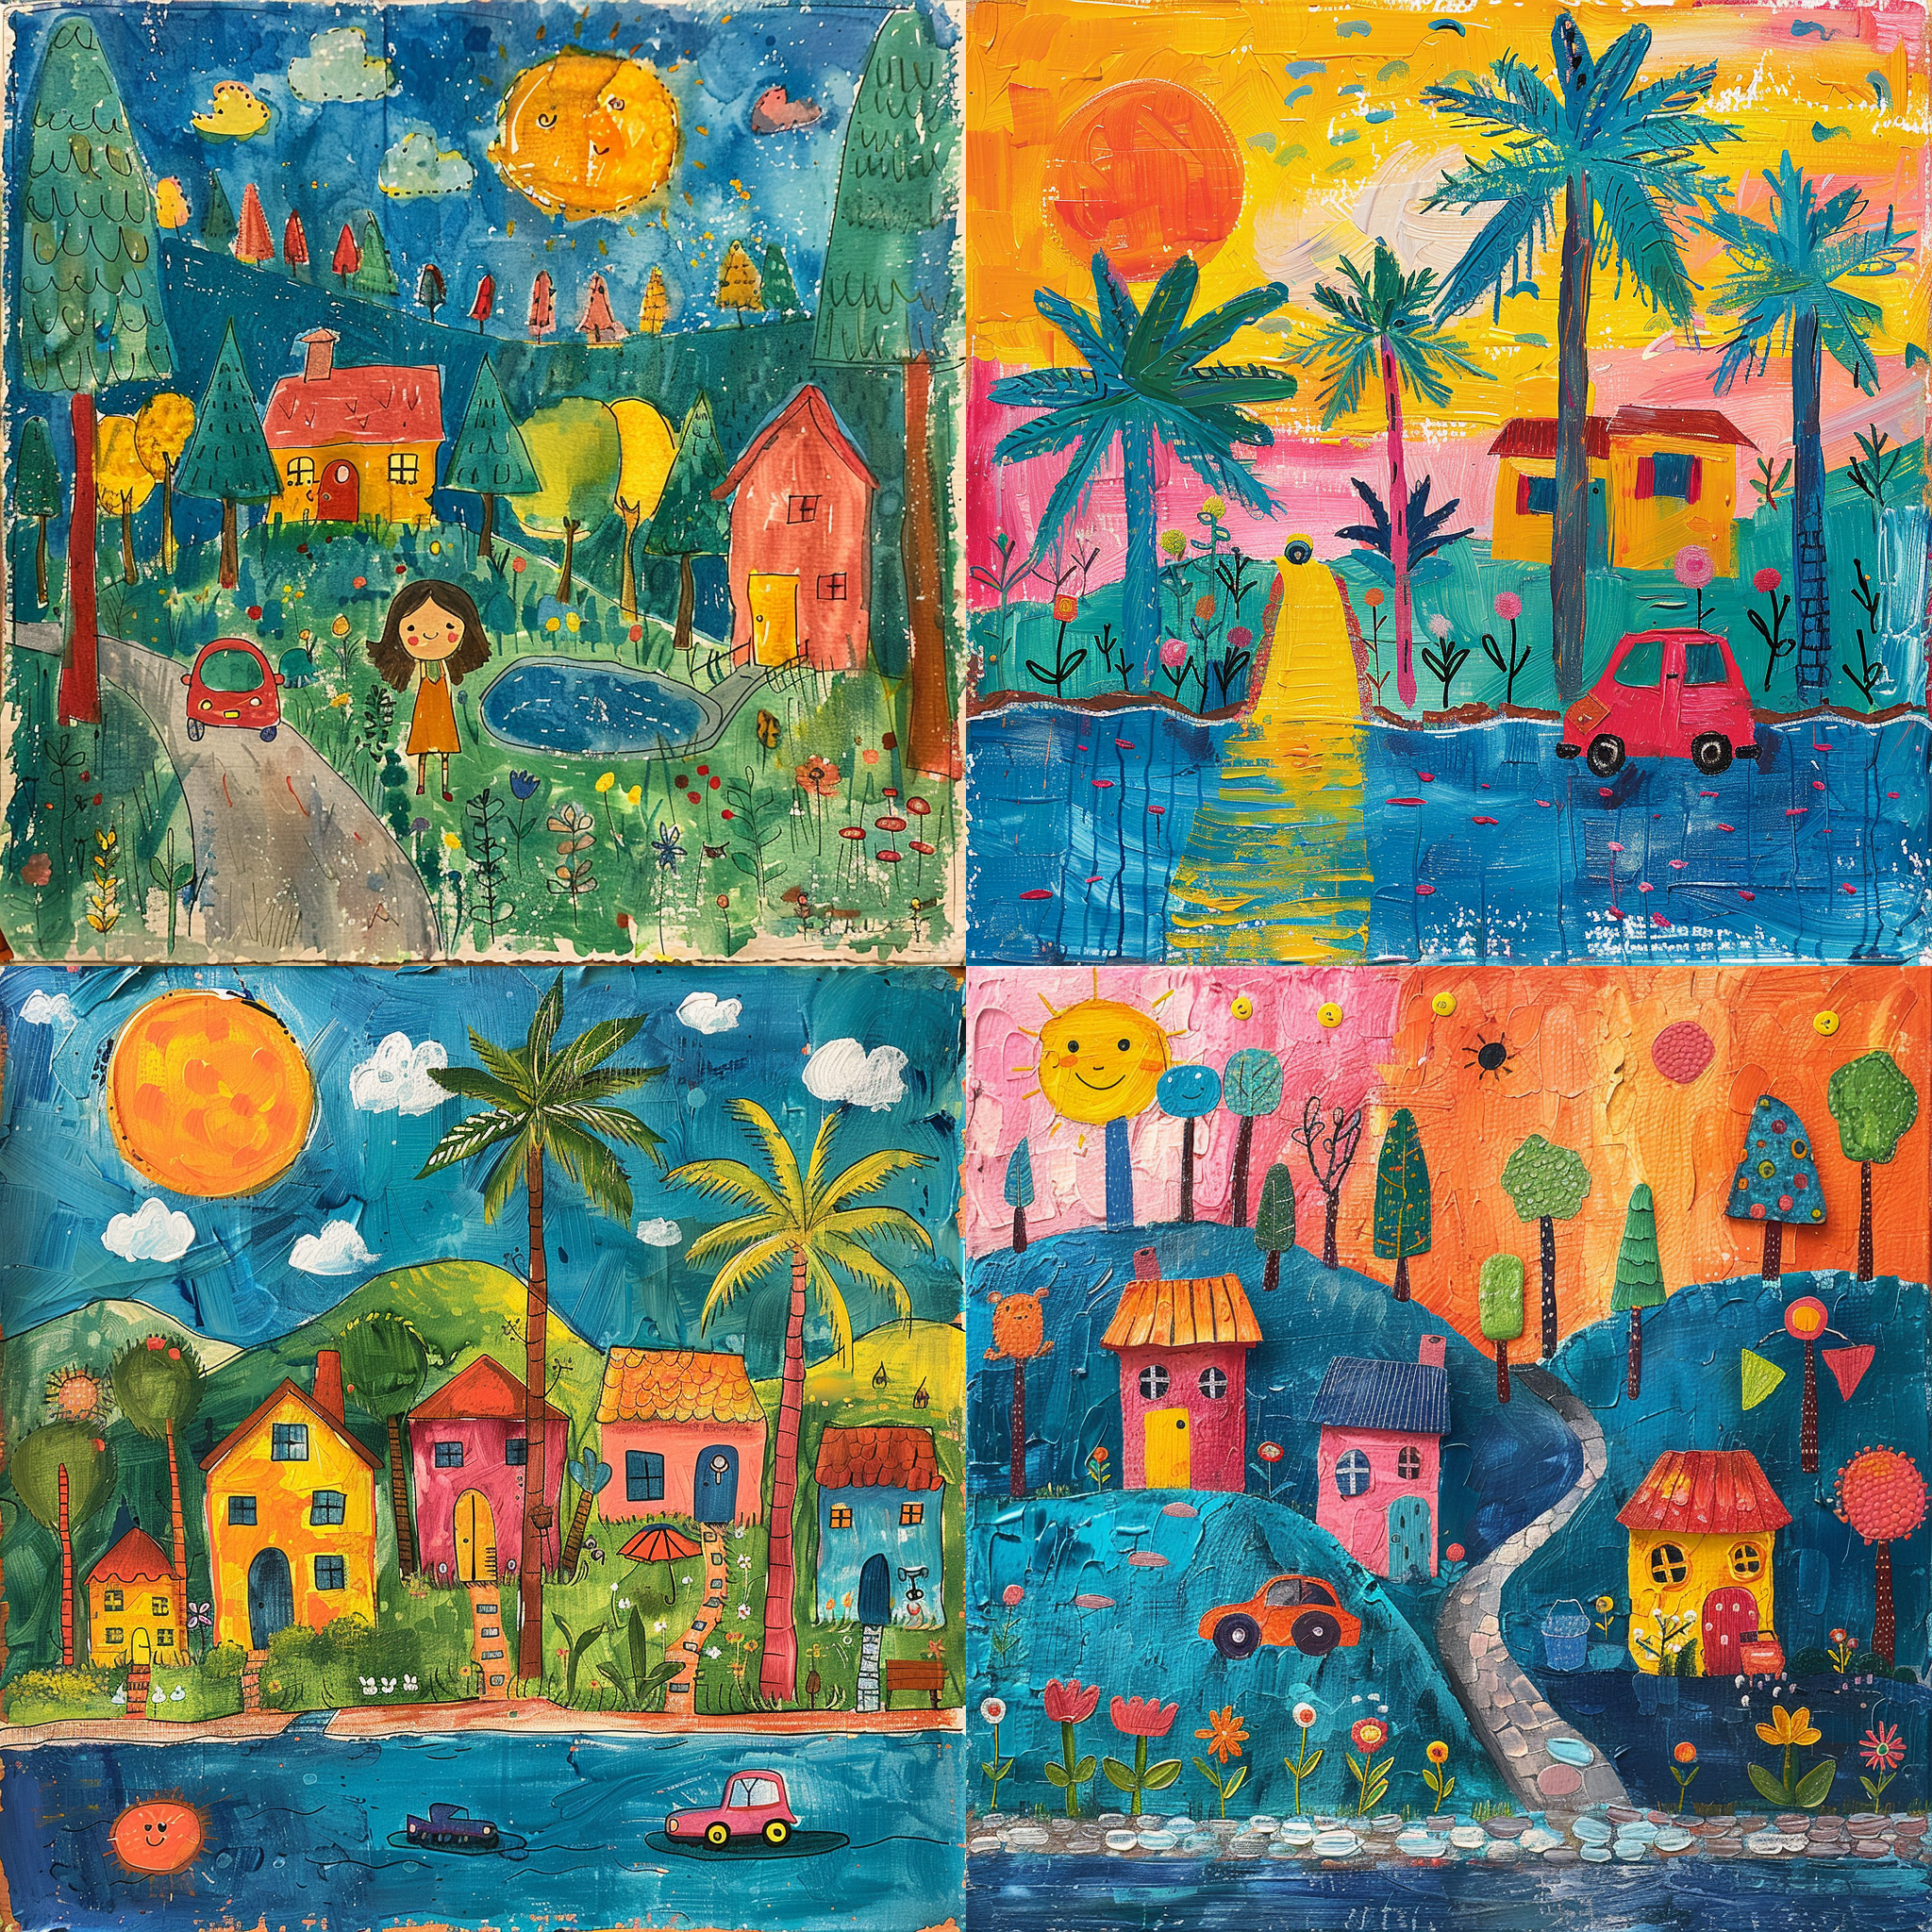
5 The Repeat Parameters: Fast Visual Exploration
Midjourney simultaneously generates 4 images from a single prompt to let you pick your favorite and work with it. However, sometimes 4 generations isn’t enough and you need to see more variations. At this time, you can either keep clicking the “reroll” button over and over again, or use the repeat parameter.
To do so, add “–repeat” (or “–r”) at the end of your prompt along with the number of times you want it to repeat. For instance, the following prompt will generate 5 sets of 4 image grids:
two friends sitting at the beach, sunset, –r 5
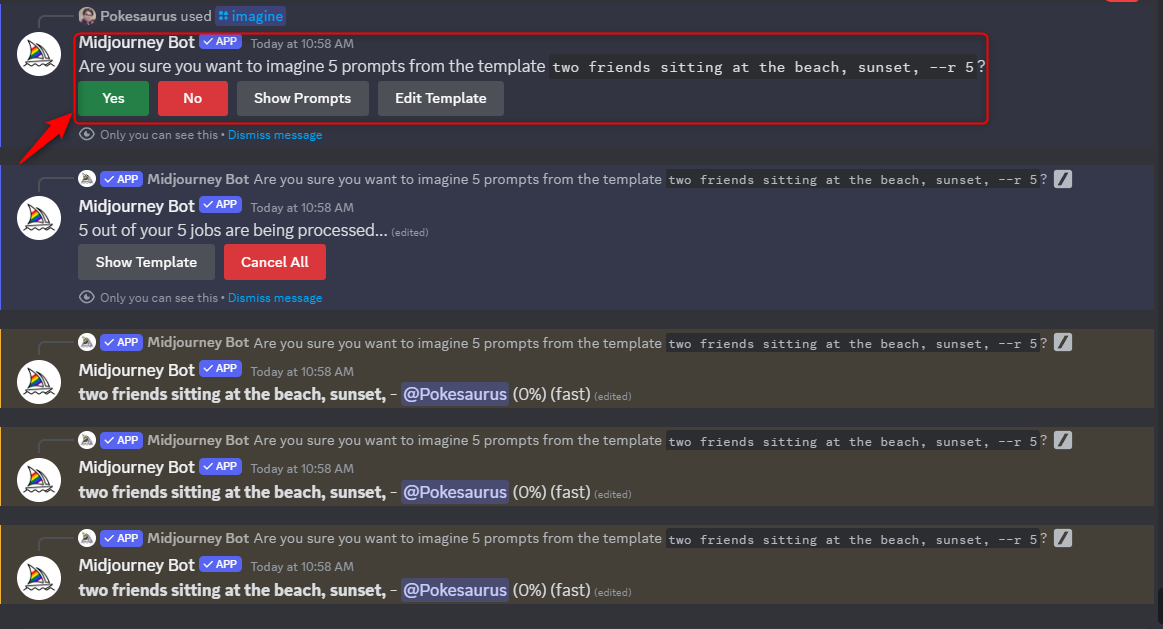
You can also mix the “repeat” parameter with other options like the “stylize” parameter to speed up your explorations.
Basic users can do 2-4 repeats, Standard users can do 2-10, and Pro/Mega users can go wild with 2-40 repeats. Also, the repeat parameter only works with Fast or Turbo GPU models, not Relax, and will eat up a fair amount of GPU hours very quickly.
6 The Weird Parameter: Make Images Stranger
If you’ve used Midjourney long enough, you’ll soon realize it has a distinct style and aesthetic preference. If you want to force it to move away from the default styling, you can use the “weird”parameter. To do so, append your prompt with “–weird” (or “–w”) at the end of your prompt along with a number between 0-3000, with 0 being the default value, meaning no weirdness.
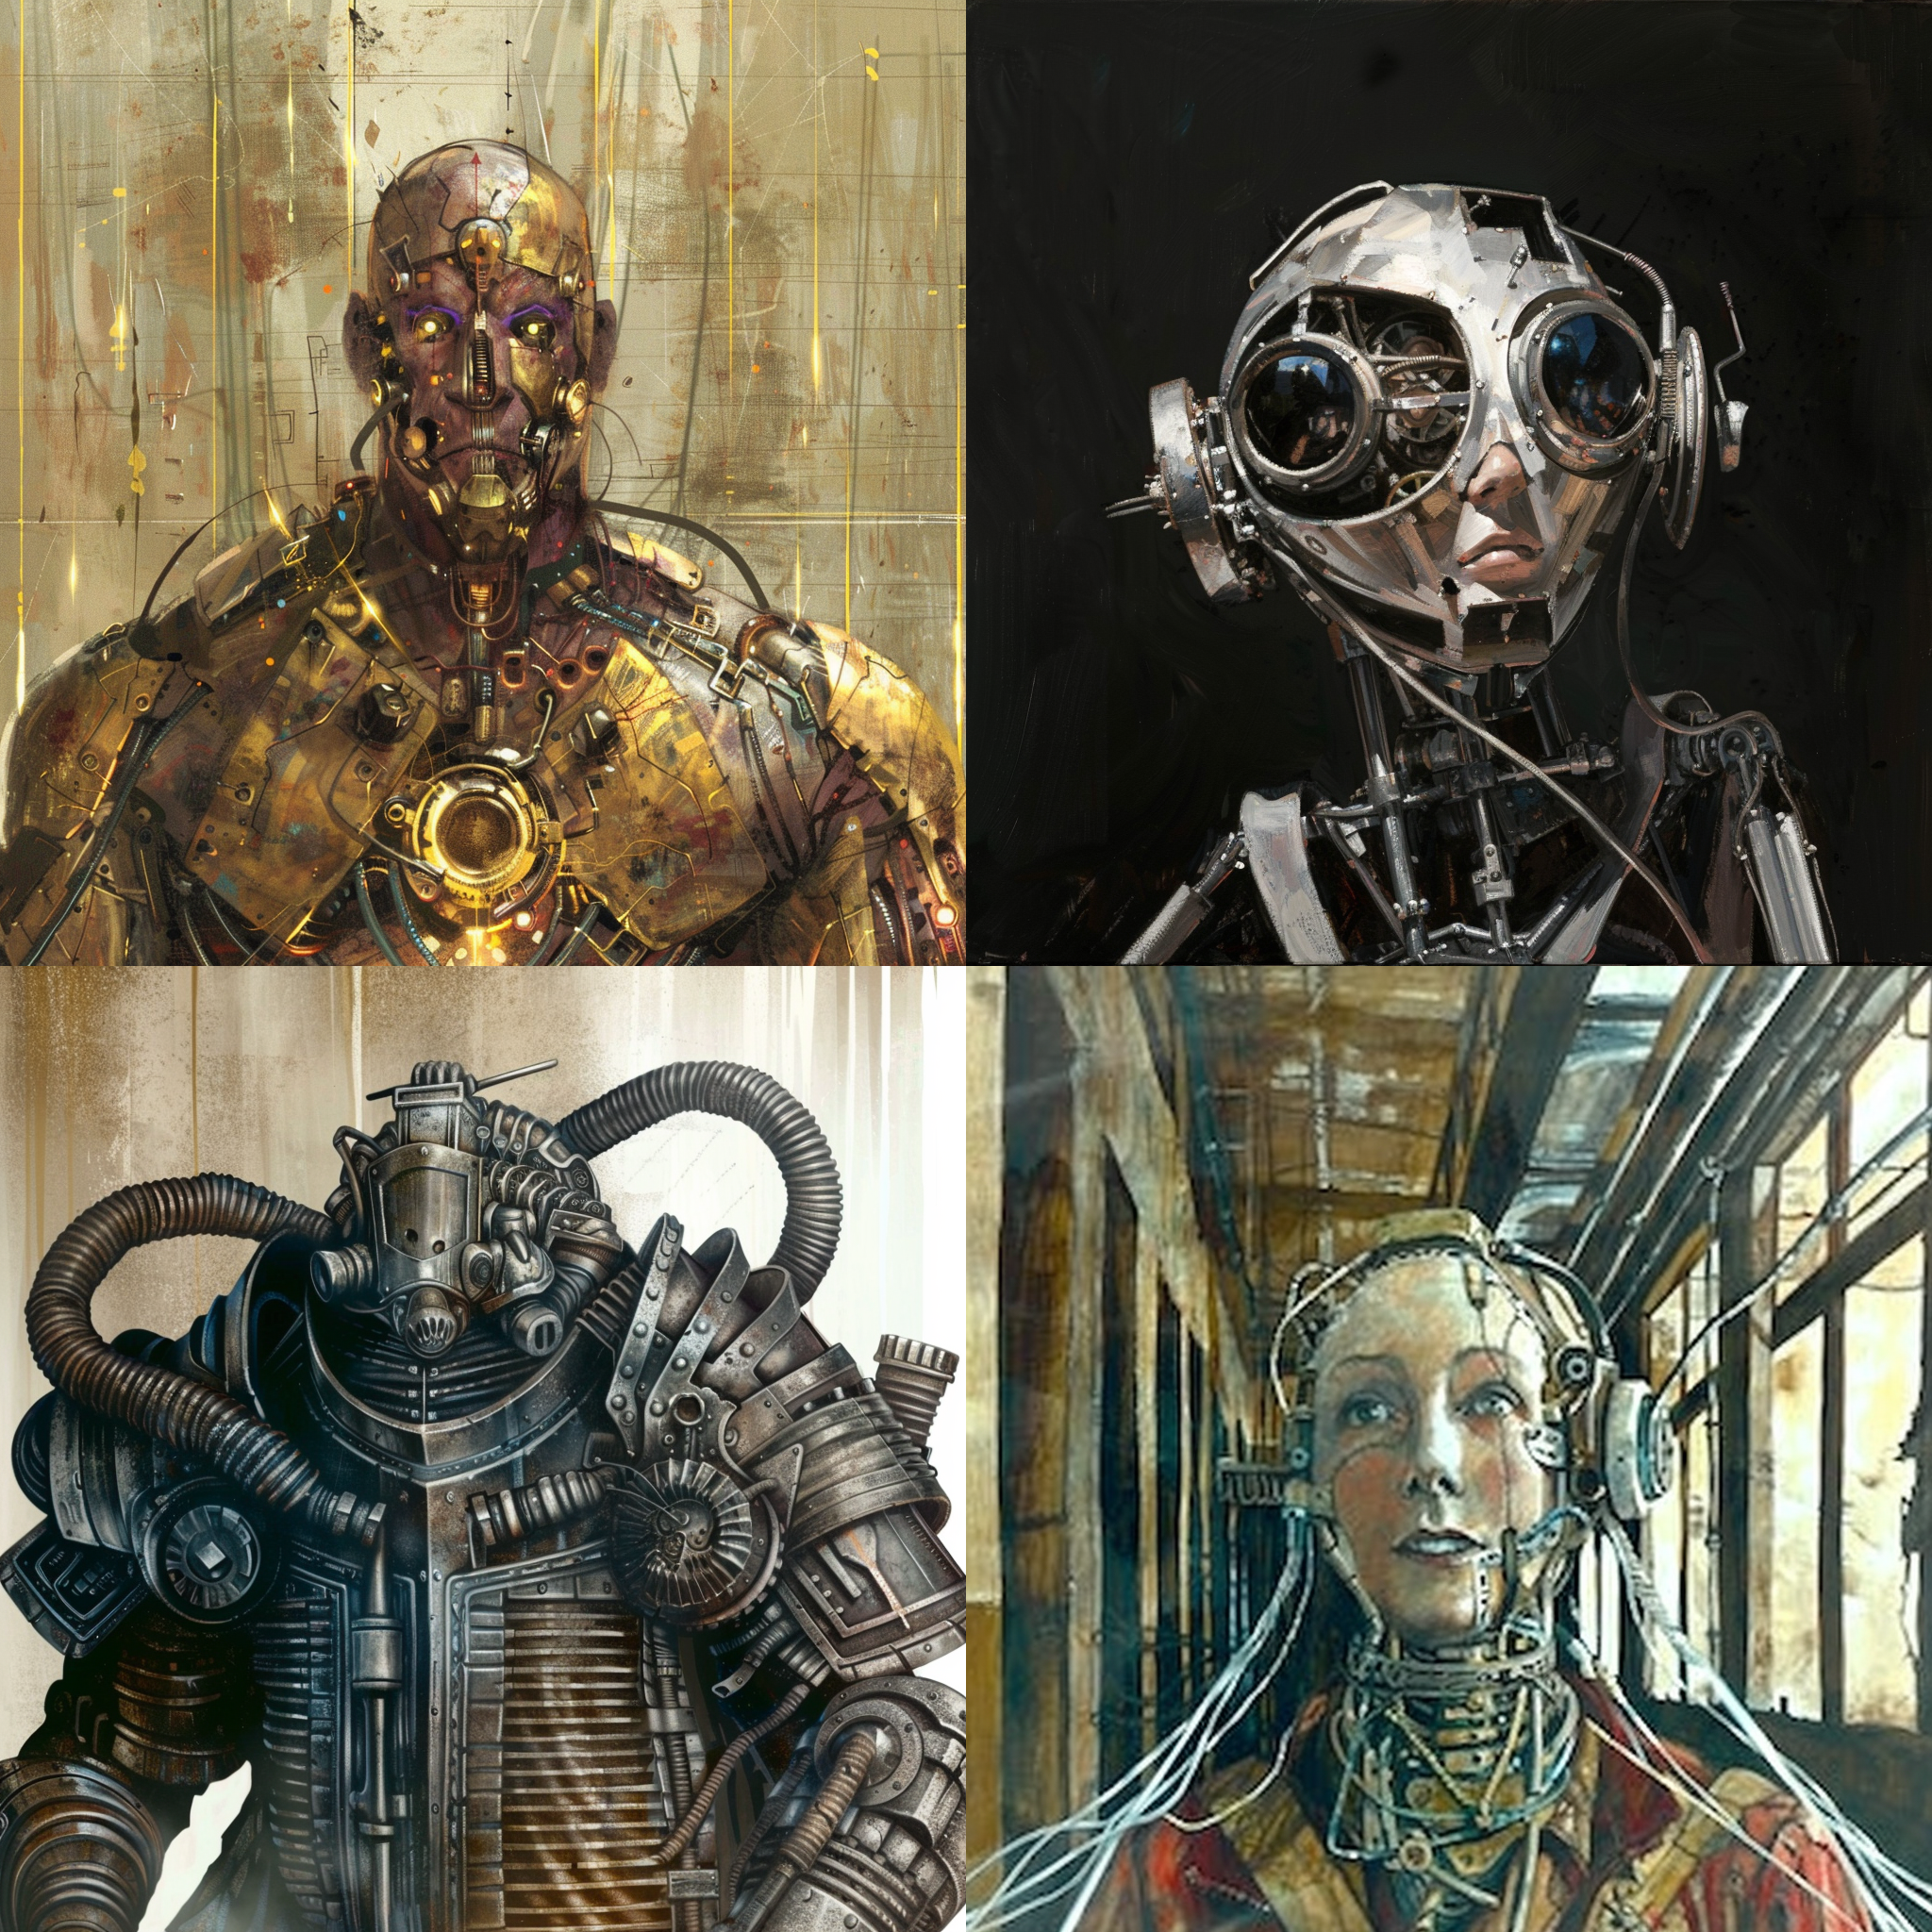
To showcase this feature in action, let’s consider, by default, the Midjourney image you get with the prompt:
a steampunk cyborg
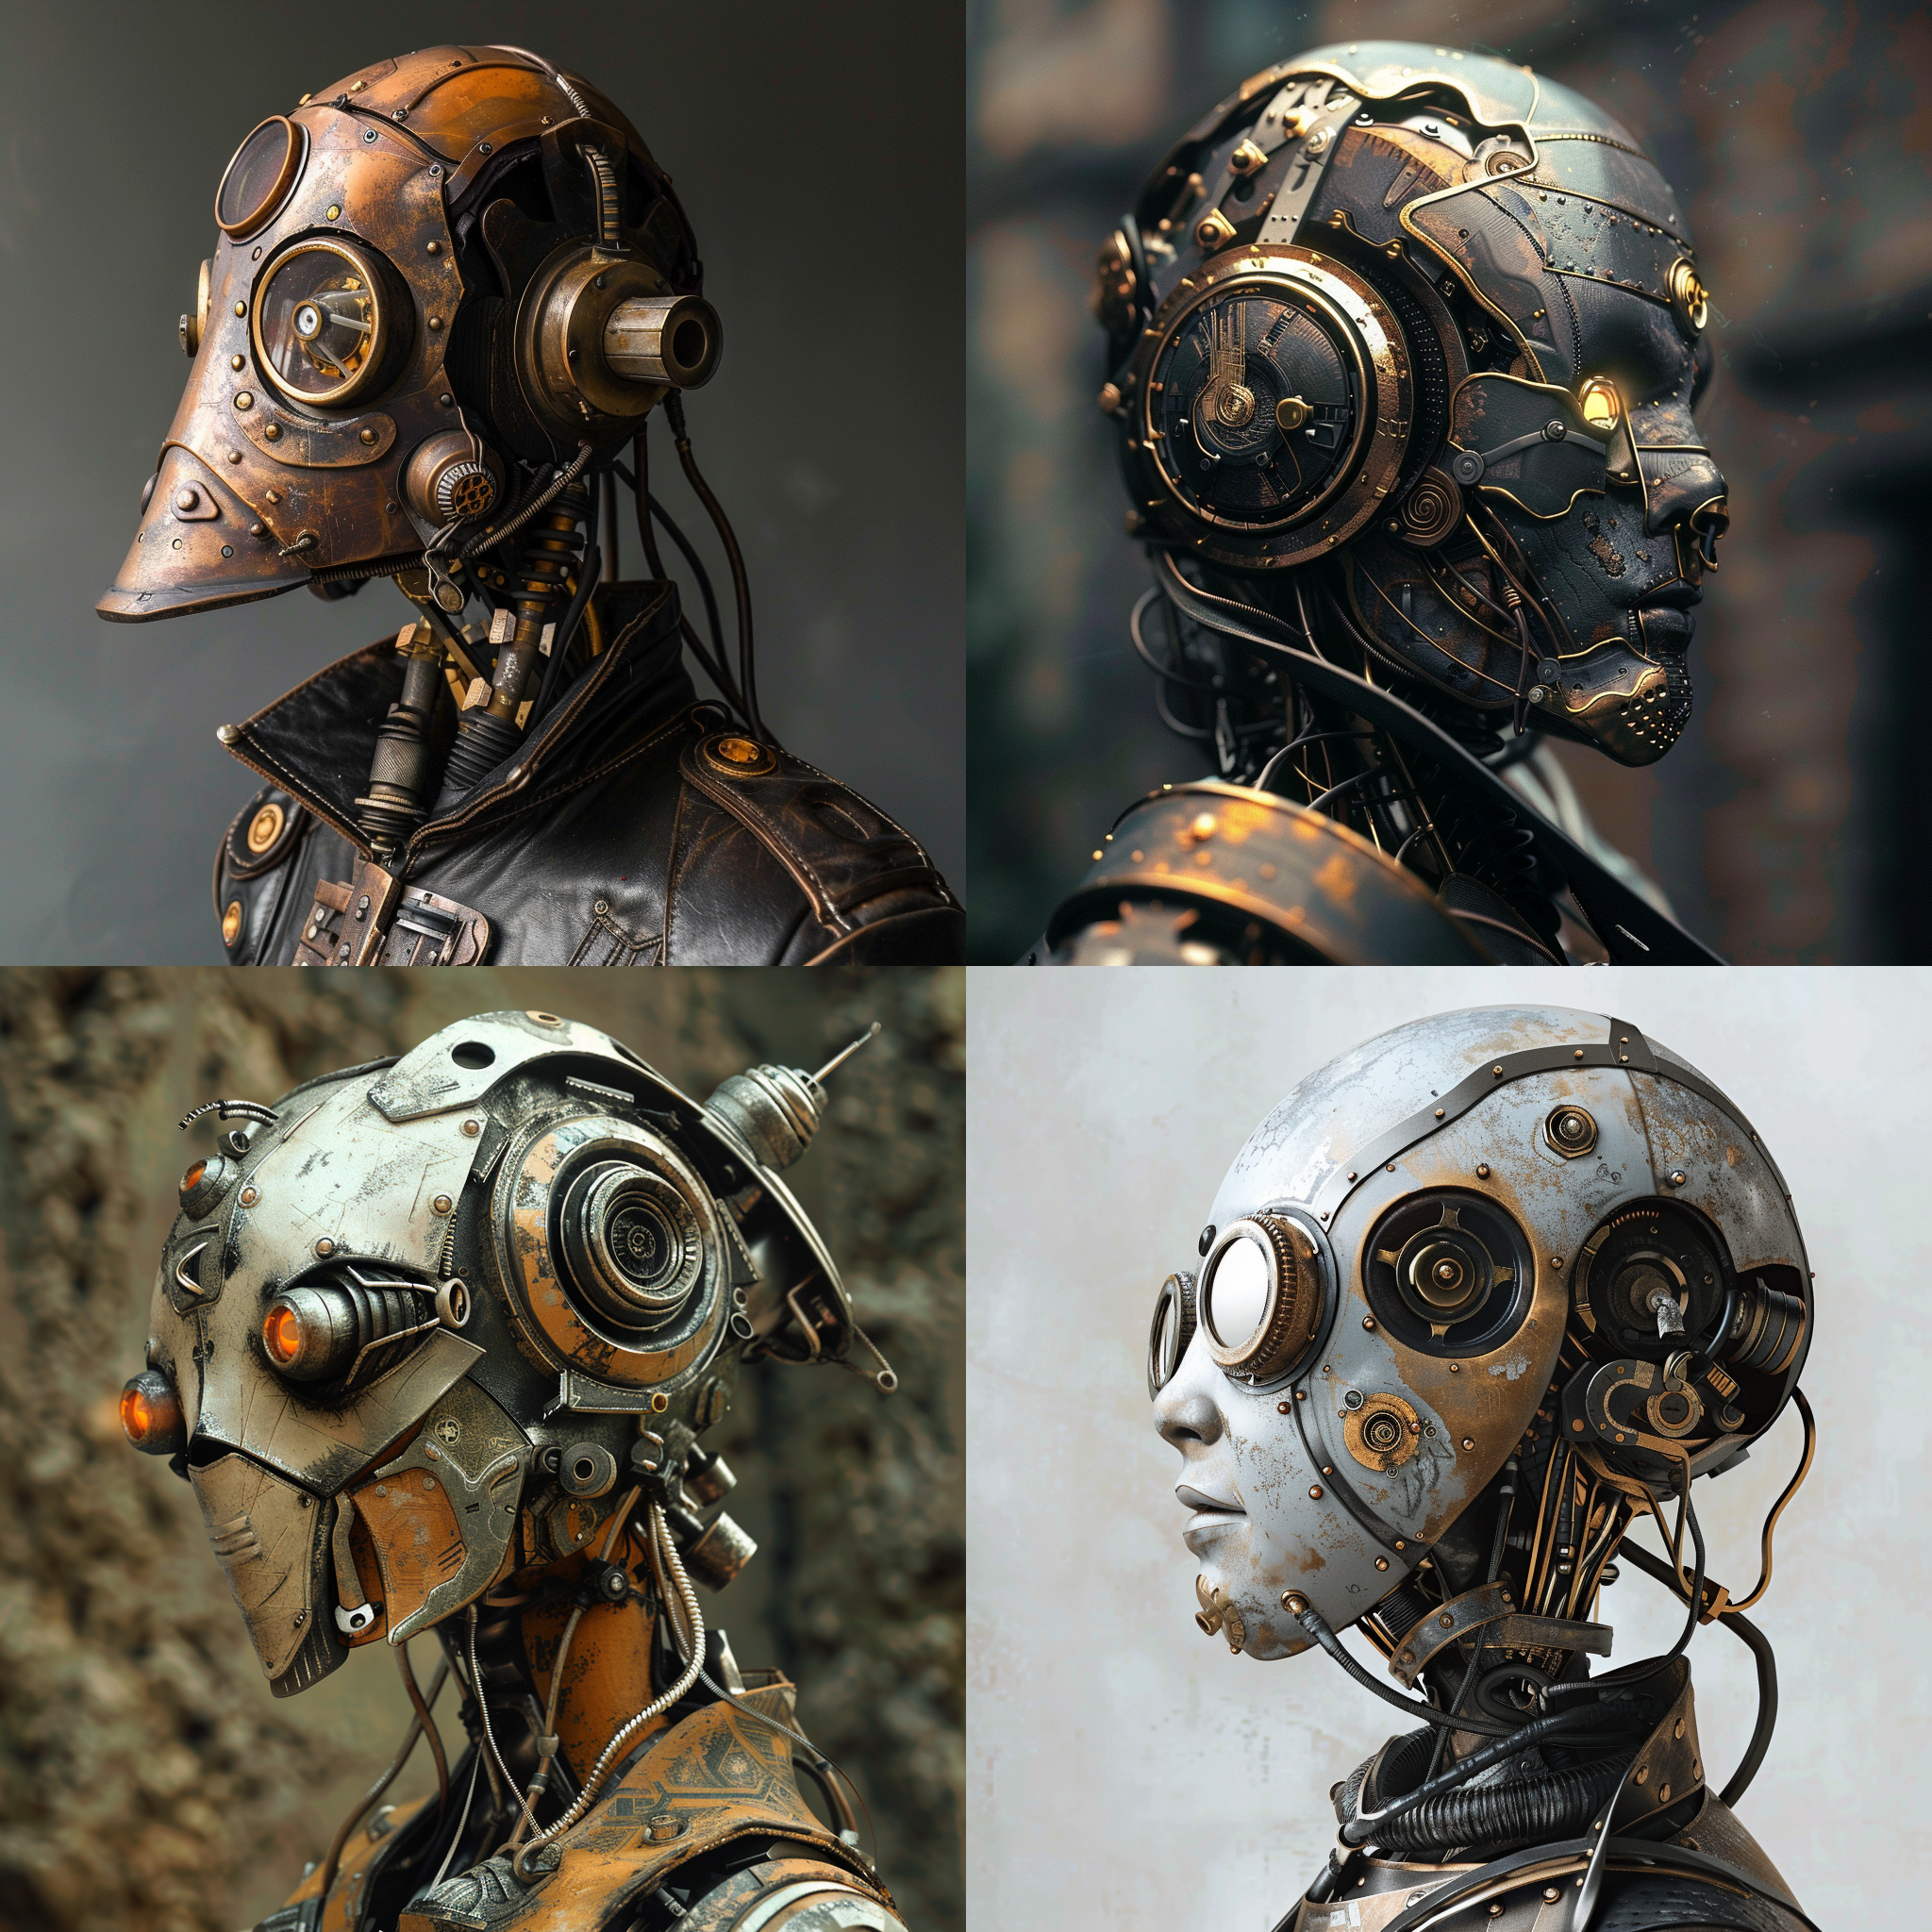
This is exactly how you’d expect Midjourney to create images. Now, let’s set weird to 100:
a steampunk cyborg –w 100
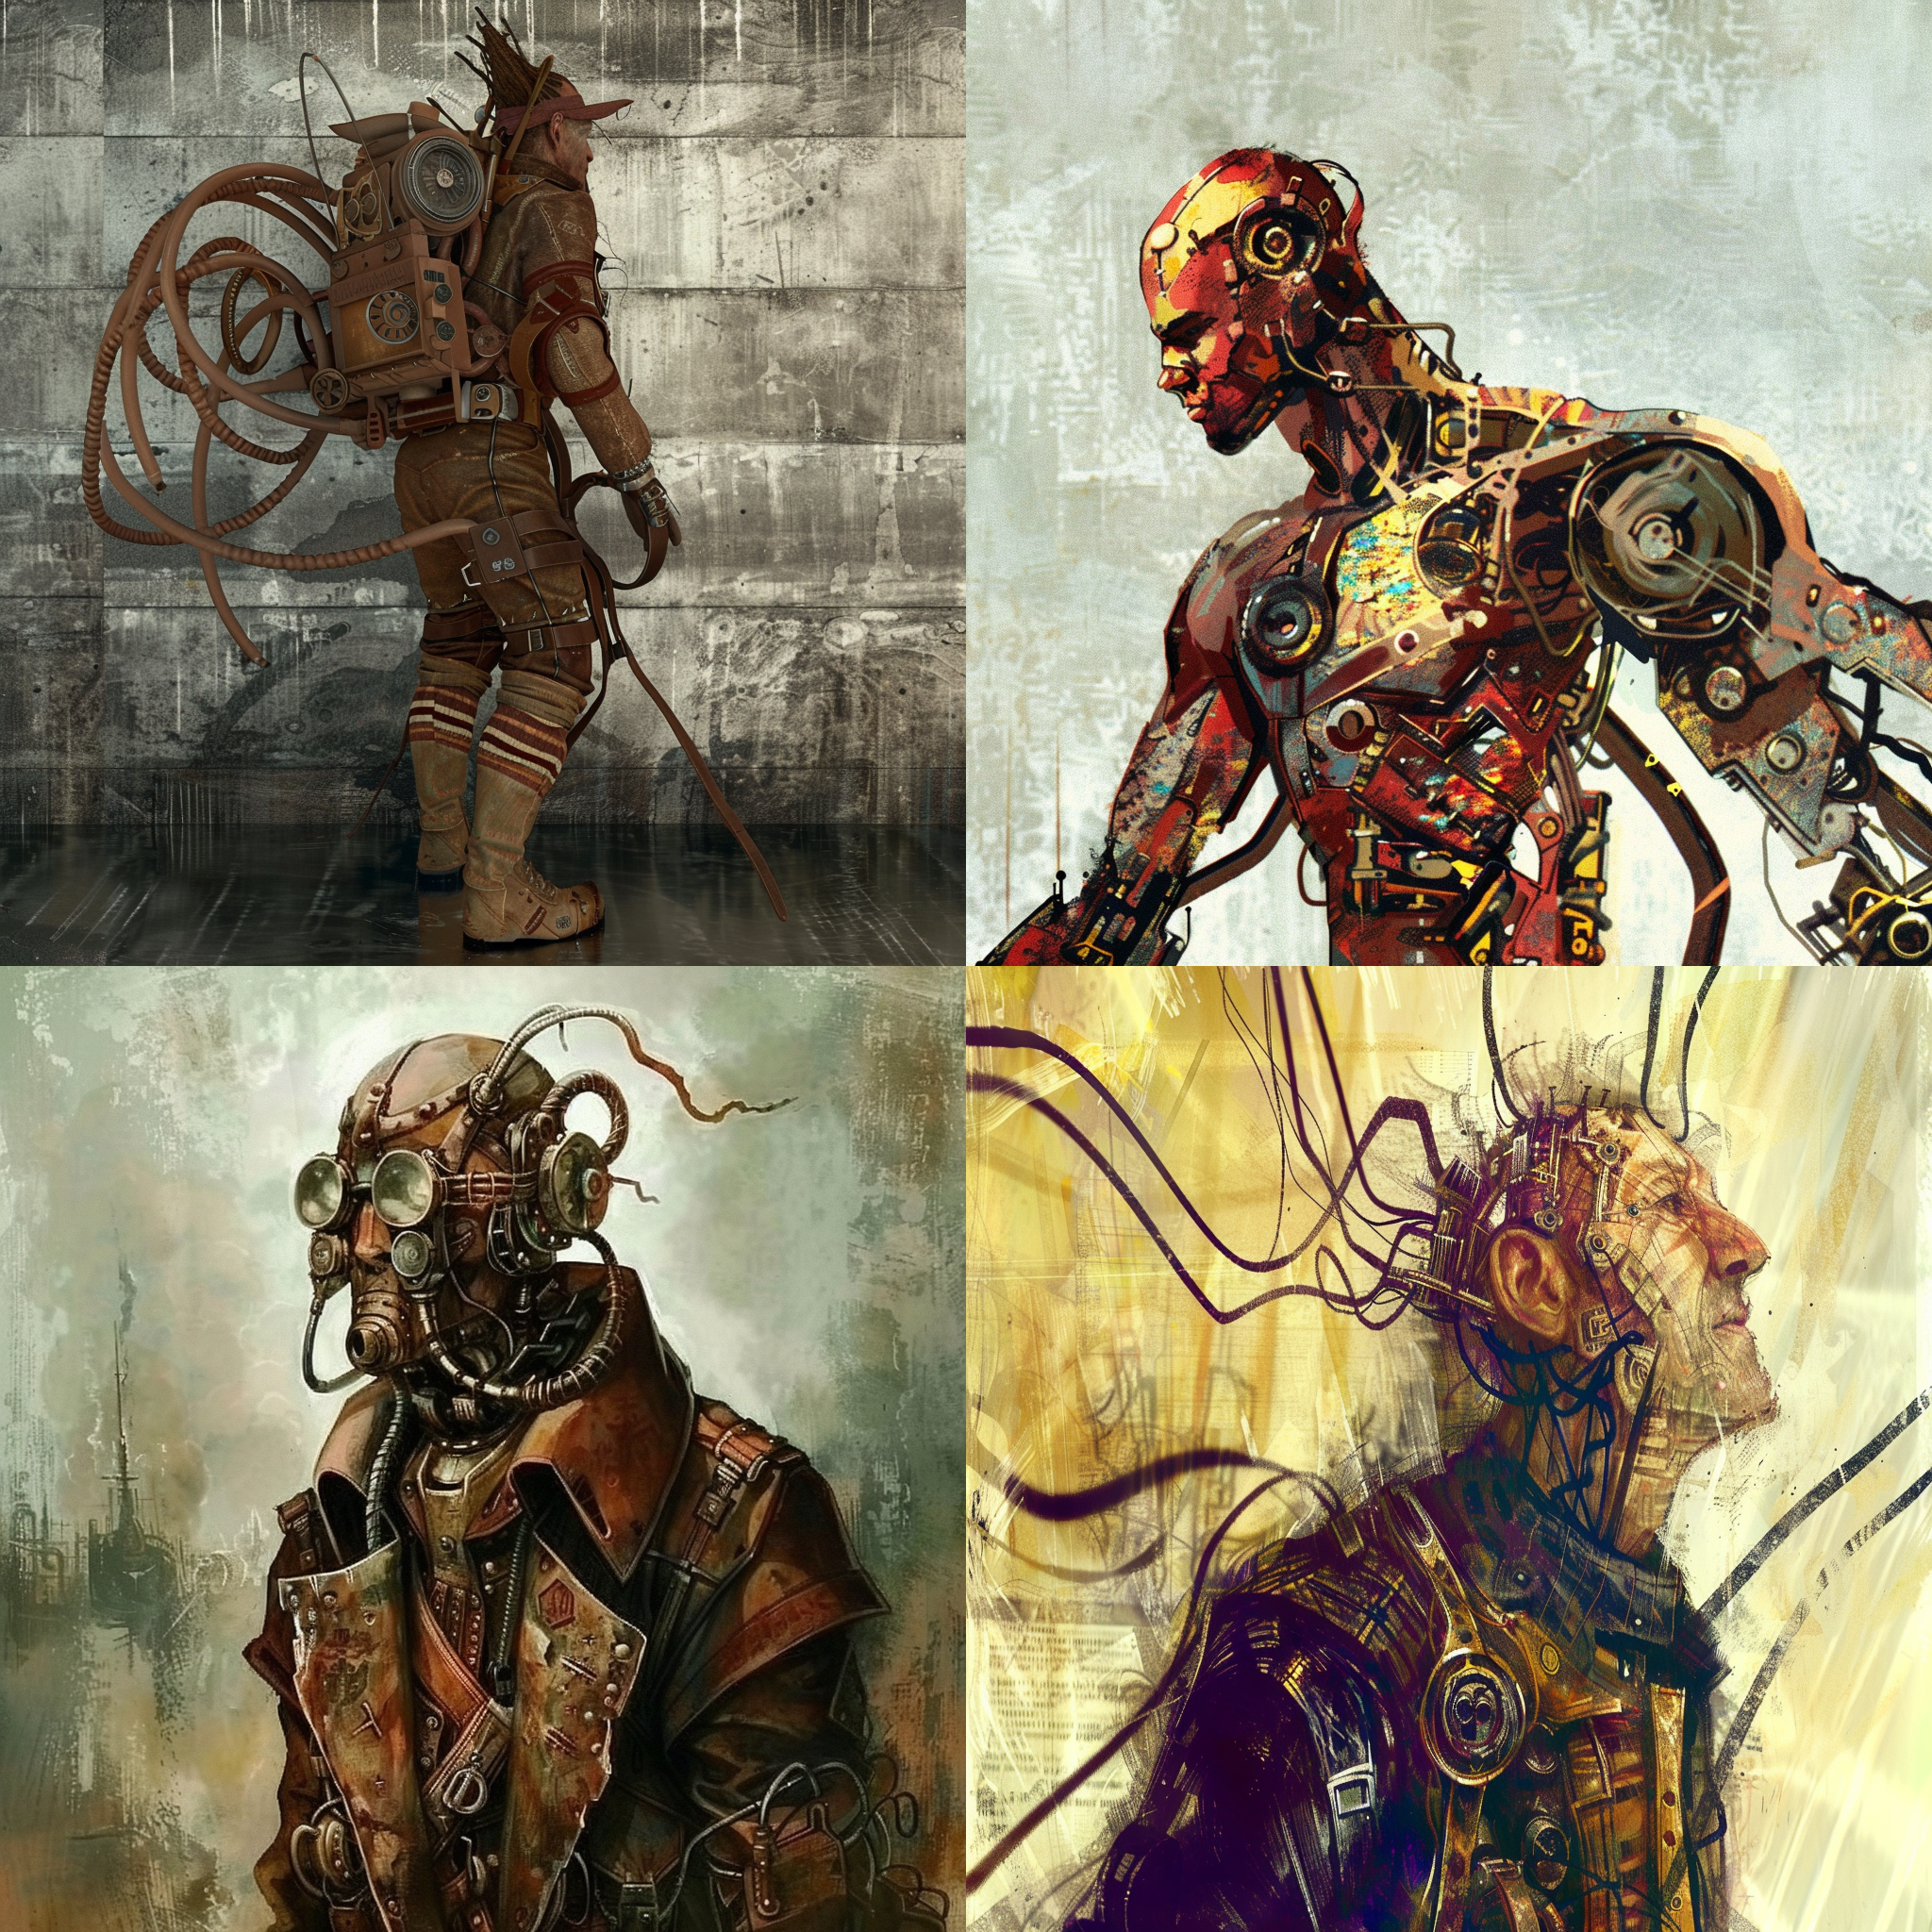
This is with weird raised to 1000:
a steampunk cyborg –2 1000
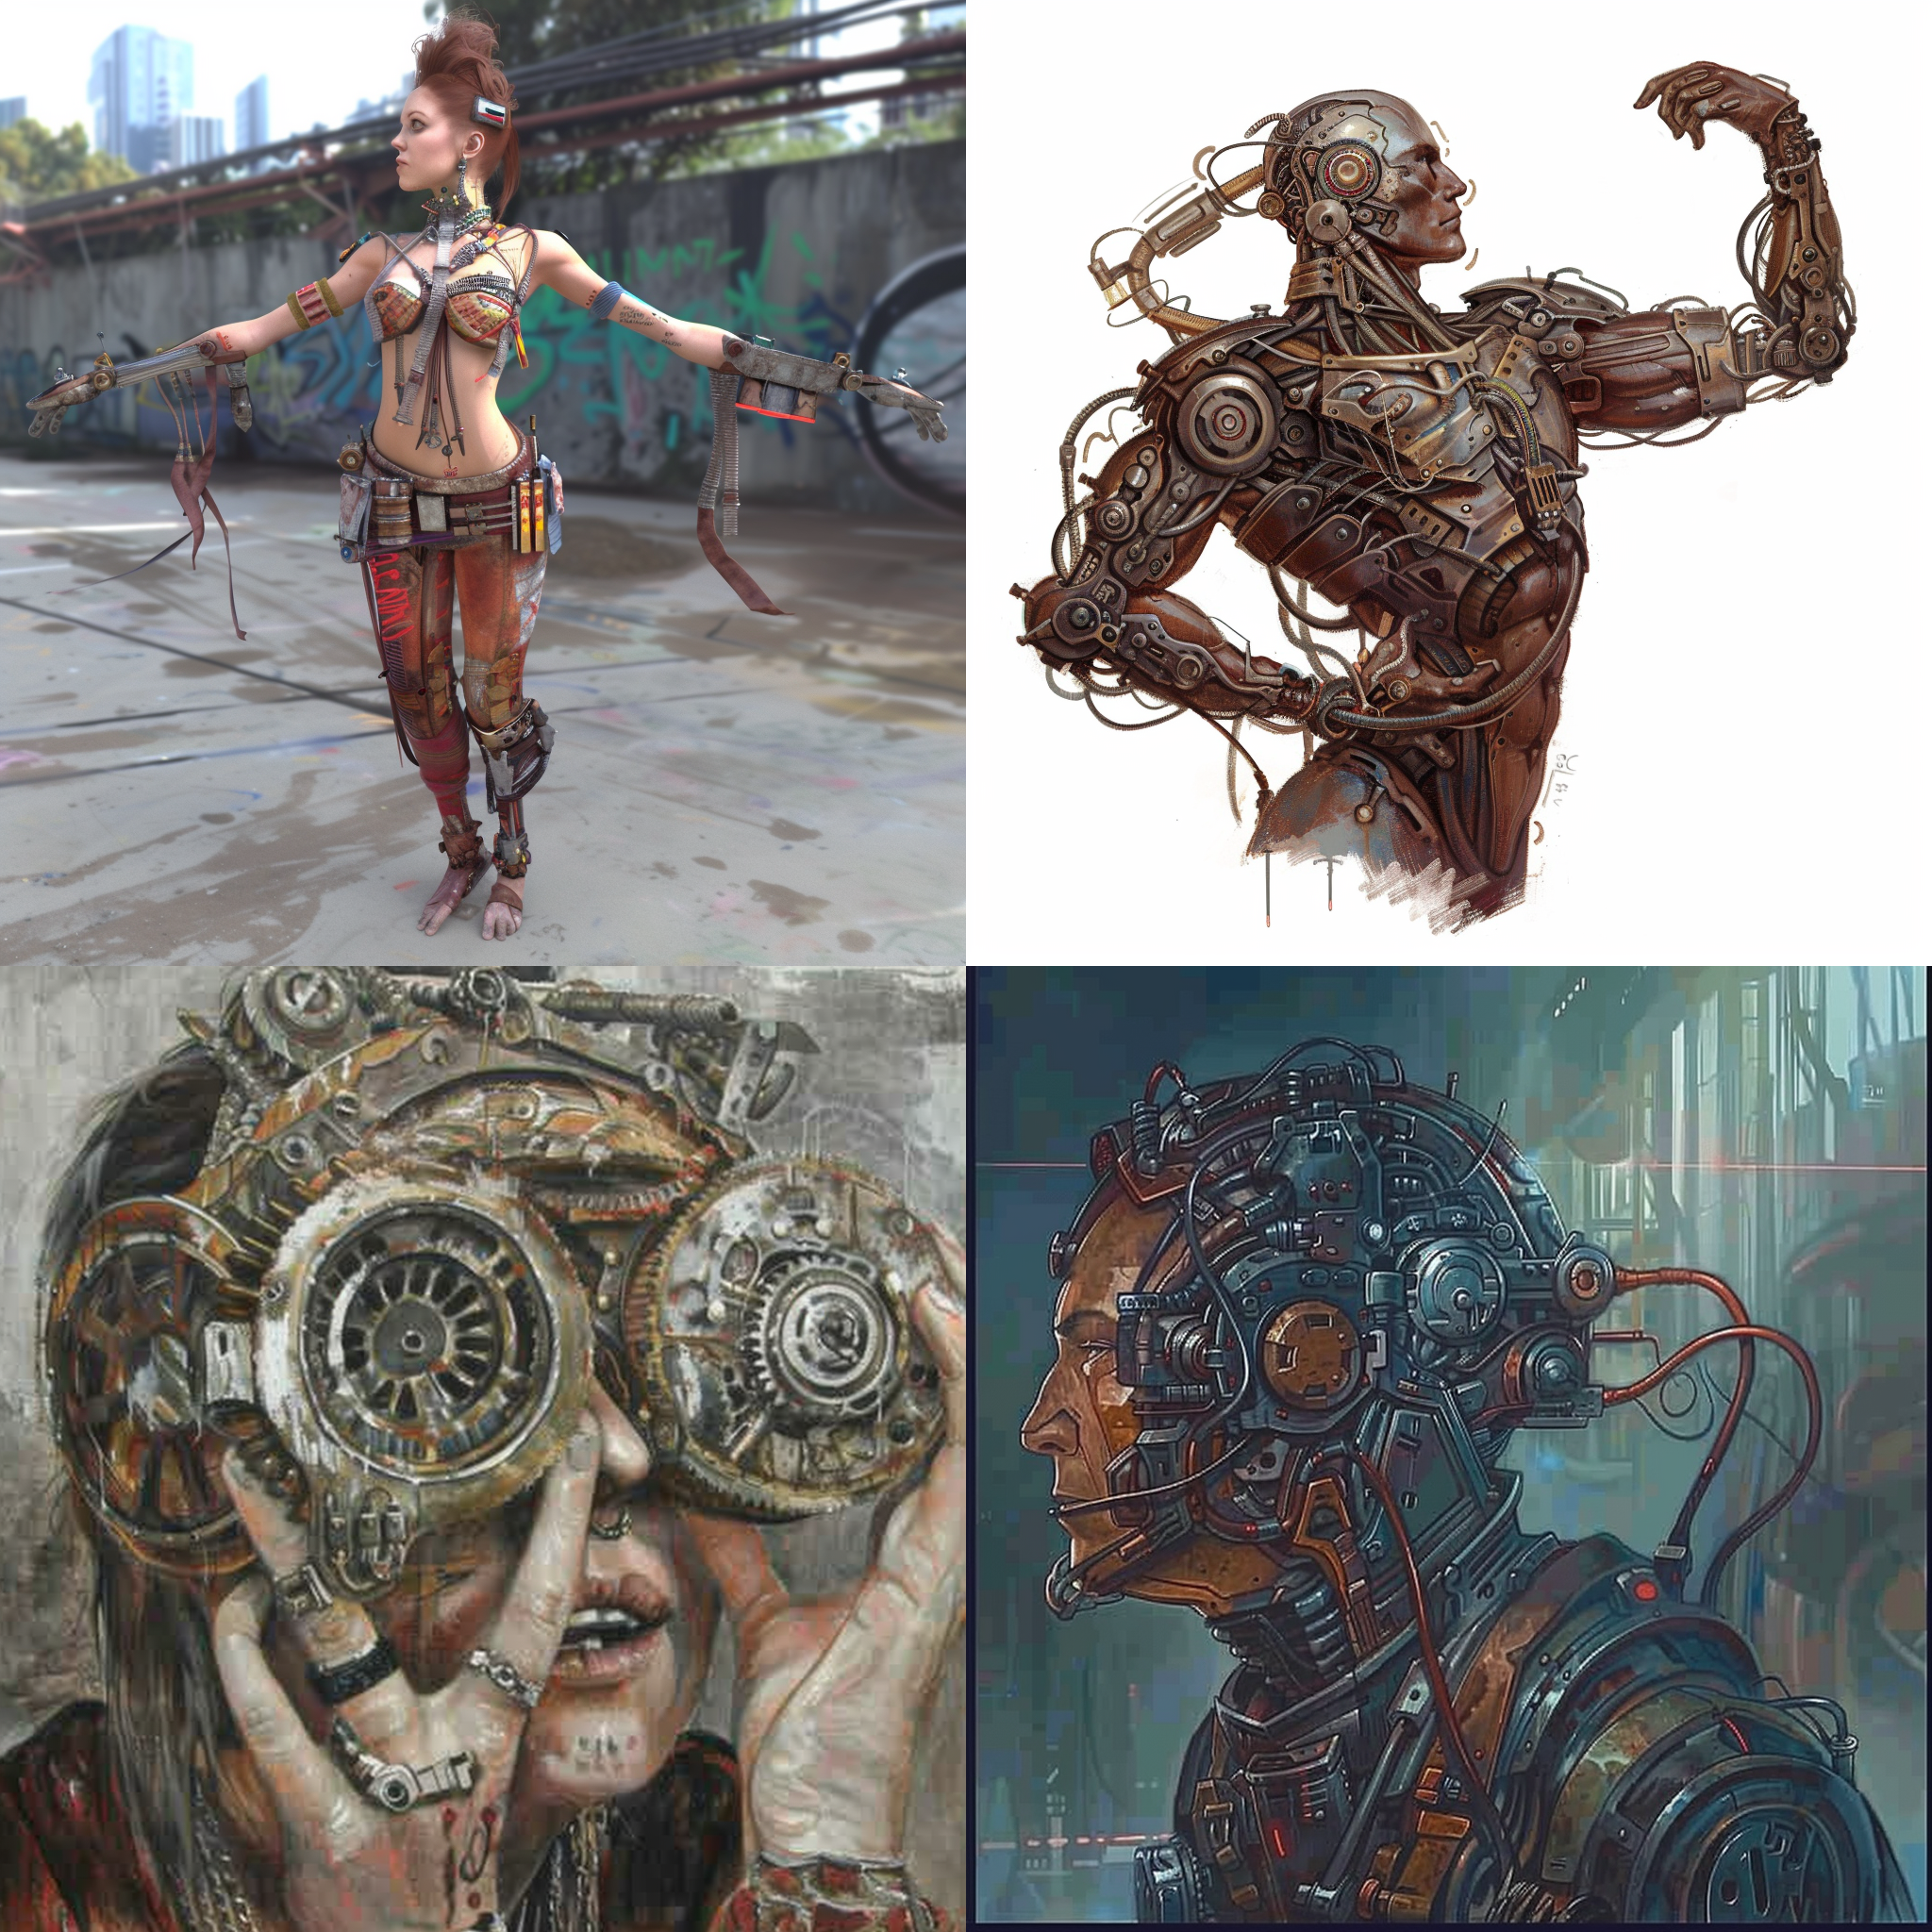
And finally, this is with weird cranked up to 2500
a steampunk cyborg –w 2500
7 The Video Parameter: Capture the Creation Process
As Midjourney processes your base imagine prompt and generates the final image grid, you get to see a slow evolutionary process of how your image goes from a crude blur to an AI masterpiece (most of the time). If you want to capture this creation process and save it as a GIF or short movie, you can do that using the “video”parameter. Just follow these steps:
Add “–video” at the end of your prompt such as:
watercolor scenery of a mountain in the woods –video
After the job finishes, click “Add Reaction” button and select the “Envelope” Emoji.
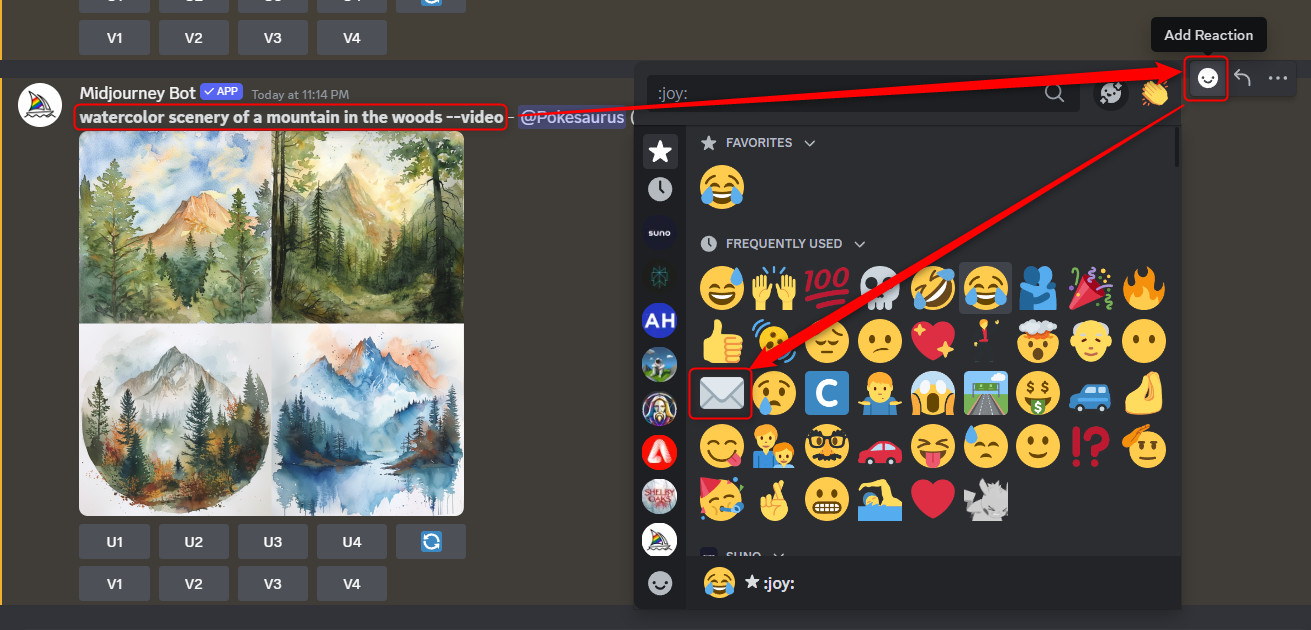
The Midjourney bot will send you a direct message with the link to the video. You can open it to view in a browser or right-click (or long press if on mobile) to download it.
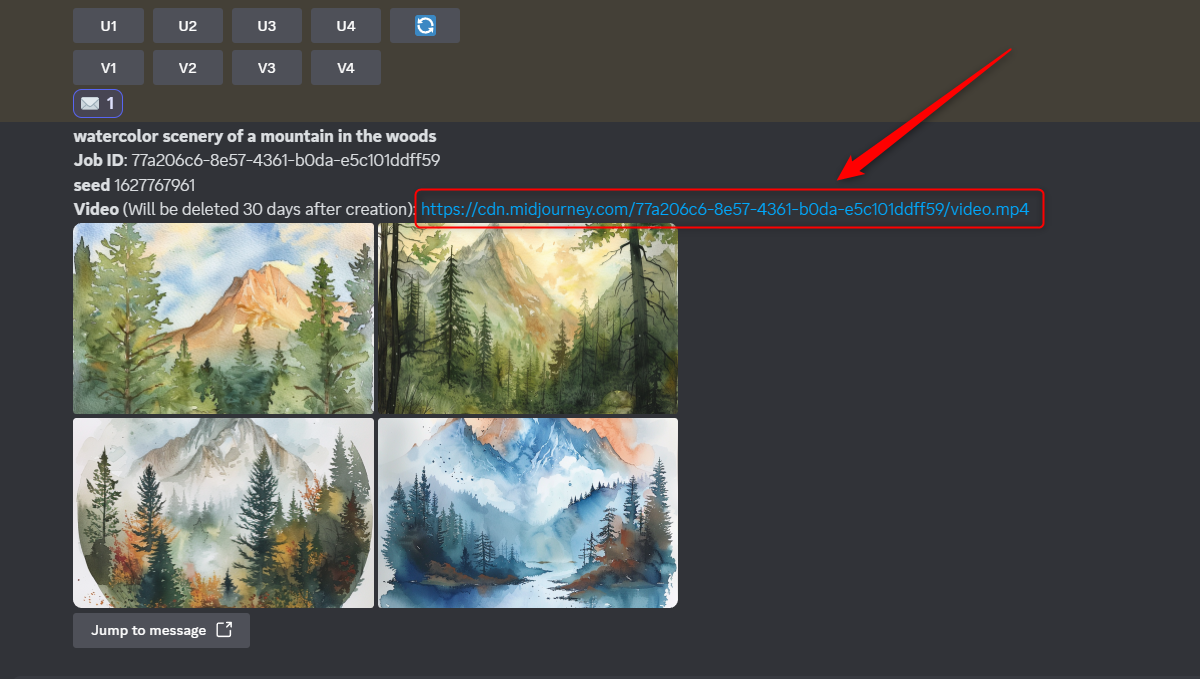
And here’s what the video looks like:
Your browser does not support the video tag.
8 The Tile Parameter: Craft Stunning Patterns
I often use Midjourney to create monotonous pattern-based wallpapers and this is when the ‘tile”parameter comes in real handy. Of course, you can also use this feature to create any seamless repeating patterns, or textures, or even for printing on fabrics. To use the feature, simply prompt Midjourney to create a pattern and append it with the –tile parameter. You will get a grid of patterns that you can individually upscale and use them as repeating patterns to create large images.
Example prompt:
a pattern of autumn leaves –tile
And this is the result:
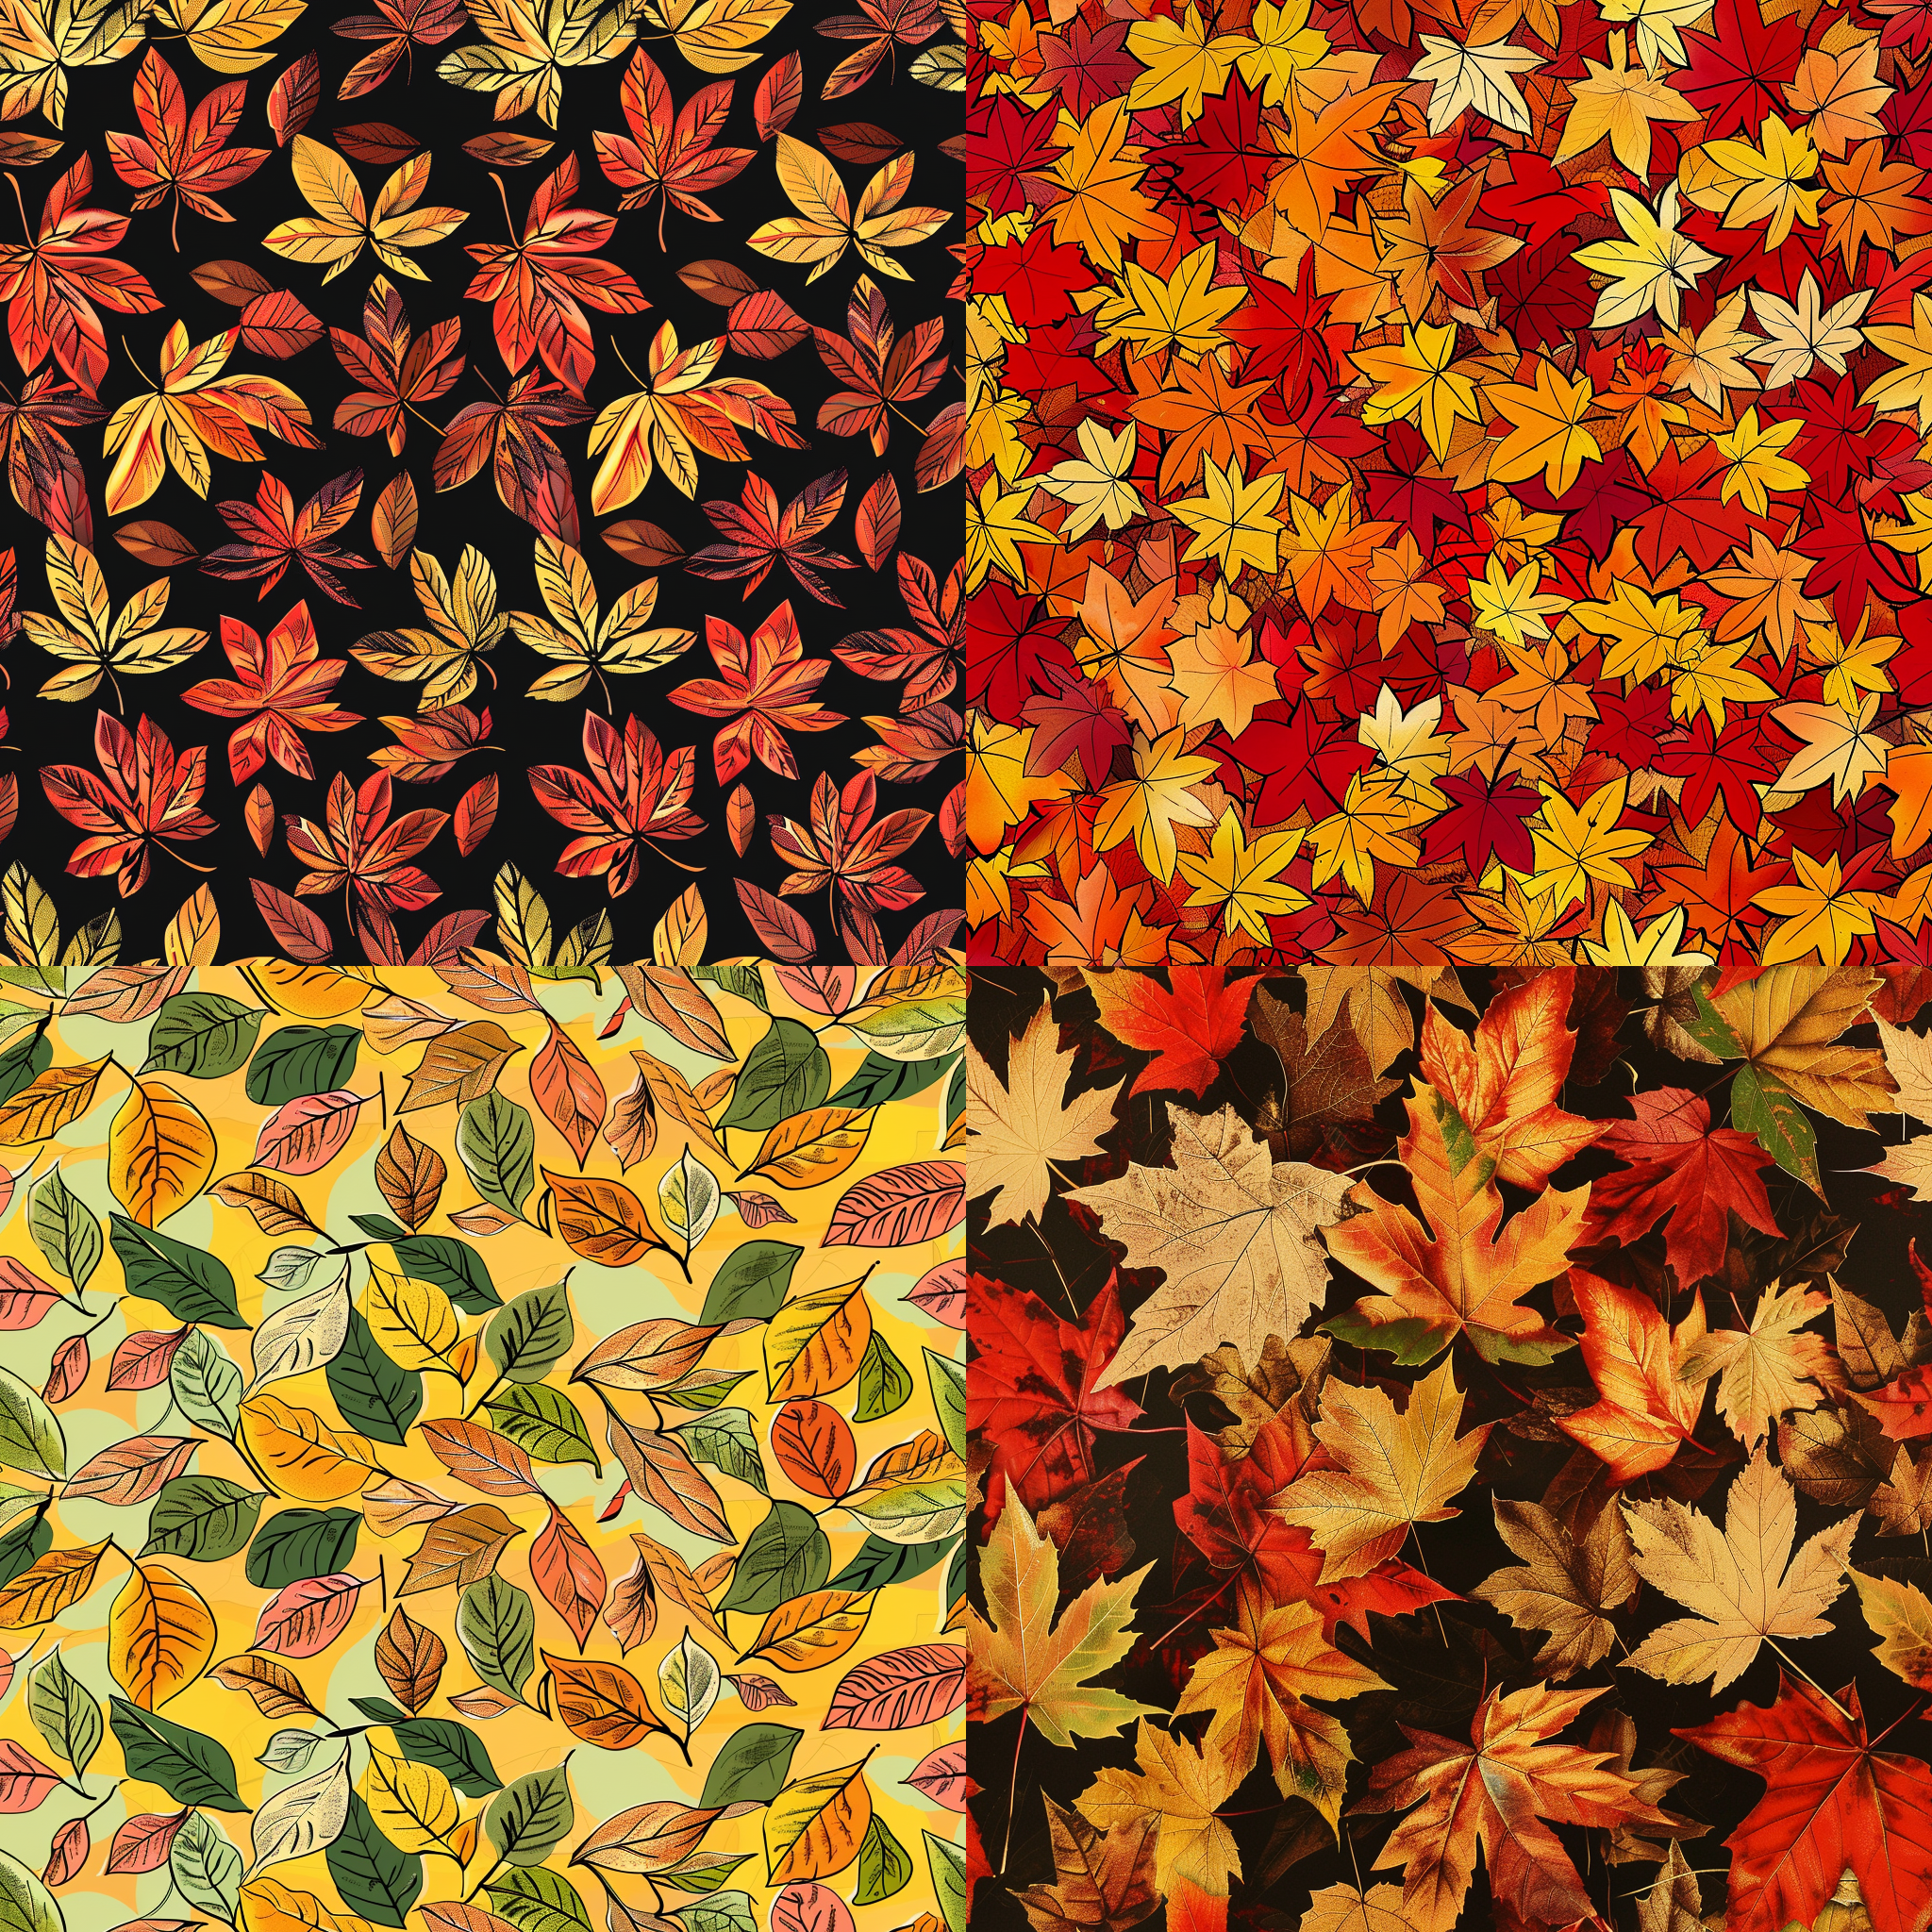
Ensure to mention “pattern”in the prompt or else the generated image will have absurd cuts and breaks in the image.
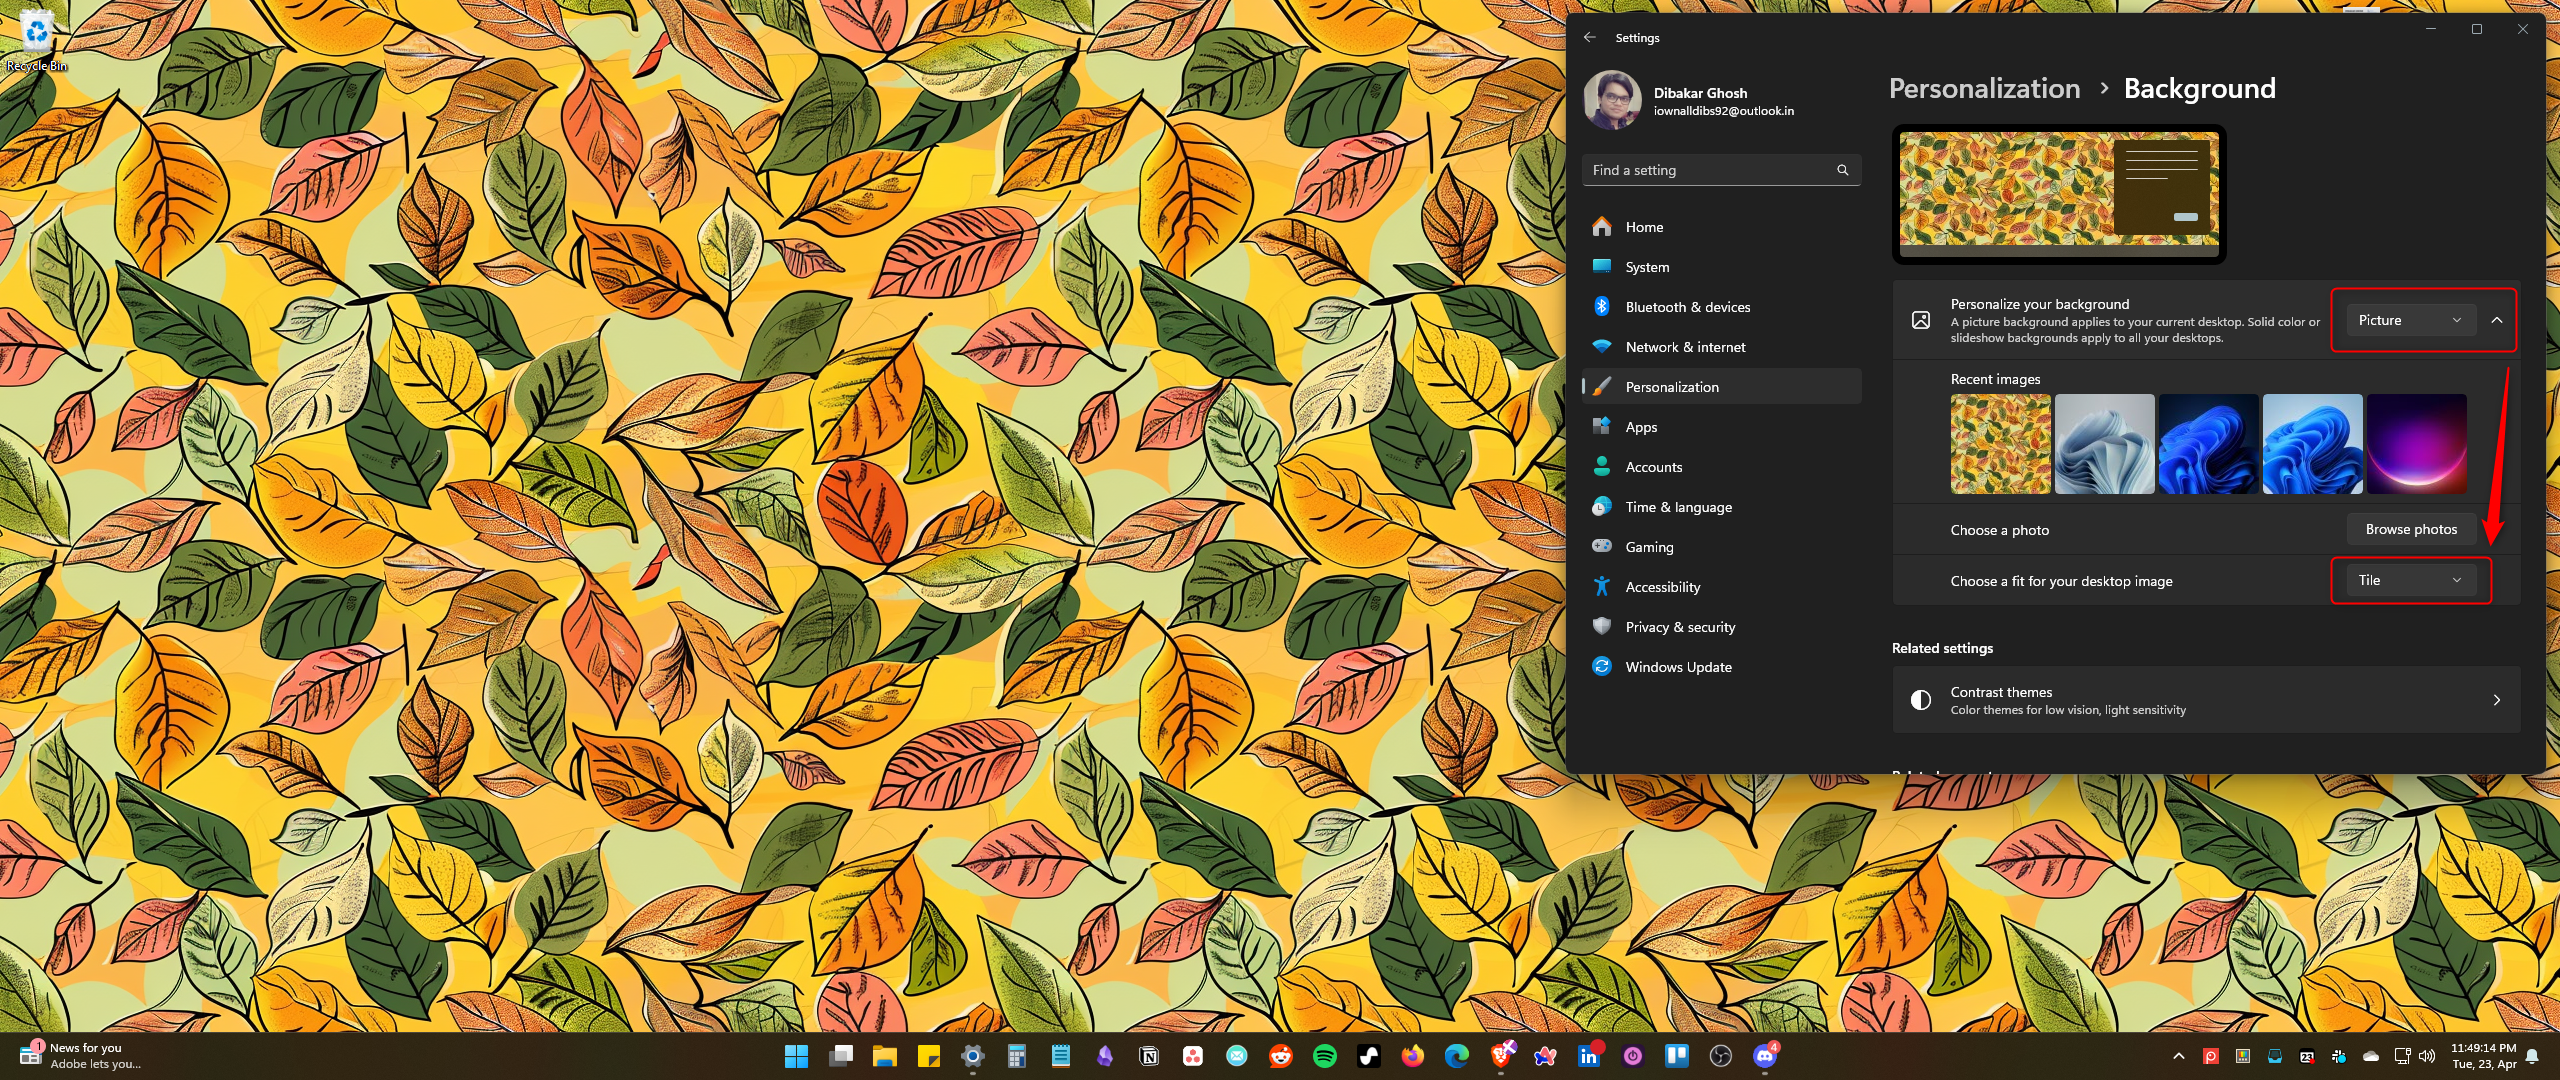
You can now use the Seamless Texture Checker to see the tile repeat and download it to your system. Whereas, if you want to use it as wallpaper like I do, follow these steps. On your Windows 11 system, go to Settings > Personalize > Background. Pick “Picture” under the option “Personalize Your Background” and select the image under “Choose A Photo field.” Then, select “Tile” under “Choose A Fit for your desktop image,” and voilà!
With these powerful Midjourney commands at your fingertips, you’re well on your way to becoming an AI image wizard. Whether crafting seamless patterns, removing unwanted elements, or adding an extra dose of weirdness, these tools offer endless ways to refine and customize your creations.
Also read:
- [New] 2024 Approved RhythmReview Music and Dialogue Analysis
- [New] Strategies for Improving Your Interview Prowess
- [New] The Most Popular Wedding Countdown Clocks A Top 10 List (Android/iOS)
- [Updated] 2024 Approved Your Speech, Any Sound Discover the Best Vocal Transformation Tools on Android
- 2024 Approved Microsoft Teams Sessions Recording
- 2024 Approved Streamline Your Media Collection with Funimate
- 2024 Approved Techniques for Optimizing GoPro Camera Battery Life
- 2024 Approved The Ultimate Guide for Effective YouTubers' Game Sessions
- 2024 Approved The Ultimate Guide to iPhone's Best 5 Podcasting Apps
- Accessing Social Network Videos Seamlessly on Apple TV for 2024
- Fixing Capture Failures on Low-End PC Systems
- Identify malfunctioning your hardware drivers with Windows Device Manager on Windows 10
- In 2024, Captivating Cinematic Experience Elevate Video Quality with Filters (PC & Mobile)
- The Ultimate Guide to Dimming Down Soundtracks in Premiere Pro for 2024
- Ultimate Guide 9 Premier Video Translators for Accurate Global Communication for 2024
- Unbeatable Upvotes Reddit's Hottest Threads From History for 2024
- Unveiling the Effectiveness of Blue Light-Blocking Prescription Eyewear by LensDirect
- Title: Elevate Your AI Imagery: Discover the Top 8 Midjourney Modifiers That Enhance Creativity
- Author: Daniel
- Created at : 2025-02-28 01:10:15
- Updated at : 2025-03-05 17:30:03
- Link: https://some-skills.techidaily.com/elevate-your-ai-imagery-discover-the-top-8-midjourney-modifiers-that-enhance-creativity/
- License: This work is licensed under CC BY-NC-SA 4.0.