Guide to Removing Individual Key Bindings and Shortcuts on Windows Keyboards

Guide to Removing Individual Key Bindings and Shortcuts on Windows Keyboards
Quick Links
- Install Microsoft PowerToys if You Haven’t Already
- Disable a Specific Keyboard Key With Microsoft PowerToys
- Disable a Specific Shortcut With Microsoft PowerToys
Key Takeaways
- To disable a specific key, navigate to Microsoft PowerToys’ Keyboard Manager, select “Remap a Key,” and click “Add Key Remapping.” Then, select the key, set it to “Disable,” and click “OK.”
- To disable a specific shortcut, open Microsoft PowerToys’ Keyboard Manager, select “Remap a Shortcut,” and click on “Add Shortcut Remapping.” Then, select the shortcut keys, set it to “Disable,” and click “OK.”
Want to disable a specific keyboard key or shortcut? Microsoft PowerToys, an official Microsoft app, makes this task quite simple. Here’s a quick guide on using the Keyboard Manager in Microsoft PowerToys to disable a specific key or shortcut.
Install Microsoft PowerToys if You Haven’t Already
If Microsoft PowerToys is not installed on your device, install the app first . Open the Microsoft Store app, type “Microsoft PowerToys” in the store’s search bar, and select Microsoft PowerToys from the search results.

Then, click the “Install” button to install the app.
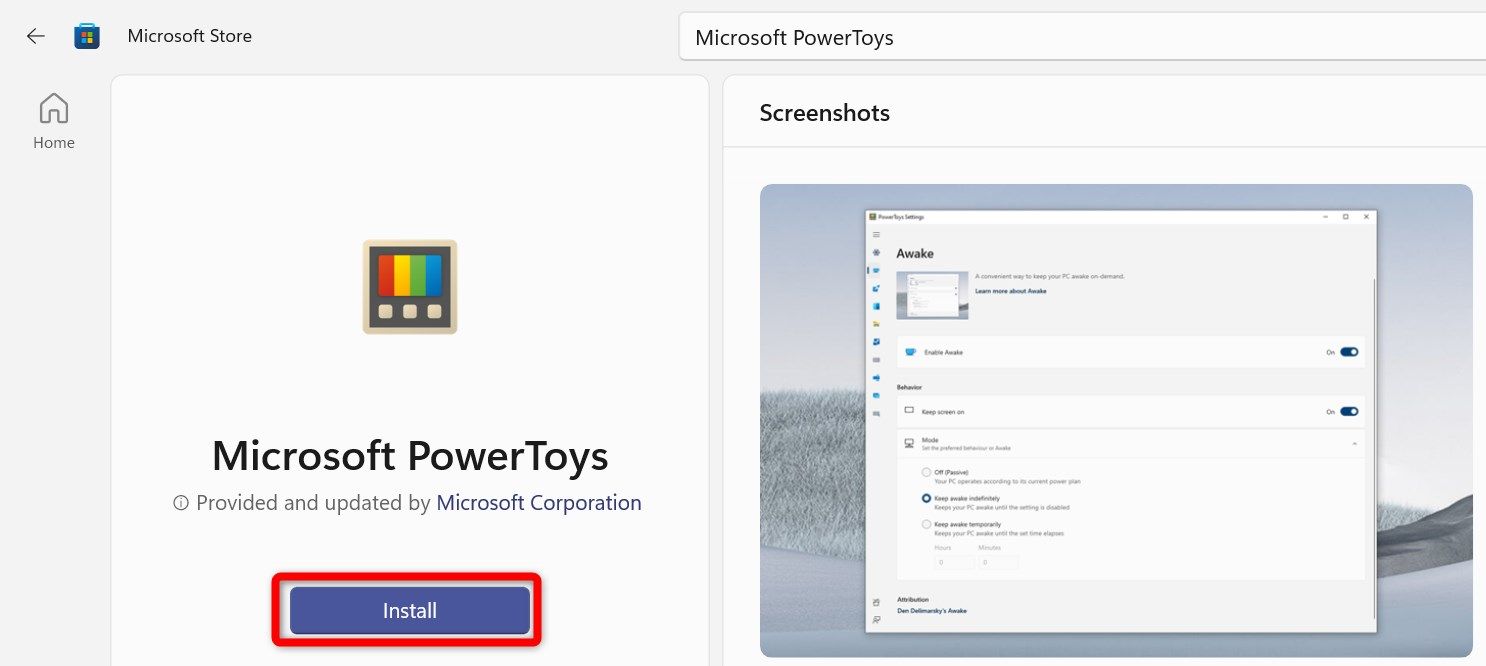
Let the installation process complete, and you will come across a User Account Control (UAC) window. Click “Yes” there, and the app will be successfully installed.
Disable a Specific Keyboard Key With Microsoft PowerToys
Type “PowerToys” in Windows Search and open the app. Navigate to the “Keyboard Manager” in the left sidebar. Then, click “Open Settings” in the right pane.
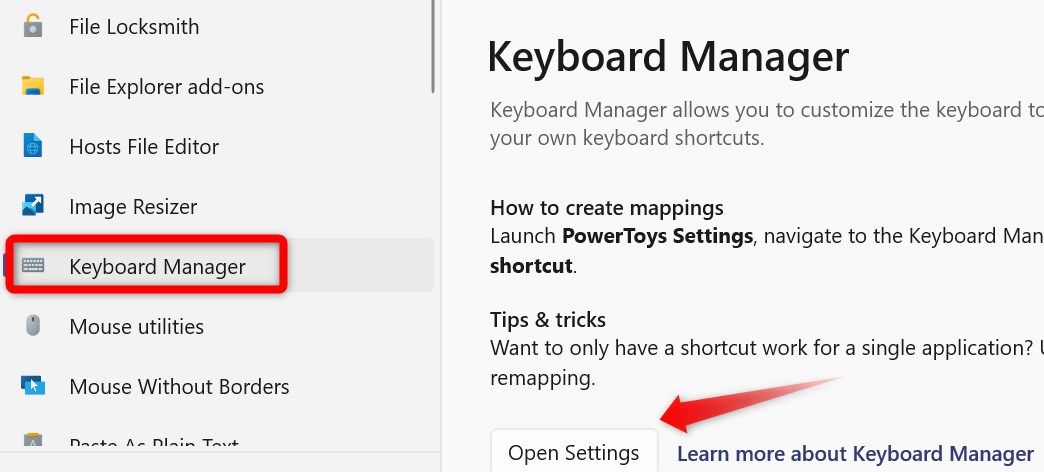
Turn on the toggle next to Enable Keyboard Manager if it’s currently turned off. Afterward, click on “Remap a Key.”

Click “Add Key Remapping,” choose the key you want to disable under Select, and select “Disable” under To Send. Finally, click “OK” in the top-right corner.
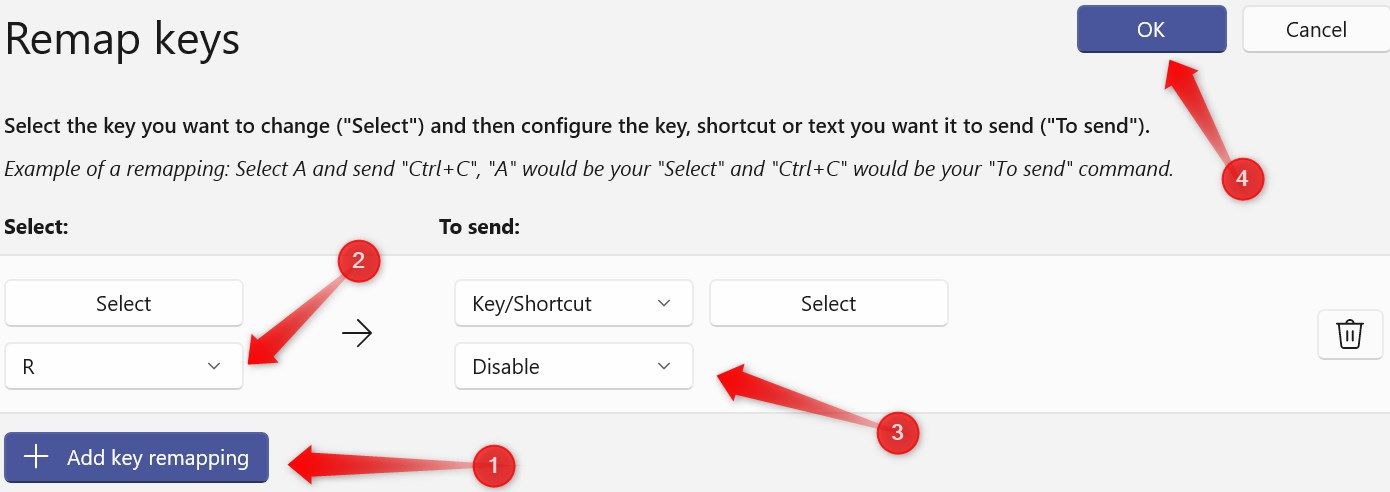
If you receive a warning, click “Continue Anyway,” and your specified key will be disabled .

Disable a Specific Shortcut With Microsoft PowerToys
To disable a specific shortcut, open Keyboard Manager settings and click “Remap a Shortcut.”
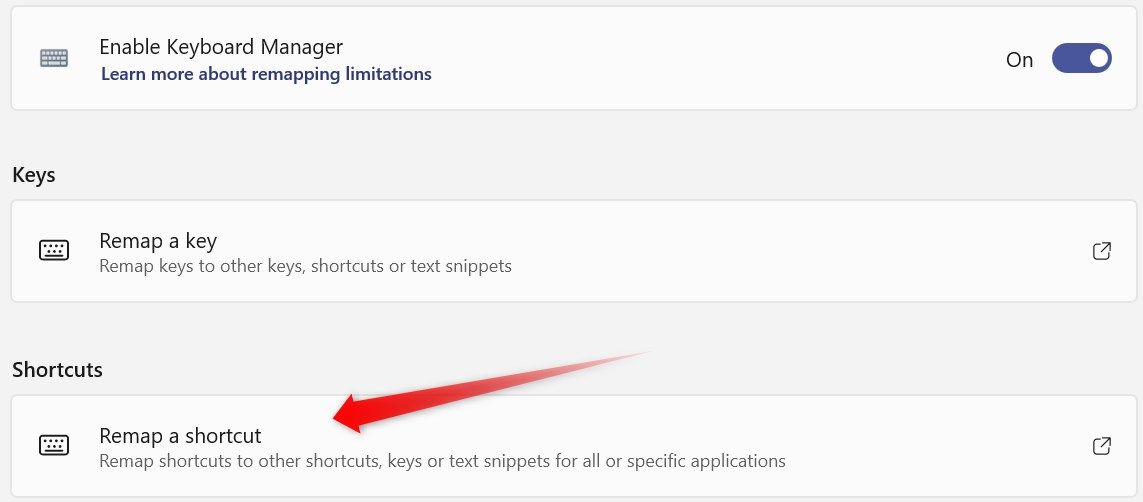
Click “Add Shortcut Remapping,” select the first key of the shortcut (it must be a modifier key, or you’ll receive a warning), and select the second key. Then, choose “Disable” under To Send and click “OK” in the top-right corner.

If you want to re-enable the disabled key or shortcut, go to the same settings, click the recycle bin icon next to it, and click “OK.”

Like remapping keyboard keys and shortcuts using Keyboard Manager, Microsoft PowerToys offers various other features geared toward power users.
Also read:
- [New] Expert Tips for High-Quality Zoom Podcast Sessions
- [New] Streamlining Your iPhone 7 Video Saving Routine
- [New] The Ultimate Guide to Text Preset Mastery
- [New] Top Steadicam Models Compatible with DSLR Cameras
- [Updated] 2024 Approved Simplified Process for Name Change in Google Meet (Laptop/Mobile)
- [Updated] The Art of Amplifying Your Minecraft Scene
- [Updated] Unravel Costs Liberating Your VOB Experience (PC/Mac)
- [Updated] Unseen Wonders in VLC's Arsenal of Features
- 11 Best Pokemon Go Spoofers for GPS Spoofing on Apple iPhone 15 Pro | Dr.fone
- 2024 Approved The Expert's Pathway Transforming SDR Footage Into HDRI
- 2024 Approved Unleashing Creativity with Pexels Finding Fabulous Images
- 2024 Approved Unleashing Humor The Kapwing Meme Builder Way
- In 2024, Triple-Tier Phones The Best Choice for High-Quality Videos
- PlayCapture X The Cost-Free Videography for Games
- Pursuing Your Vision Learn Professional Filmmaking on YouTube
- Step-by-Step Solutions to Get Your Hogwarts Legacy Running Smoothly - Latest Fixes
- The Budding Filmmaker’s Companion Understanding Display Quality 101 for 2024
- Top Reddit Threads Ever The 10 Greatest Hits
- Ultimate Guide to the Leading 9 Video Call & Collaboration Tools (Android, iOS)
- Title: Guide to Removing Individual Key Bindings and Shortcuts on Windows Keyboards
- Author: Daniel
- Created at : 2025-02-27 23:25:16
- Updated at : 2025-03-05 20:13:05
- Link: https://some-skills.techidaily.com/guide-to-removing-individual-key-bindings-and-shortcuts-on-windows-keyboards/
- License: This work is licensed under CC BY-NC-SA 4.0.