
In 2024, The Zoomer's Guide to Enhancing Call Quality with Filters
The Zoomer’s Guide to Enhancing Call Quality with Filters
Zoom is the most popular app for remote communication digitally. Starting from taking online classes to organizing online meetings, Zoom is the most preferred platform. There are several reasons for the popularity of Zoom such as easy to setup and join meetings, access from any device, instant chatting integration, and easy screen sharing option.
There are certain features where Zoom outshines its competitors, and they are the use of virtual background and video filters. You can add different video filters to change the look and feel of your video that others can see on Zoom. This helps when the color scheme and the lighting in your video are not accurate. We will illustrate how to add video filters in Zoom for desktop and smartphone users.
Part 1. How to Add Video Filter on Zoom Desktop App
If you are a professional and you attend client and corporate meetings, you are likely to use your desktop computer for remote communication. Zoom desktop app is equally popular as its smartphone app for video conferencing. All you need is a webcam with a microphone and a stable internet connection on your computer. Here are the steps how to add video filters to Zoom desktop app.
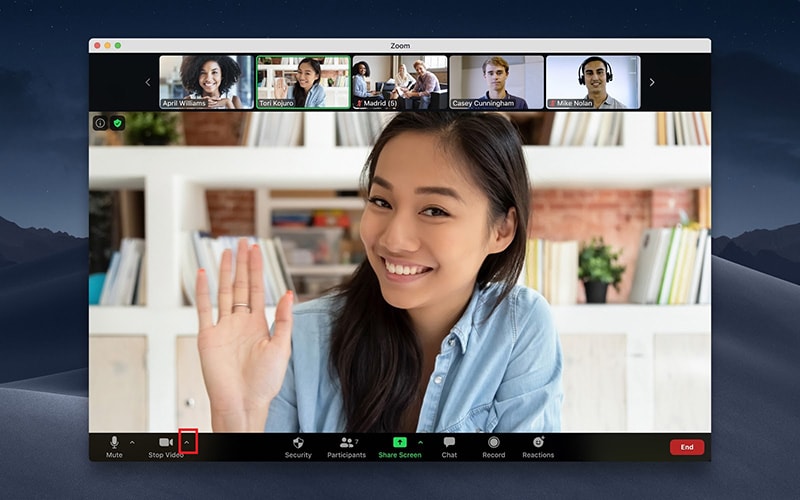
Step1Open your Zoom desktop app and start a meeting.
Step2Click on the up-arrow located on Stop video option.
 Lyric Video Creator Professional Version
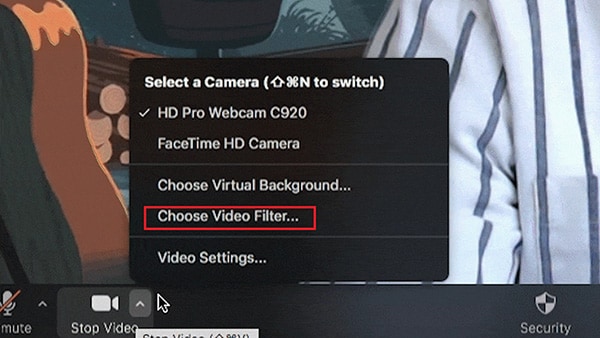
Step3From the menu, click on Choose Video Filter option. This will open a new Window inside Zoom app.
 ZoneAlarm Pro Antivirus + Firewall NextGen
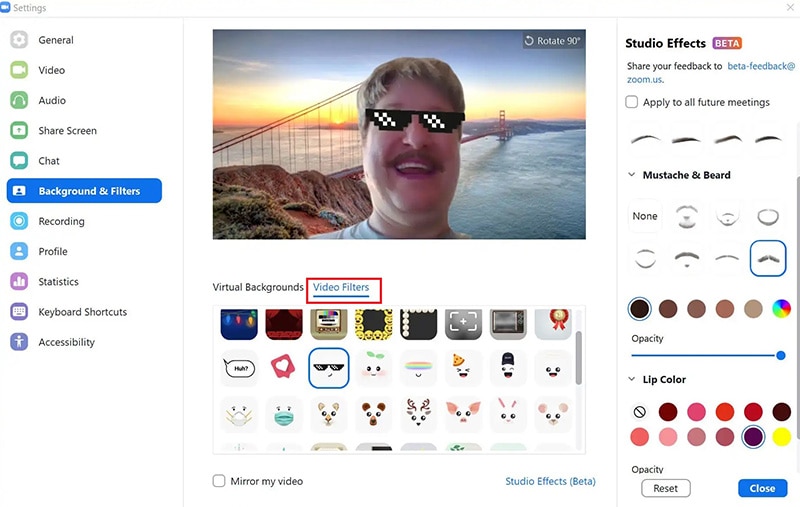
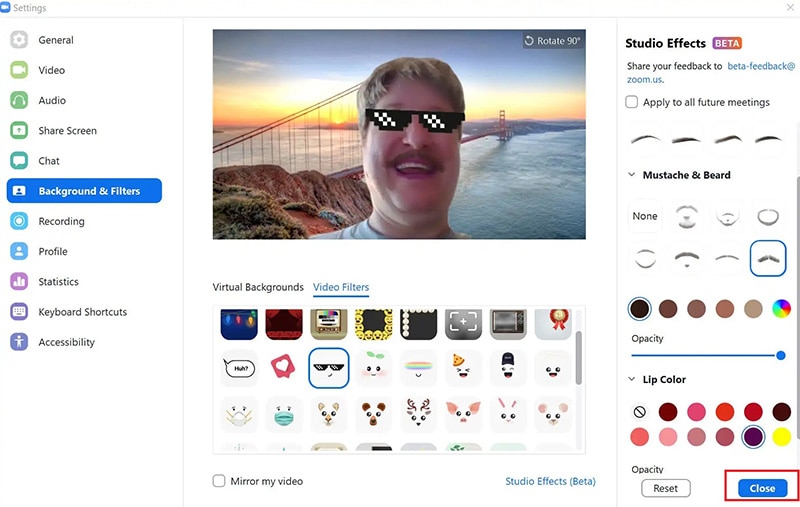
Step4You will see different video filters under Video Filters tab, and select the one to serve your purpose. Scroll down to find different video filters including color filters.
Step5Click on Studio Effects on the right side to add different elements to your face such as eyebrows, facial hair and likewise.
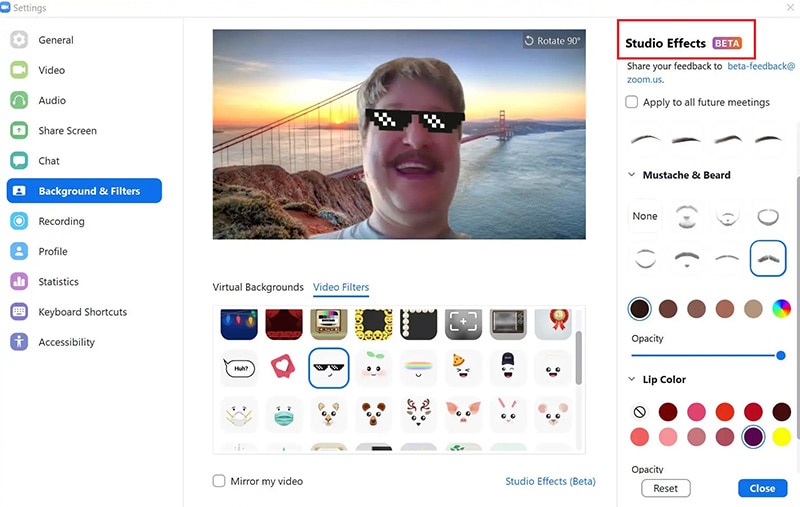
Step6When you are satisfied with the result, click on Close button.

Part 2. How to Add Video Filter on Zoom Mobile App
You can add video filters on Zoom mobile app as well. The process of adding video filters is the same for Android and iOS Zoom app. You have to make sure that you are logged into your Zoom account to add video filters. Moreover, make sure that Zoom app on your smartphone is updated to the latest version. Here are the steps on how to add a video filter on Zoom app.
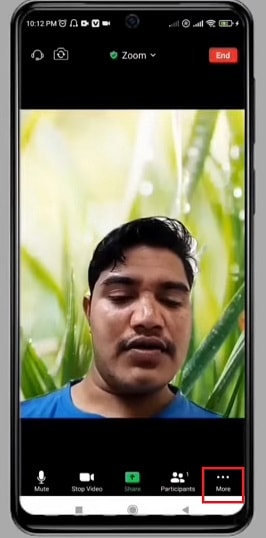
Step1Open Zoom app on your smartphone. Start a meeting in Zoom app as usual.
Step2Tap on More option located in the bottom-right corner.

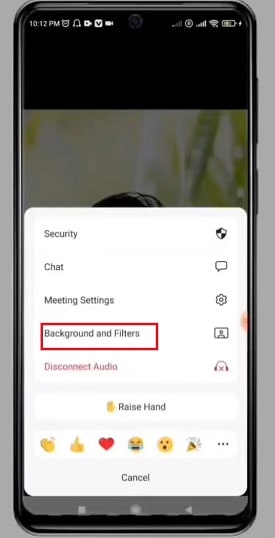
Step3A pop-up menu will appear and tap on Background and Filters option.
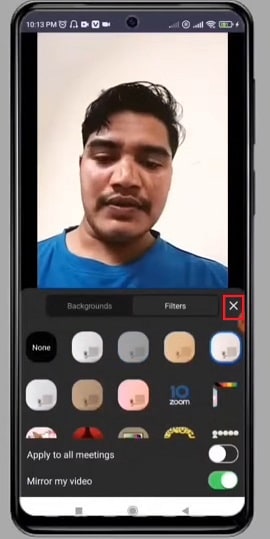
Step4Tap on Filters tab and select a desired filter from the available filters.

Step5The last filter you tap on will be applied to your video. Finally, tap on “X” icon to close the filters overlay window.

Extra Info: How to Add Filters to Videos with Filmora
If you have recorded a video on your phone with phone camera, computer with a webcam or even shot a video with your digital camera, you can add filters to videos after recording. There are times when you record your Zoom meeting and publish it online. Before publishing, you can add filters for color enhancement. You will need a video editor to add filters to videos, and we recommend Wondershare Filmora.
Filmora is a desktop application, and hence, you have to transfer your recorded videos to your computer if you have shot them with your phone or digital camera. Filmora is a professional video editor, but the user interface is suitable for amateurs as well. There are far more filters available on Filmora than you can find on Zoom or any regular video editor app. Here are the steps on how to add zoom video filters to recorded videos using Filmora.
Step1Download and install Wondershare Filmora on your computer based on your operating system. It is available for both Windows and Mac users.
Step2Launch Filmora and click on New Project option on the welcome screen.

Step3Drag and drop the video that you want to edit into Project Media folder and thereafter, on the Timeline.

WPS Office Premium ( File Recovery, Photo Scanning, Convert PDF)–Yearly

Step4Click on Effects at the top of the application screen and from the left panel, go to Filters option.
Step5Drag and drop the desired filter on the Timeline to apply to your video. You can stretch the duration of the video filter to cover the recorded video as much as you want.


You can also use multiple video filters of different durations for one video clip. You can even customize the video filter by clicking on the applied filter.
Step6Once you are satisfied with the editing, click on Export to save the edited video in desired file format.
The Bottom Line
You must have heard that Zoom lets you use a virtual background to make your video look better. We have stated how to improve your video color and add graphical elements through video filters. Go through the process on how to add video filters on Zoom desktop app and smartphone app. If you want to add video filters to an already recorded video, we recommend Wondershare Filmora .
Free Download For Win 7 or later(64-bit)
Free Download For macOS 10.14 or later
Free Download For macOS 10.14 or later
- Title: In 2024, The Zoomer's Guide to Enhancing Call Quality with Filters
- Author: Daniel
- Created at : 2024-08-21 02:31:46
- Updated at : 2024-08-22 02:31:46
- Link: https://some-skills.techidaily.com/in-2024-the-zoomers-guide-to-enhancing-call-quality-with-filters/
- License: This work is licensed under CC BY-NC-SA 4.0.