Step-by-Step Tutorial: Installing and Running ChatGPT in Windows Environment

Step-by-Step Tutorial: Installing and Running ChatGPT in Windows Environment
Quick Links
- Download ChatGPT Using Chrome
- Download ChatGPT Using Edge
- How to Launch the Downloaded ChatGPT App
- How to Uninstall the ChatGPT App
Key Takeaways
- Use Chrome or Edge to turn ChatGPT’s site into a native Windows app.
- In Chrome, launch the ChatGPT site, sign in to your account, click the three dots in the web browser’s top-right corner, choose Save and Share > Install Page as App, and click “Install.”
- In Edge, open the ChatGPT site, log in to your account, click the three dots in Edge’s top-right corner, select Apps > Install This Site as an App, and choose “Install.”
If you don’t prefer using a web browser to access ChatGPT, it’s possible to turn this AI tool into a native Windows app. It will then act and work as if it was a native Windows 11 or Windows 10 app. We’ll show you how to do that.
To turn ChatGPT’s site into an app, you’ll use a built-in option in Chrome or Edge. This option turns any site you access in these web browsers into a Windows app. You can use either web browser, but Edge offers the option to change the app’s icon when you create the app.
Download ChatGPT Using Chrome
Launch Chrome on your PC and access the ChatGPT site . Log in to your account on the site and get to the chat screen (where you send and receive messages).
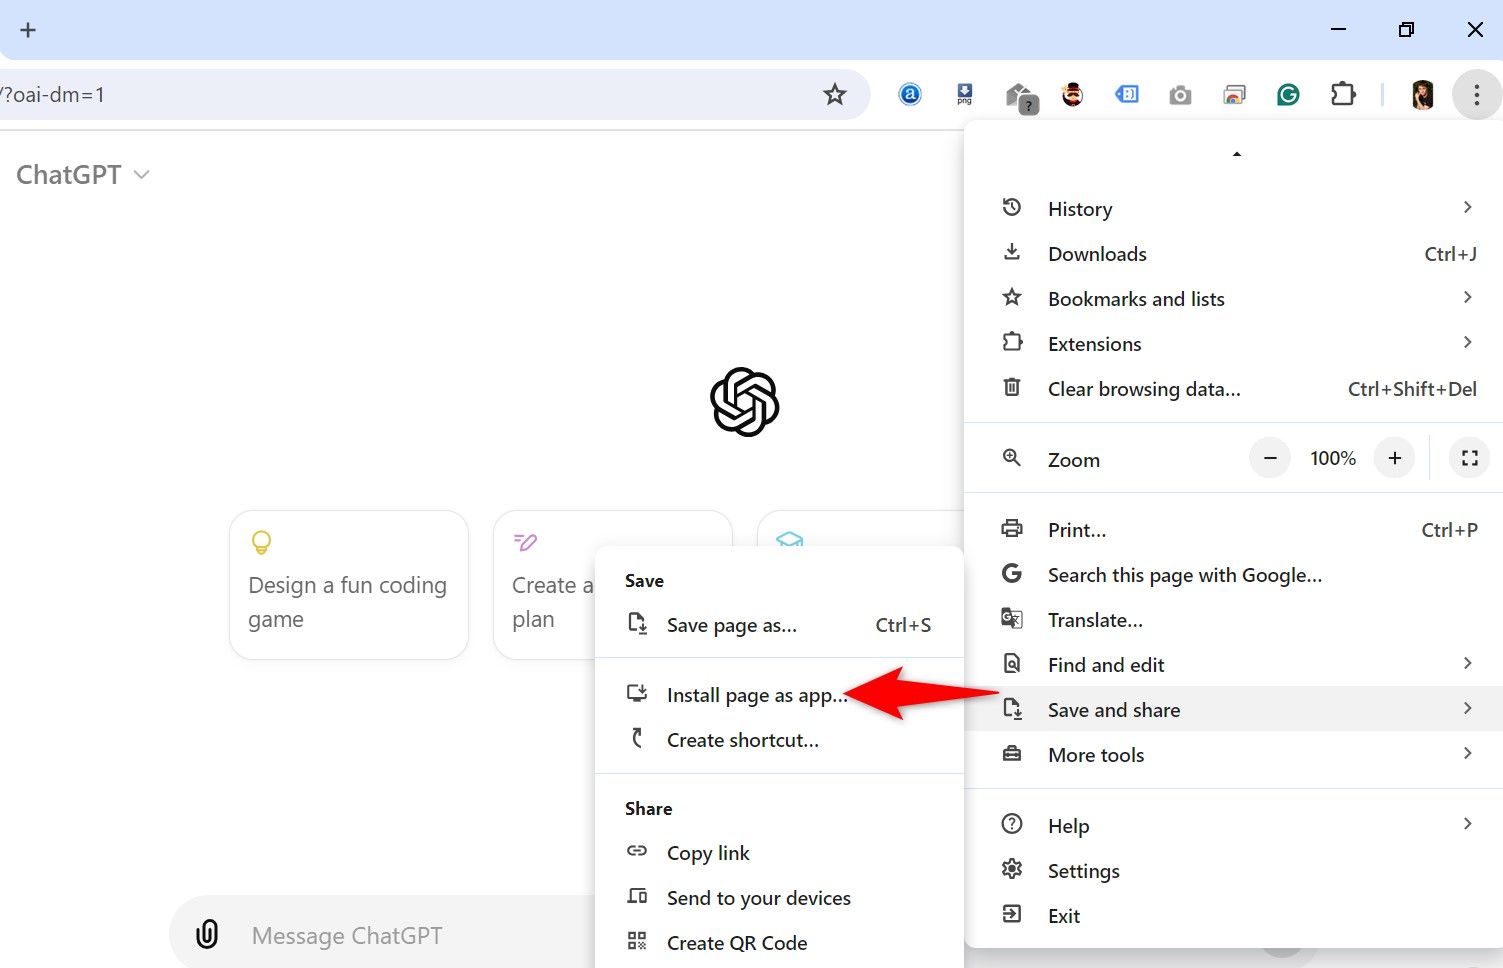
In Chrome’s top-right corner, click the three dots and choose Save and Share > Install Page as App.
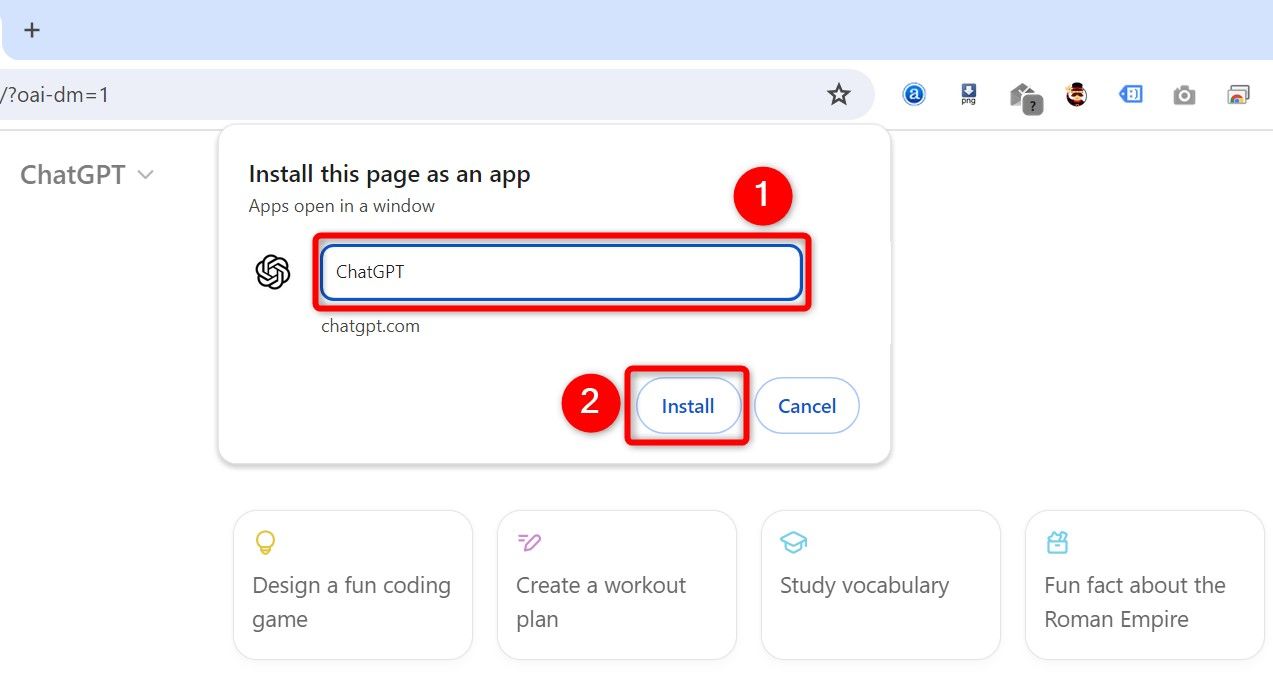
You’ll see an “Install This Page as an App” dialog box. To change the app’s name, click the text field and type a name. This name will appear wherever the app is listed. Then, click “Install.”
Chrome will create and launch the app in a new window. You may now start using the app.
Windows will display a notification asking if you want to pin the app to the taskbar . To do that, click “Yes.” Otherwise, select “No, Thanks.” And that’s it.
Download ChatGPT Using Edge
Open the Edge web browser and access the ChatGPT site . Sign in to your account if you haven’t already done so.
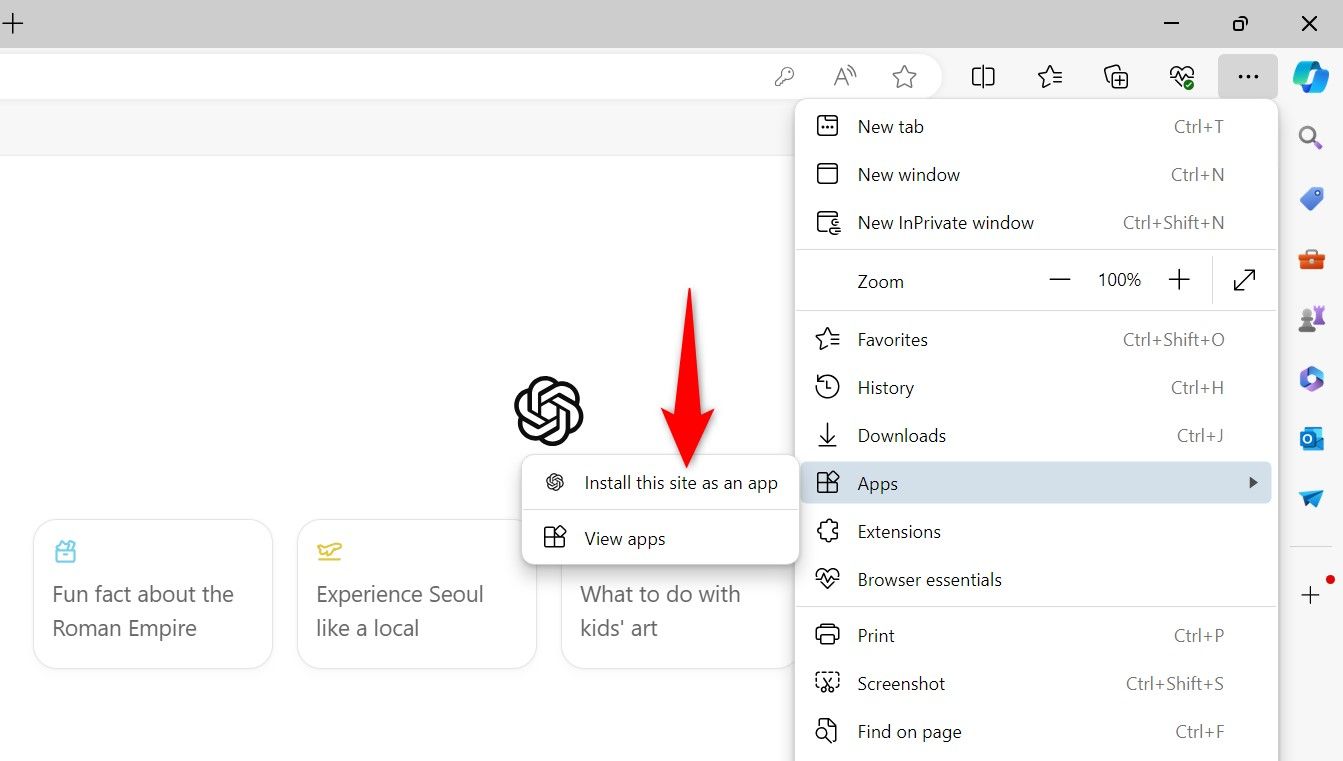
When the chat screen loads, in Edge’s top-right corner, click the three dots and choose Apps > Install This Site as an App.
An “Install This Site as an App” dialog box will open. To change the app’s default name, click the text field and type a new name. To change the app’s icon, beneath the current icon, click “Edit.” Then, choose an ICO or PNG file as the app icon. There’s a way to turn any image into an icon file .
Once that’s done, click “Install” to add the app to your PC.
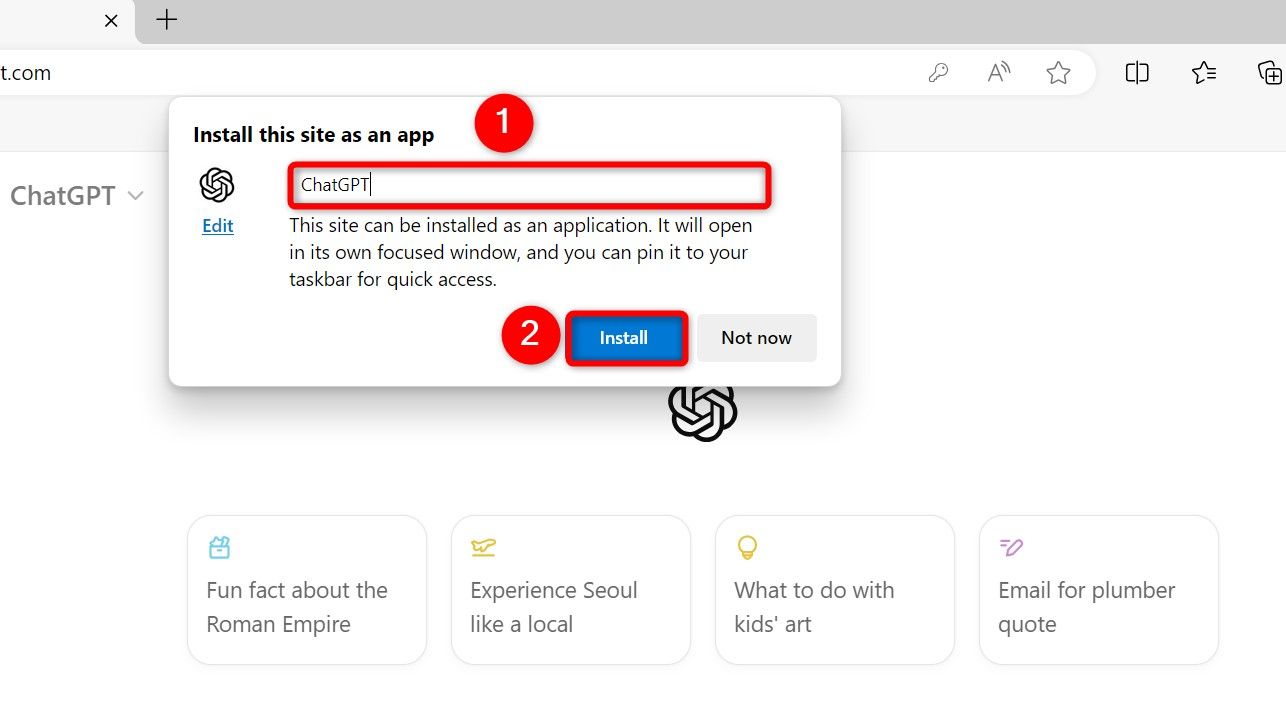
And that’s all.
How to Launch the Downloaded ChatGPT App
Since the ChatGPT app you’ve created works like any other installed app on your PC, you can launch it like you would any other app . One way to do that is by using the Start Menu.
Open the Start Menu, search for ChatGPT (or whatever name you used), and click the app in the search results.
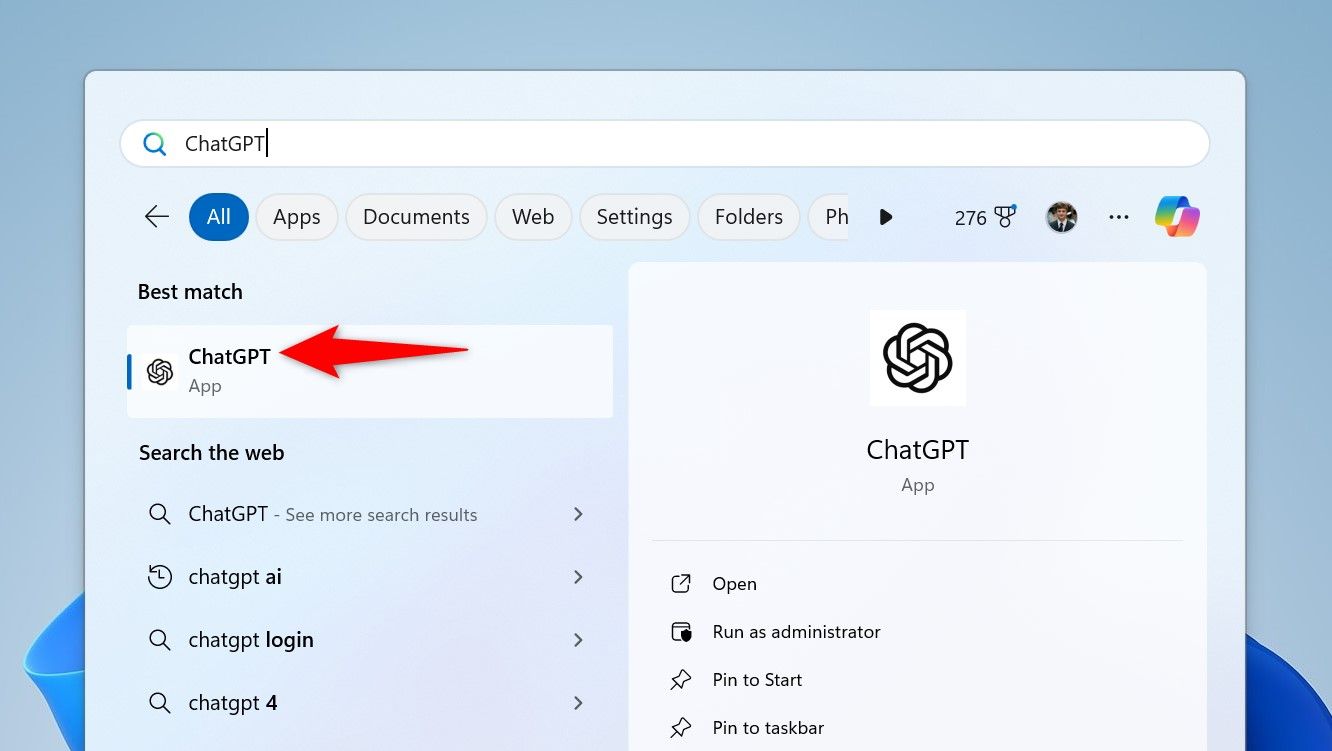
To pin the app to the Start Menu or the taskbar, right-click the app in the search results and choose “Pin to Start” or “Pin to Taskbar.” This allows you to launch the app quickly and conveniently.
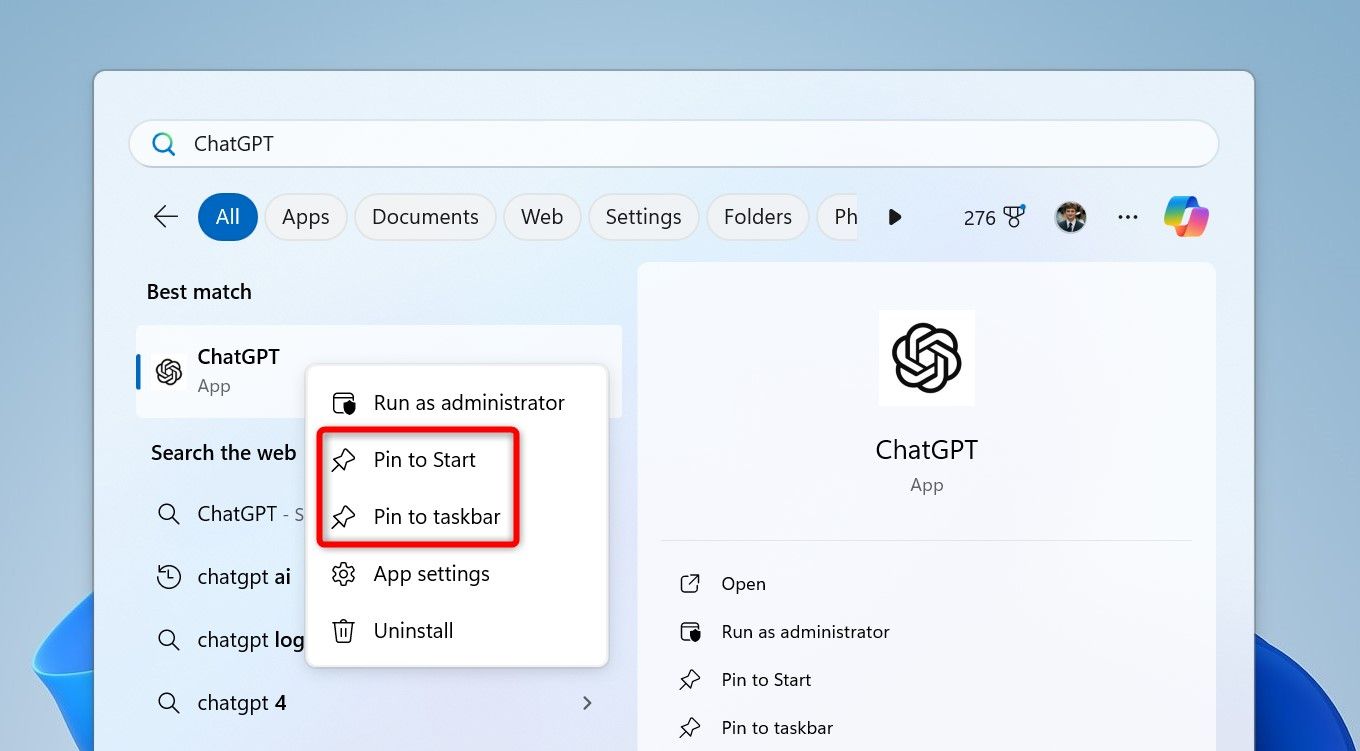
And you now have access to your favorite AI tool as a native Windows app.
How to Uninstall the ChatGPT App
If you ever want to remove the ChatGPT app, you delete it like any other app.
To remove the app using Settings on Windows 11 , head into Settings > Apps > Installed Apps. Next to the ChatGPT app, click the three dots and choose “Uninstall.” Select “Uninstall” in the prompt.
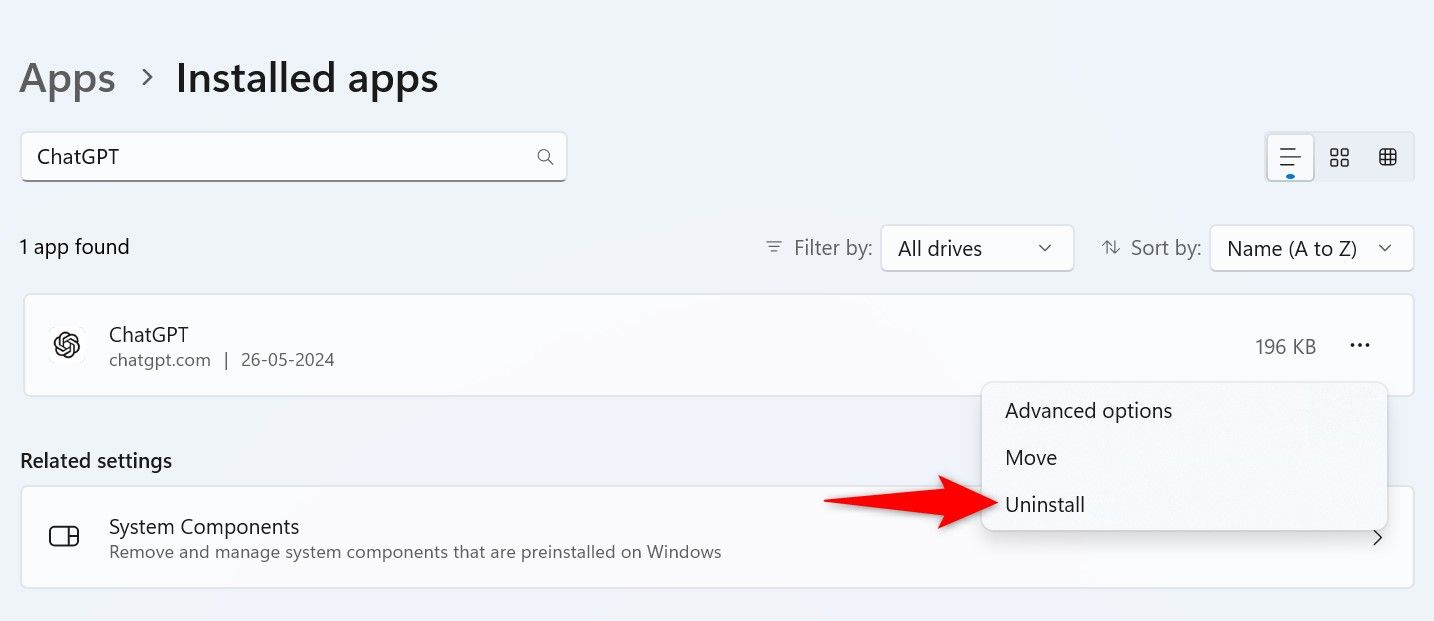
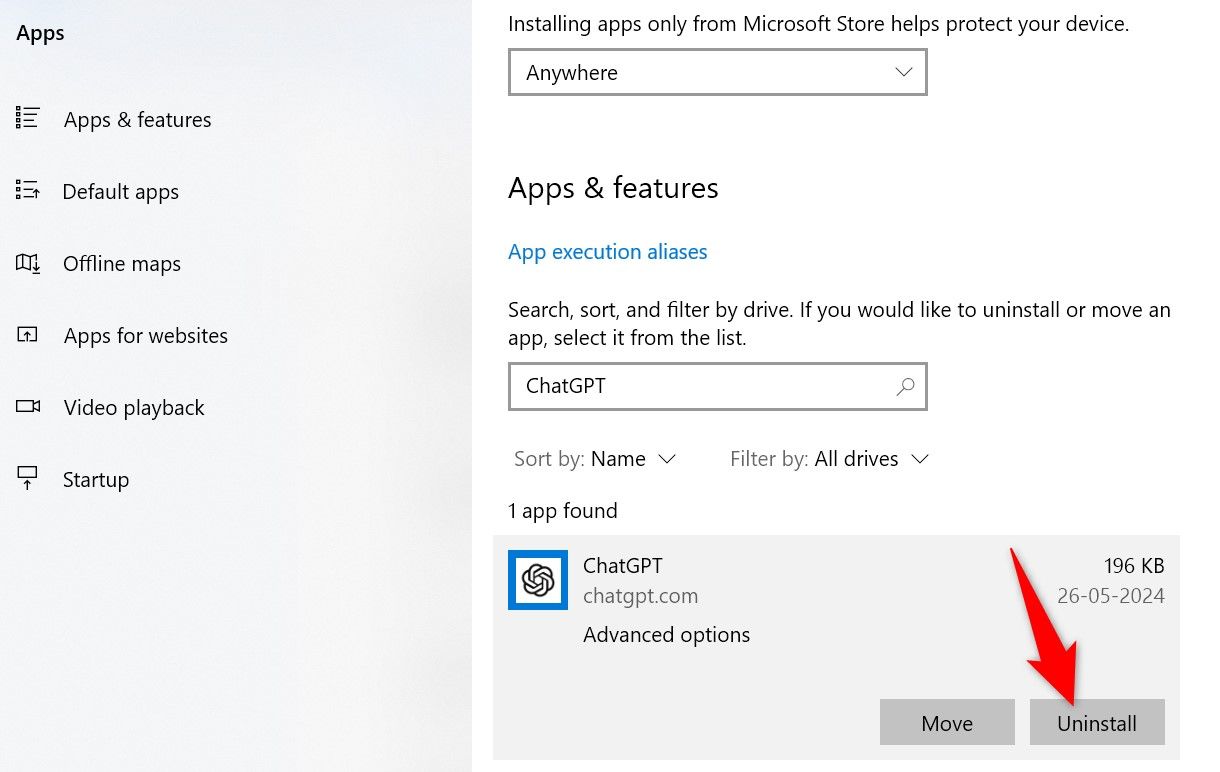
To delete the app using Settings on Windows 10 , go to Settings > Apps. Select the ChatGPT app, click “Uninstall,” and choose “Uninstall” in the prompt.
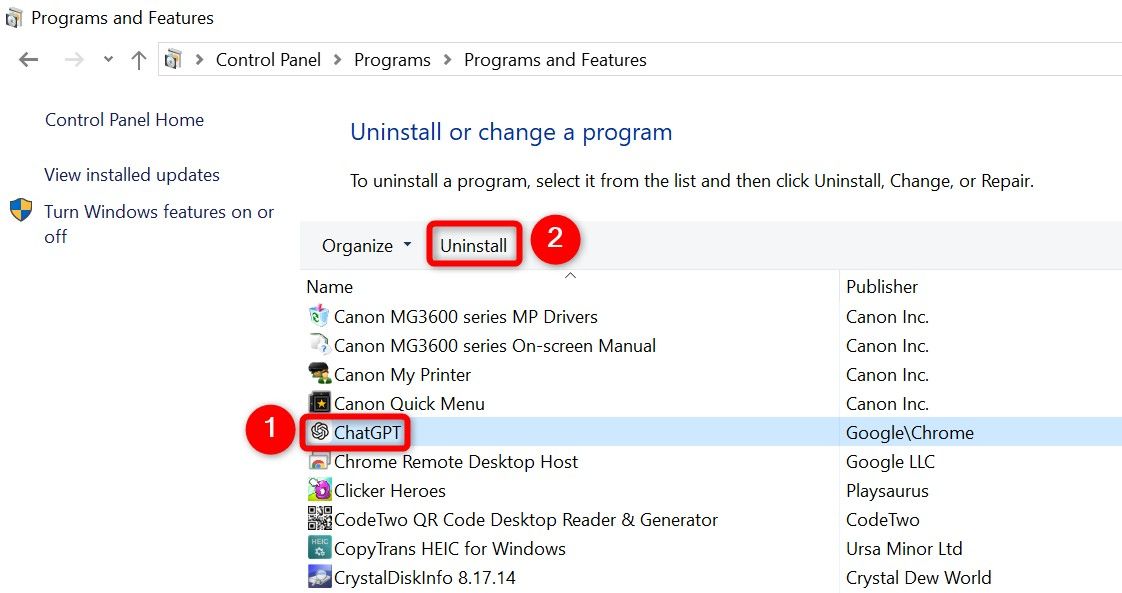
If you made the app with Chrome, you can use Control Panel to uninstall the app as well . To do that, navigate to Control Panel > Uninstall a Program. Find and select the ChatGPT app and choose “Uninstall” at the top. Click “Remove” in the prompt.
And that’s how you create, launch, and remove ChatGPT’s Windows version from your computer. Have a good time using your favorite AI tool!
Also read:
- [New] Canvas Kids Discover 10 Free, Kid-Friendly Art Makers for Mac for 2024
- [New] Techniques to Boost Periscope Live Video Speed
- [New] The Future of Immersion Insights on LG's 360 VR Headset
- [Updated] Unmatched Value, Game-Changing Voice Switcher for Valorant Awaits You
- 2024 Approved The Complete Handbook for Telegram Web Newbies
- A Deeper Insight Into Augmented Reality Stickers by Google
- Comprehensive Review of the High-Performance Razer Blade Pro 17 Notebook
- Content Commanders Vs. Computerized Word Wizards
- Enchanting Your Audience Podcast Opener Scripts
- In 2024, Safari's Picture-in-Picture on iOS & iPad How to Use
- IPhone 13 Analysis: In-Depth Performance & Feature Evaluation
- Service Host: Local System (svchost.exe) High Disk Usage on Windows 10 [Solved]
- Ultimate Free Timers for Daily Use for 2024
- Understanding FB Pages vs UNAMES: Key Insights & Tips
- Title: Step-by-Step Tutorial: Installing and Running ChatGPT in Windows Environment
- Author: Daniel
- Created at : 2025-03-02 00:16:24
- Updated at : 2025-03-05 20:41:13
- Link: https://some-skills.techidaily.com/step-by-step-tutorial-installing-and-running-chatgpt-in-windows-environment/
- License: This work is licensed under CC BY-NC-SA 4.0.