
Troubleshooting Guide: Resolving Windows Spotlight Malfunctions Effortlessly

Troubleshooting Guide: Resolving Windows Spotlight Malfunctions Effortlessly
Quick Links
- Preliminary Fixes
- Turn Windows Spotlight Off and On
- Re-register the Windows Spotlight Service
- Reset Windows Spotlight Settings
- Delete Existing Windows Spotlight Assets
- Disable Metered Connection
- Enable Background Apps (Windows 10)
- Disable Your Antivirus Program
- Perform a Network Reset
When Windows Spotlight stops working, your computer’s lock screen or desktop background gets stuck on the same image. Here, we show you how to fix this problem, so you can enjoy Spotlight’s high-quality photos again.
Windows Spotlight can take 24 hours to cycle a new image, so be patient after applying any of these fixes.
Preliminary Fixes
The first thing to do when Windows Spotlight is stuck is to check if your internet is working . Without it, Spotlight can’t download new images.
If your internet connection is fine, try updating your Windows computer , as it may contain a patch for any Spotlight bugs. Conversely, if you think a recently installed update caused the issue, uninstall the Windows update to reverse the changes.
Turn Windows Spotlight Off and On
The age-old advice of turning something off and on may sound silly, but it often works. It’s no different here—try disabling and re-enabling Windows Spotlight.
On Windows 11, go to Settings > Personalization. Since you can use Spotlight for both the lock screen and desktop background, choose the “Background” or “Lock Screen” option as needed.
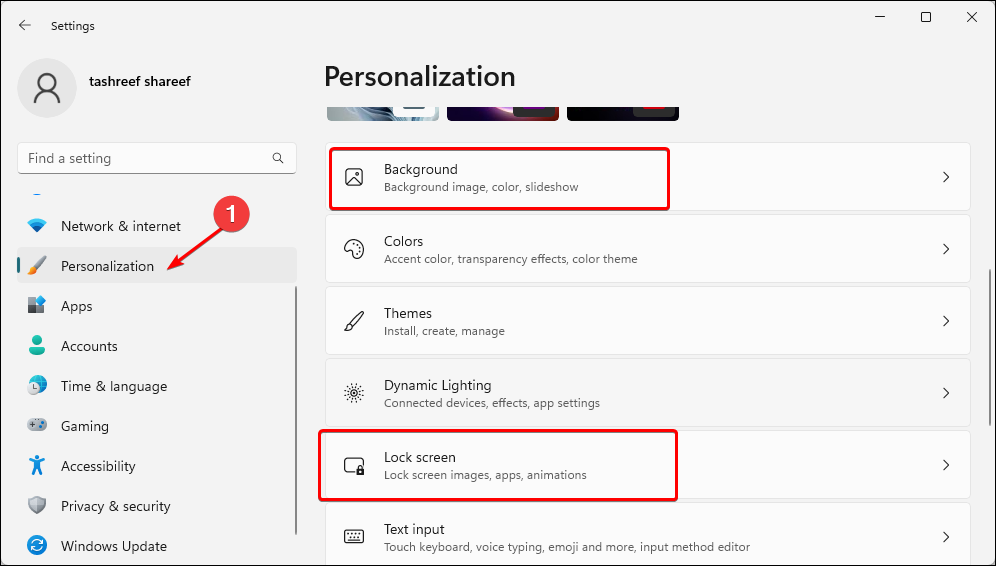
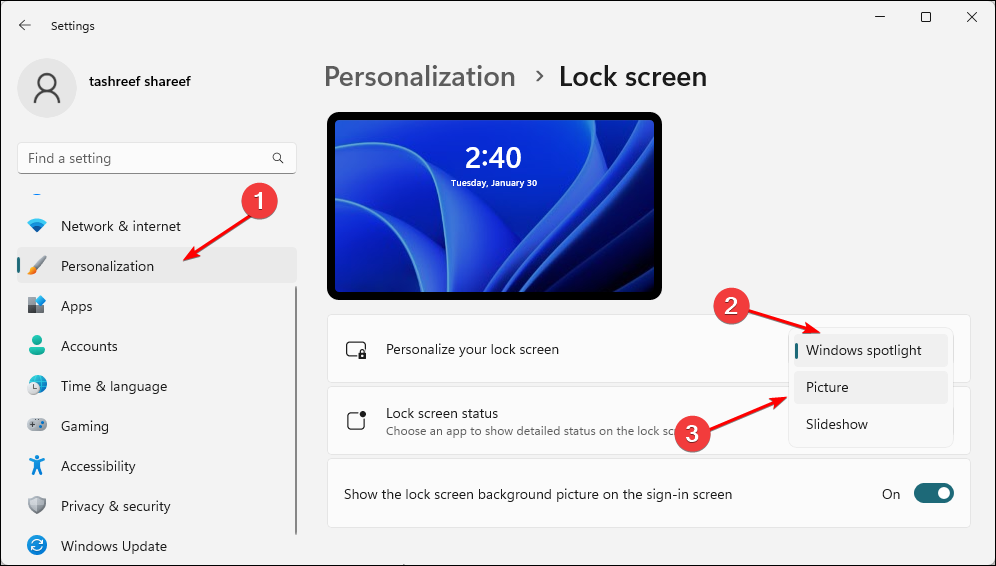
Click the “Personalize Your Background/Lock Screen” dropdown and select “Picture” to turn it off.
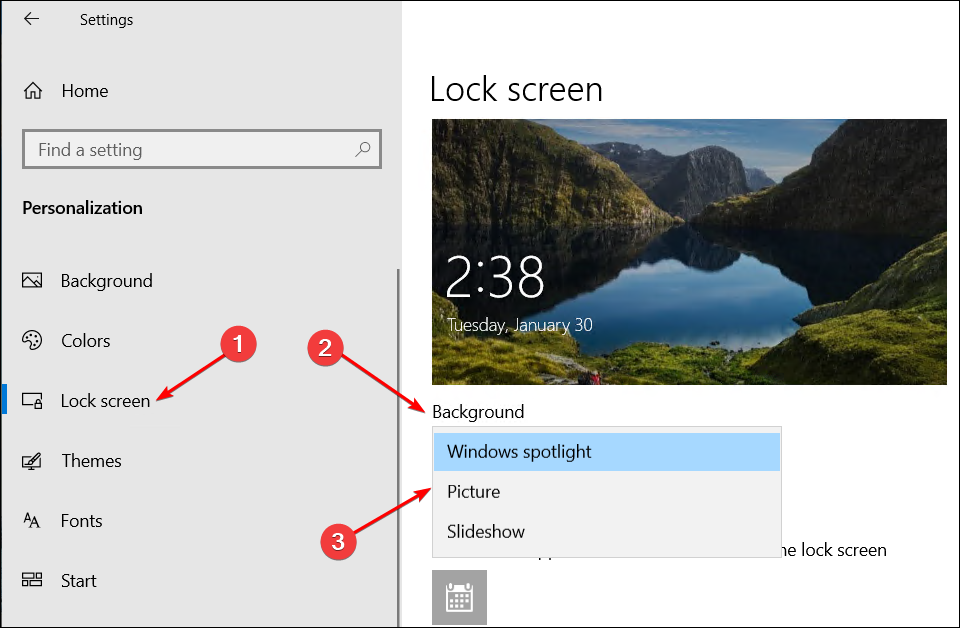
On Windows 10, go to Settings > Personalization > Lock Screen. Click the “Background” dropdown, and choose “Picture.”
After that, restart your computer and set your background and lock screen to Windows Spotlight again.
Re-register the Windows Spotlight Service
Windows Spotlight may stop working if the Windows Content Delivery Manager (WCDM) component, responsible for downloading new images and content from Microsoft servers, is damaged or misconfigured. To fix this, you can re-register the component using Windows PowerShell.
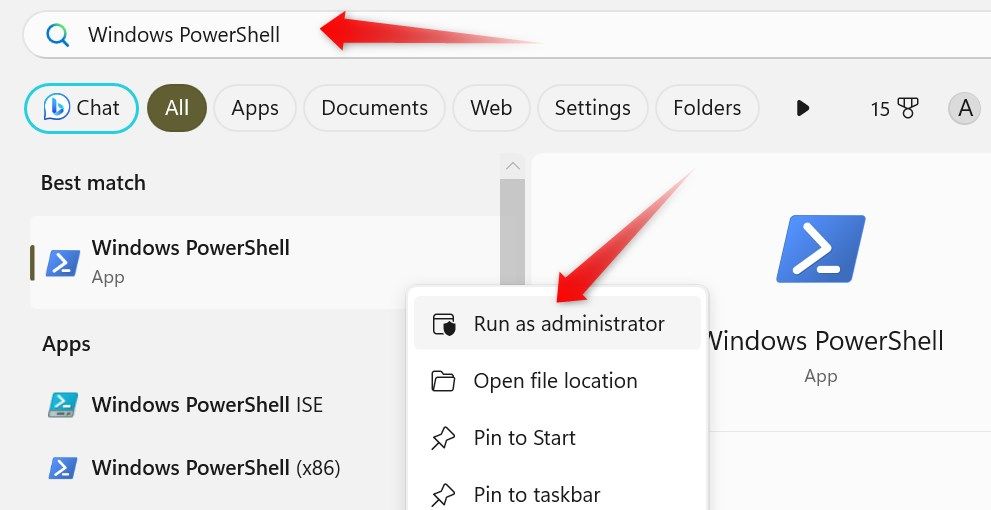
Press the Windows key, type “PowerShell,” then right-click “Windows PowerShell,” and choose “Run as Administrator.” In the “User Account Control” prompt, select “Yes.”
Type the following command in the PowerShell window and press Enter:
`Get-AppxPackage -allusers *ContentDeliveryManager* | foreach {Add-AppxPackage "$($_.InstallLocation)\appxmanifest.xml" -DisableDevelopmentMode -register }`
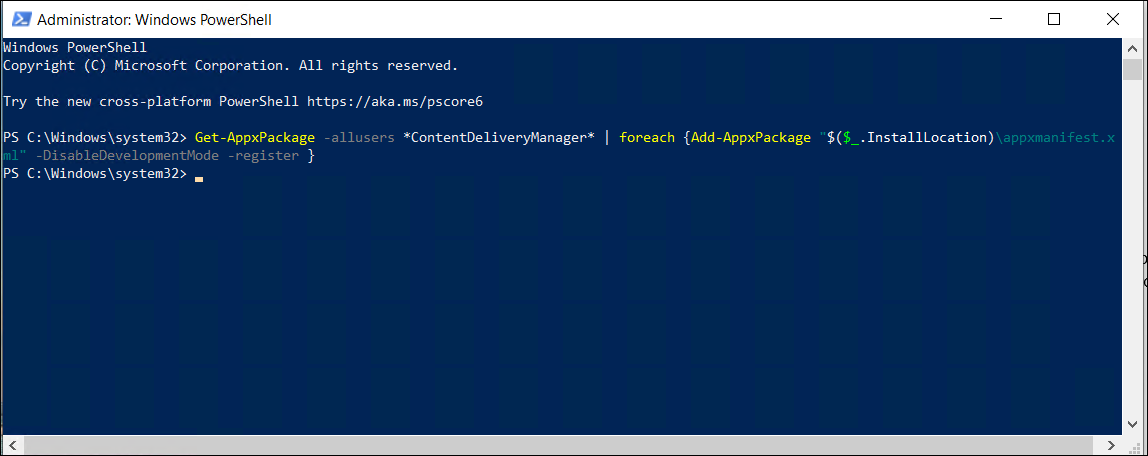
Wait while PowerShell re-registers the Windows Content Delivery Manager component. If you see an error, restart your computer and try again.
Reset Windows Spotlight Settings
You can reset Windows Spotlight to its default settings to fix data corruption issues. To perform a reset, rename two files (roaming.lock and settings.dat) in the Windows Content Delivery Manager folder.
Press Win+E to open File Explorer. Then, copy/paste the following path into the address bar and press Enter:
`%USERPROFILE%/AppData\Local\Packages\Microsoft.Windows.ContentDeliveryManager_cw5n1h2txyewy\Settings`
To rename the file, select “settings.dat,” and press F2 (or Fn+F2) on your keyboard to highlight the file name. Then type “settings.dat.bak” as the new name and press Enter.
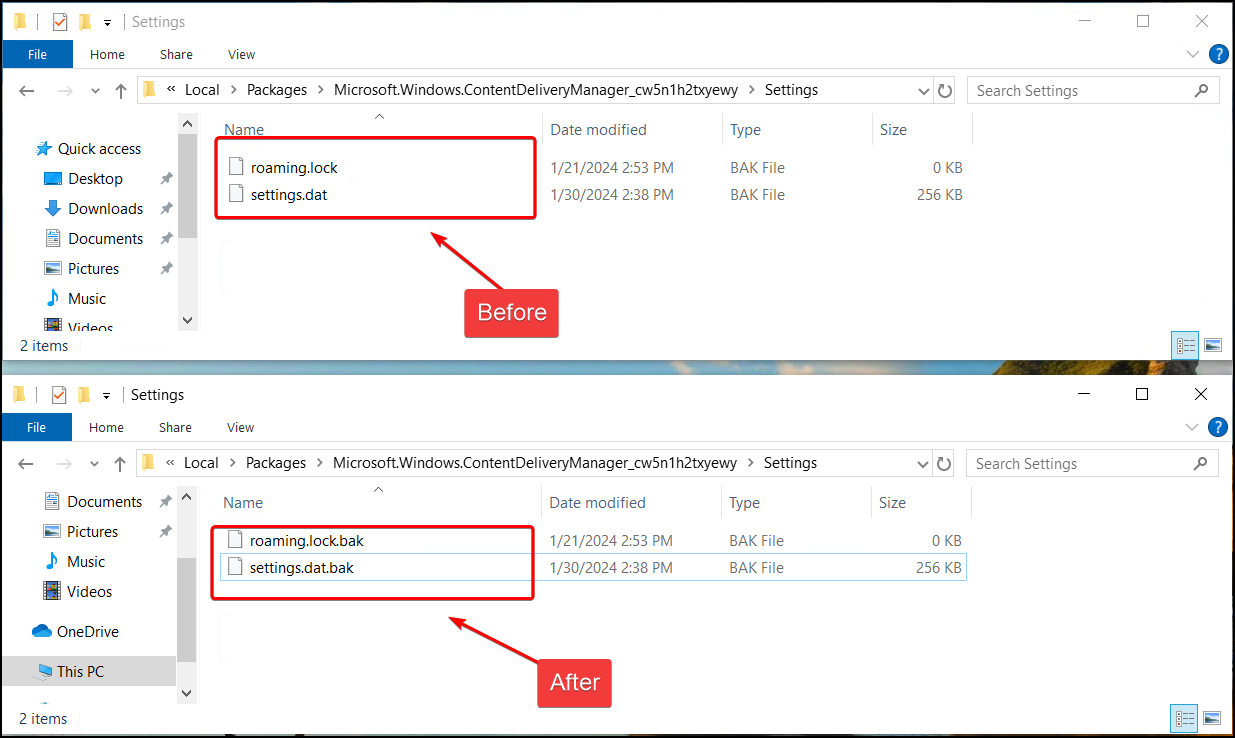
Next, repeat the steps for the “roaming.lock” file, renaming it to “roaming.lock.bak”. Once done, restart your computer.
Delete Existing Windows Spotlight Assets
If the locally stored Windows Spotlight images are damaged, you can delete them to prompt Windows to download new images.
Open File Explorer, copy and paste the following path into the address bar, and press Enter:
`%USERPROFILE%/AppData\Local\Packages\Microsoft.Windows.ContentDeliveryManager_cw5n1h2txyewy\LocalState\Assets`
Press Ctrl+A to select all, then click “Delete” to remove the files.
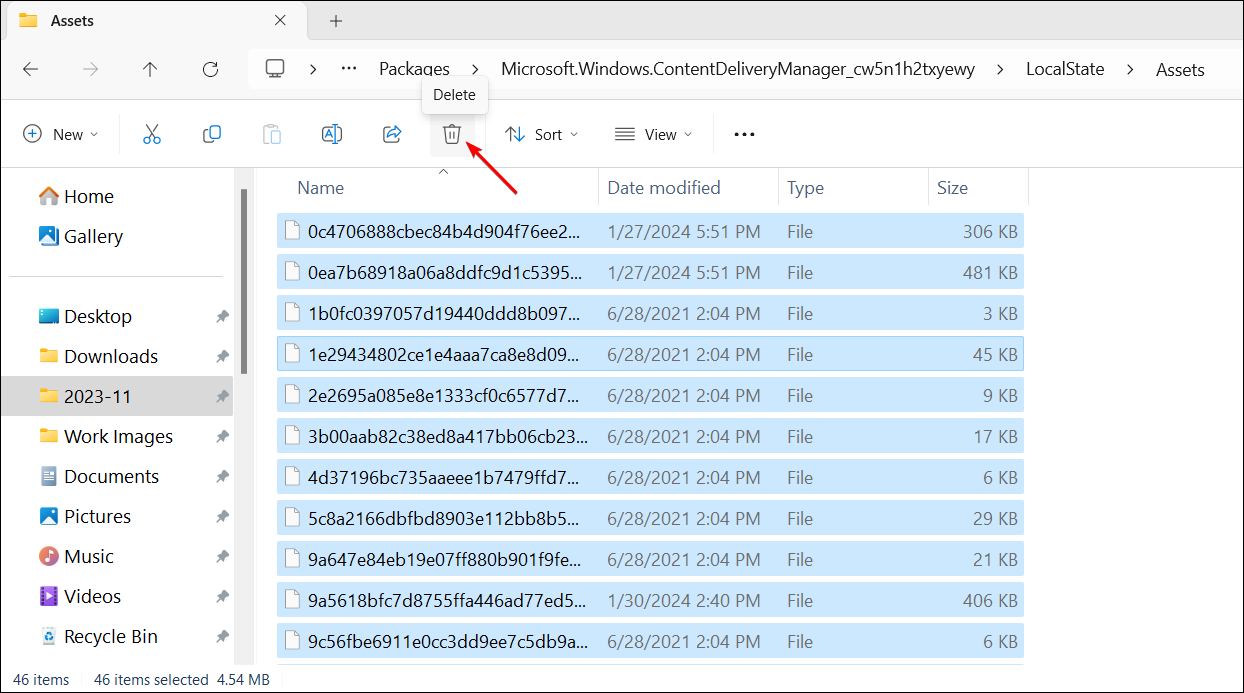
Once done, restart your computer.
Disable Metered Connection
If you’re on a metered connection, it limits background services’ data usage. As such, Windows Spotlight won’t work. To resolve this, turn off the metered connection for your network.
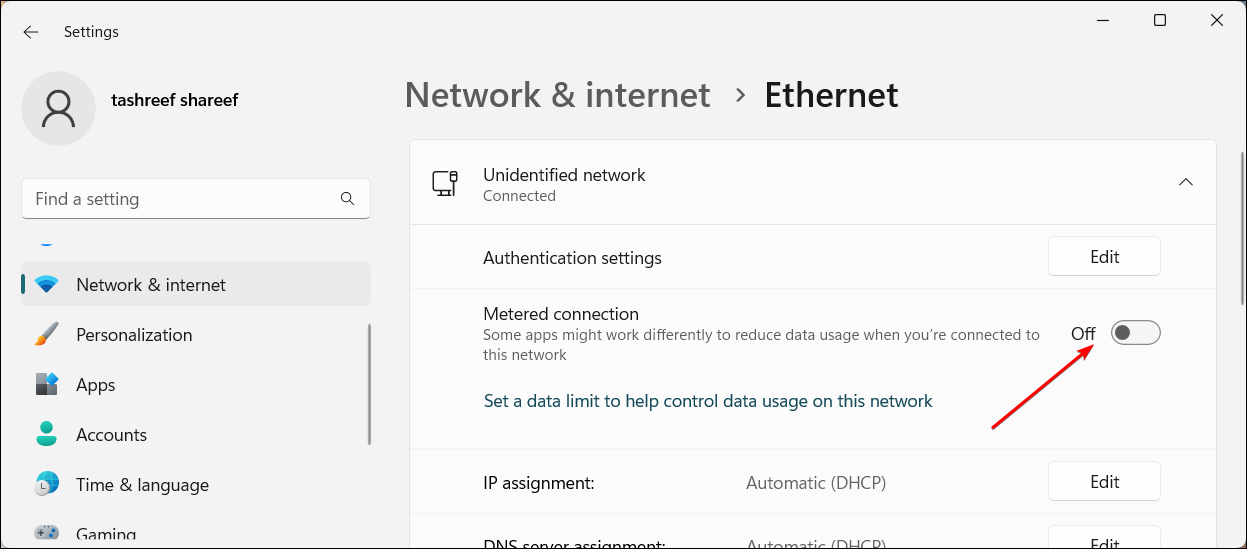
On Windows 11, open the Settings app and select “Network & Internet.” For an Ethernet connection, click “Ethernet.”
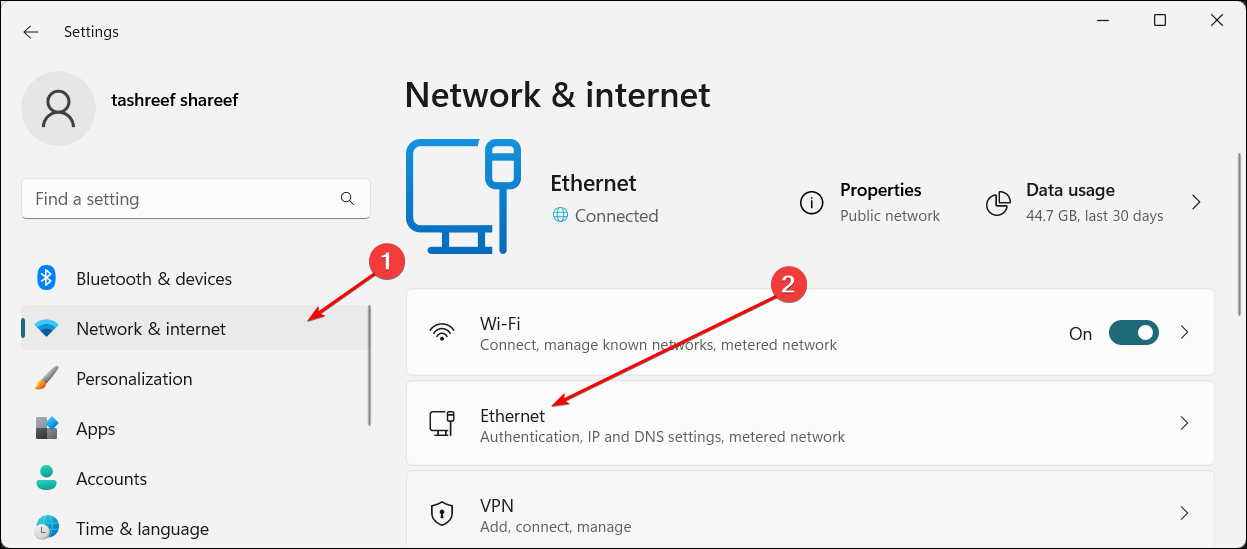
Ensure the “Metered Connection” switch is set to “Off.”
To manage your wireless network, go to Wi-Fi > Manage Known Networks.

Then, select your Wi-Fi network and turn off “Metered Connection.”
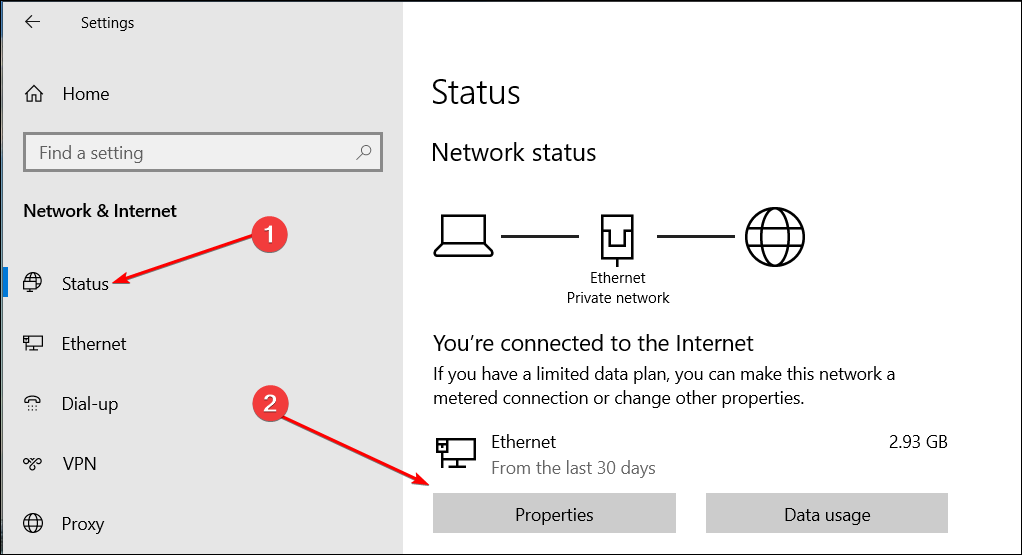
On Windows 10, go to Settings > Network & Internet > Status. Under your “Ethernet” or “Wi-Fi” network, click “Properties.”
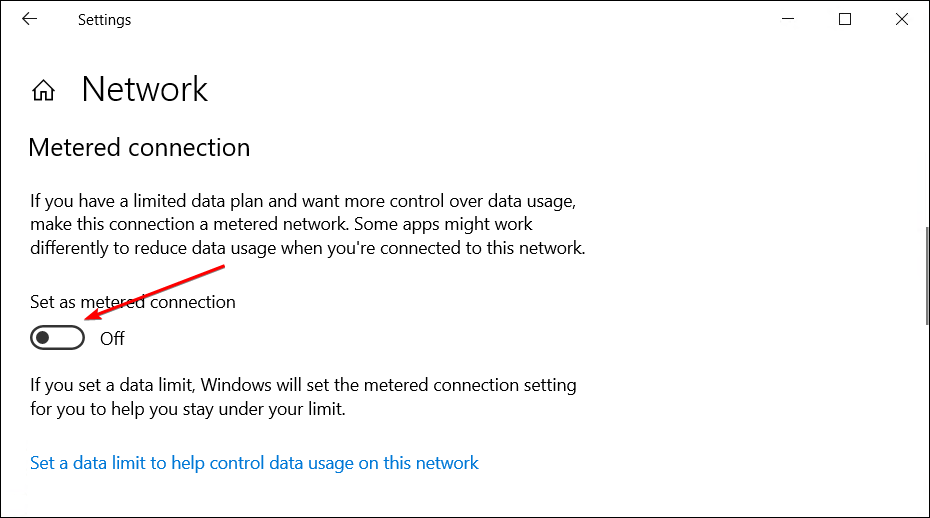
Under “Metered Connections,” toggle the “Set as Metered Connection” switch to turn it off.
Enable Background Apps (Windows 10)
This is only applicable if you’re using Windows 10. If you’re using Windows 11, skip this step.
Ensure that your system allows apps to run in the background, as Spotlight needs this to function.
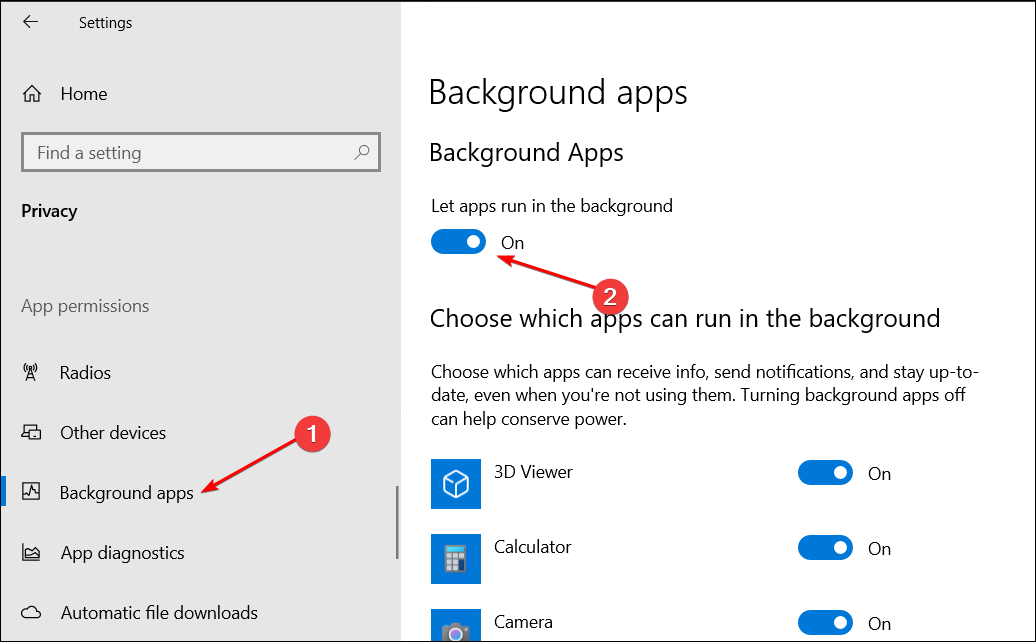
Navigate to Settings > Privacy > Background Apps. Under “Background Apps,” make sure the “Let Apps Run in the Background” option is turned on.
Restart your computer to apply the changes.
Disable Your Antivirus Program
If you’re using third-party antivirus software rather than Microsoft Defender, it might mistakenly flag and block Windows Spotlight-related processes as a security threat. Consider temporarily turning it off to see if that’s causing the problem (or add Windows Spotlight as an exception, if possible.)
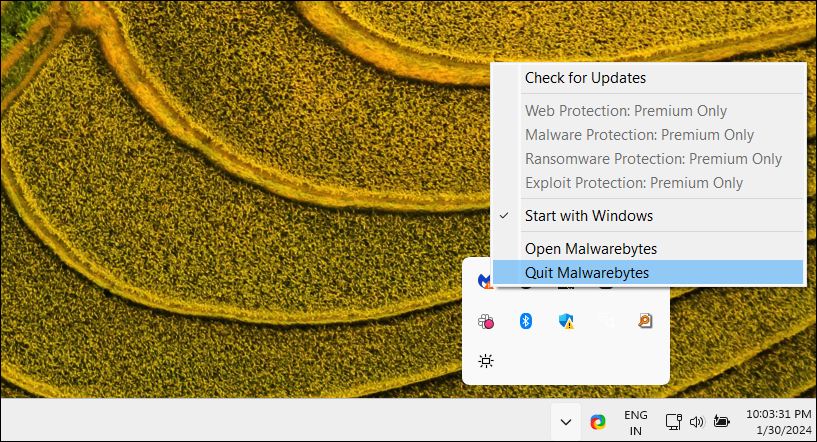
You can likely turn off your antivirus from the system tray. To do this, right-click the antivirus app icon in the system tray and choose “Quit”, “Shut Down Protection”, or similar. Alternatively, turn it off through the antivirus’ app interface.
Perform a Network Reset
Your network may be incorrectly configured, meaning Spotlight can’t pull the latest images. In this situation, perform a network reset to restore all your network settings to their defaults.
On Windows 11, go to Settings > Network & Internet > Advanced Network Settings.
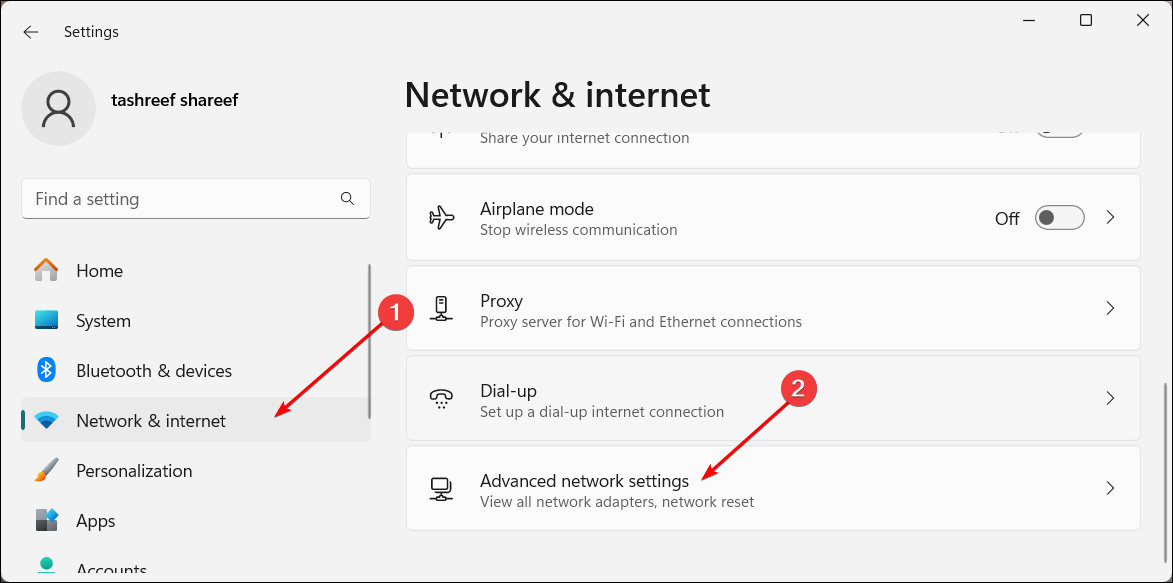
Under “More Settings,” select “Network Reset.”

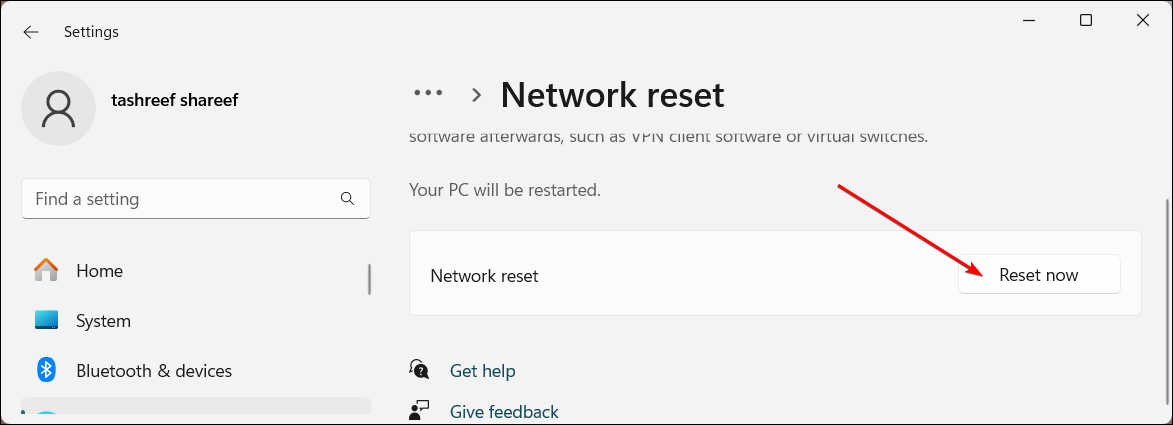
Finally, click “Reset Now” and choose “Yes” to confirm the action.
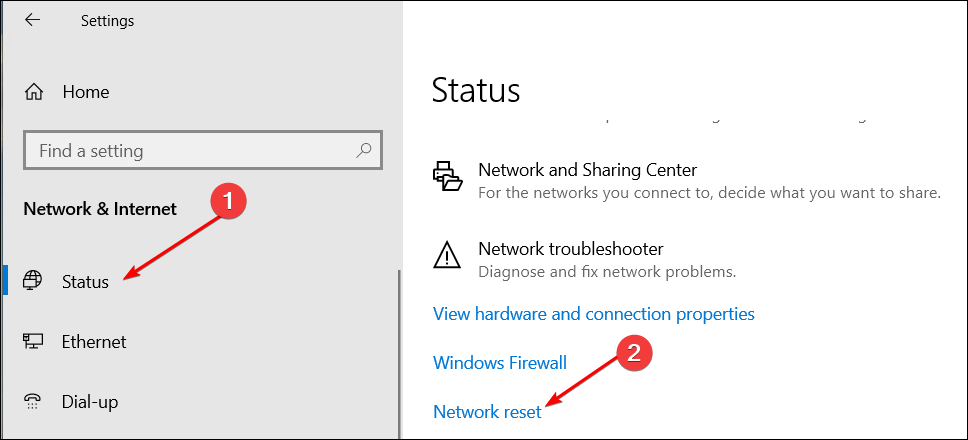
On Windows 10, go to Settings > Network & Internet > Status. Under “Advanced Network Settings,” select “Network Reset.”
Click “Reset Now” and choose “Yes” to confirm the action.
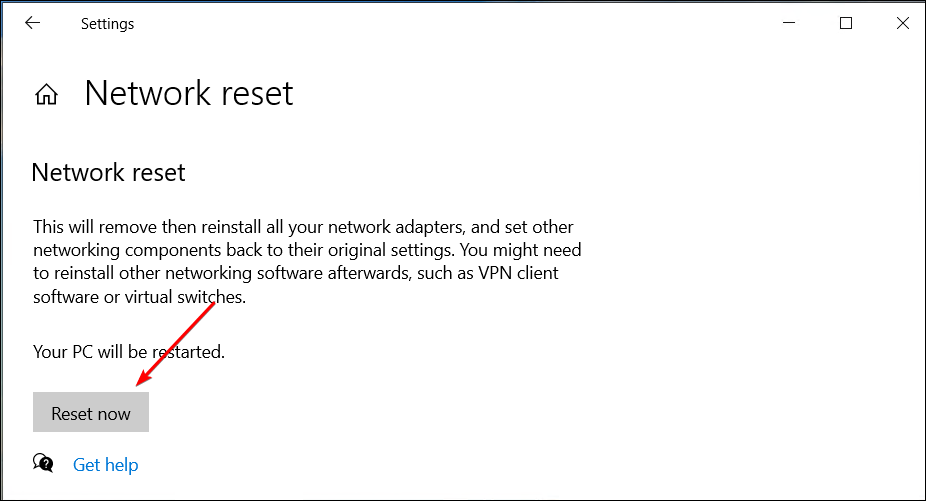
After the restart, Windows will walk you through setting up your network.
By trying each of these tips in turn, Windows Spotlight should be working again, so you can enjoy visually stunning images to start your day, along with interesting facts and tips on your lock screen.
Also read:
- [New] In 2024, Mastering Video Visibility Settings on YouTube
- [New] Unlocking Advanced Functionalities of Zoom on Windows 10
- [Updated] The Easy Path to Great Audio Recordings in Windows 11
- [Updated] Turning on Adaptive HDR in Windows 11
- 5 Quick Methods to Bypass Huawei Nova Y71 FRP
- How to Blur Background of Your YouTube Video
- How To Enable USB Debugging on a Locked Xiaomi 14 Pro Phone
- In 2024, Unlocking Untapped Utility Zoom in on Minecraft
- The Blog Post Should Not Exceed 500 Words and Must Be Written at an Eighth-Grade Reading Level, Ensuring It Is Easily Understandable by Your Readers Who Might Range in Age but Are Likely Parents or Guardians of Children Under Five Years Old.
- Top 7 Skype Hacker to Hack Any Skype Account On your Vivo X90S | Dr.fone
- Unlocking the Full Potential of VLC Media Player on Mac for 2024
- Title: Troubleshooting Guide: Resolving Windows Spotlight Malfunctions Effortlessly
- Author: Daniel
- Created at : 2025-02-27 01:54:49
- Updated at : 2025-03-05 17:34:03
- Link: https://some-skills.techidaily.com/troubleshooting-guide-resolving-windows-spotlight-malfunctions-effortlessly/
- License: This work is licensed under CC BY-NC-SA 4.0.